
Published October 28, 2026
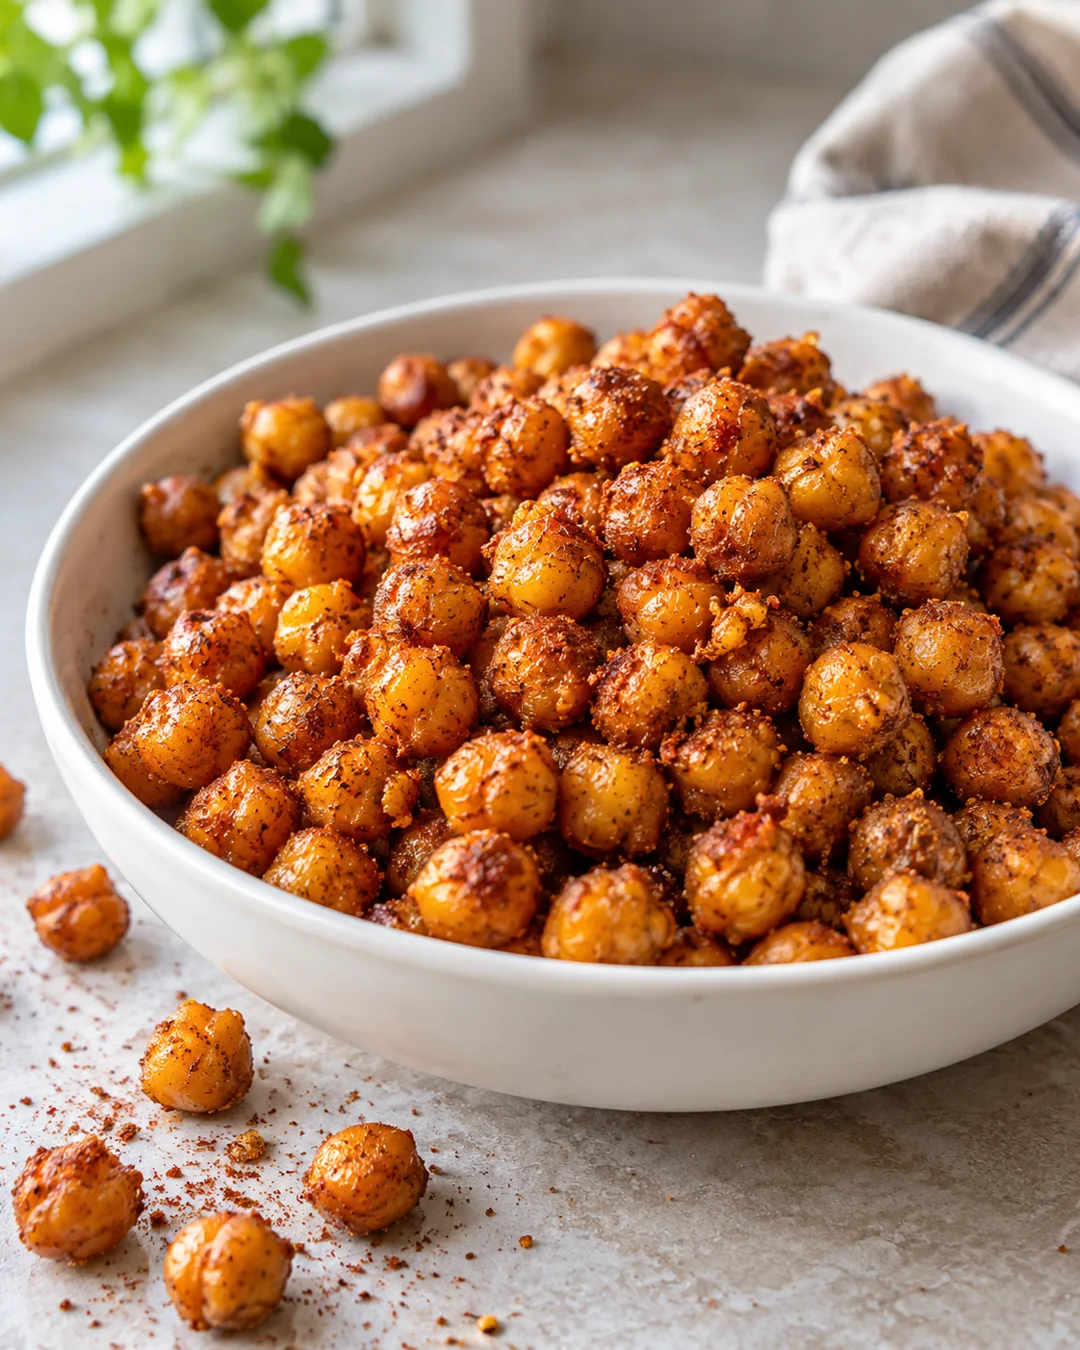
For crispy roasted chickpeas, start with cooked chickpeas, dry their surfaces thoroughly, spread them in one layer, and roast until a cooled sample has the texture you want. Add delicate spices near the end or after roasting. A crowded tray, wet beans, and sealing them while warm are common reasons the result turns soft.
This guide uses canned chickpeas and a simple paprika-and-cumin finish. It is an oven method for a snack or crunchy topping, not a way to cook raw dried chickpeas. The goal is a browned exterior and a pleasantly firm bite, not teeth-breakingly hard beans or a promise that a homemade batch is shelf-stable.
The recipe at a glance
- Yield: approximately four snack portions or six to eight smaller toppings.
- Main ingredient: two cans of cooked chickpeas, about 15 ounces/425 g each before draining.
- Preparation: approximately 15–20 minutes, including drying.
- Roasting: approximately 35–50 minutes, with earlier checks for smaller chickpeas.
- Oven: 400°F/200°C conventional, or approximately 375°F/190°C fan.
- Equipment: a colander, clean kitchen towel or paper towels, a large rimmed metal tray, a mixing bowl, and a spatula.
Timing varies with the chickpeas, their remaining moisture, the tray, and the oven. Use the stated range to plan, then inspect the actual batch. You do not need to keep roasting until every single chickpea is identical; some variation is normal, especially when the cans contain mixed sizes.
The University of Maryland Extension roasted-chickpea recipe also emphasizes drying, roasting, and seasoning. Its method uses different preparation steps and quantities. The recipe below is an original home-oven approach, and its yield should not be assigned the nutrition values of another recipe.
Ingredients
- 2 cans cooked chickpeas, approximately 15 ounces/425 g each, drained and rinsed
- 1 tablespoon olive oil or another cooking oil suitable for the oven temperature
- 1 teaspoon sweet or smoked paprika
- 1/2 teaspoon ground cumin
- 1/4 teaspoon garlic powder
- 1/4 teaspoon fine salt, optional and adjustable
- Black pepper to taste
- A small pinch of cayenne, optional
Drain first, then weigh the chickpeas if you want a repeatable batch. Two cans may give roughly 450–500 g drained beans, but the actual amount depends on the product. The can’s total weight includes liquid and is not the weight entering your oven. If you have substantially more beans, use a second tray instead of piling them higher.
Check spice blends for added salt and any allergens relevant to your household. A plain spice and a seasoning mix with the same name can behave differently. If your chickpeas are already salted, try the finished beans before adding all the optional salt.
How to roast chickpeas without a soggy finish
1. Drain, rinse, and remove surface water
Pour the chickpeas into a colander, rinse, and let them drain. Spread them on a clean absorbent towel. Pat the tops and gently roll them so water is removed from more than one side. Use a second dry section of towel if the first becomes saturated.
Do not leave the beans sitting out for hours in pursuit of dryness. The aim is to remove visible surface water during normal preparation, not to dehydrate them on the counter. You should no longer see droplets clinging to the beans before you add oil.
2. Remove loose skins, without making peeling compulsory
Some skins will loosen as you dry the beans. Pick out the obvious loose pieces because they can brown faster than the chickpeas. You do not need to peel every bean individually. That is a preference, not a requirement for a useful weeknight recipe.
If the beans are extremely soft and collapsing, handle them more gently and consider another can for a crunchy snack. Broken chickpeas are still usable, but their small pieces will finish earlier. Keep those pieces together on one part of the tray so you can remove them before they burn.
3. Coat lightly and spread widely
Heat the oven before putting the tray in. Toss the dried beans with the tablespoon of oil until the coating is distributed. Spread them over the rimmed tray with space between most beans. A few touching is fine; several layers are not.
Use parchment only within its manufacturer’s temperature limit. A metal tray gives a practical starting point; a deep casserole dish traps more steam around the food. If you change the pan type later, expect the timing and browning to change too.
4. Roast, stir, and assess a cooled sample
Roast for about 20 minutes, then stir carefully. Continue roasting, checking every 5–10 minutes as the beans become golden. Rotate the tray if one side is browning faster. Start sampling before the end of the suggested range rather than assuming 50 minutes is always better.
Lift one chickpea out with a utensil and let it cool enough to bite safely. Hot beans can seem softer than they will after a brief cooling period. If the middle is still noticeably moist and soft, continue in short intervals. If the outsides are becoming very dark before the centers suit you, lower the heat slightly for the remainder.
5. Season and finish uncovered
Mix the paprika, cumin, garlic powder, optional salt, pepper, and cayenne in a bowl. Toss the hot roasted beans with the seasoning. Their light oil coating helps the spices cling. If little sticks, use a very small additional drizzle of oil rather than pouring on a second full tablespoon automatically.
Return the seasoned beans to the tray to cool briefly in a single layer before serving. Do not immediately pour them into a deep jar or snap on a lid. Steam trapped in a container works against the crisp texture you have just developed.
What “crispy” should mean for this recipe
There is a difference between a crisp shell with a firm center and a commercially manufactured, fully dry snack. This recipe aims for the first. A supermarket crunchy chickpea snack may use a different drying process, oil level, size selection, and packaging.
Choose your preferred texture through a cooled sample. If you enjoy a little tenderness inside, remove the beans sooner. If you prefer a drier bite, continue cautiously while watching the smallest beans. Do not judge solely by color: paprika can make the surface look darker, and some chickpea varieties begin more yellow than others.
Very hard roasted chickpeas may be unsuitable for someone with dental problems or swallowing difficulties, and whole hard beans are not an appropriate snack for young children who cannot manage them safely. Choose a softer preparation when needed rather than trying to make this texture work for everyone.
A tray test that helps you diagnose uneven results
If one batch is disappointing, look at where the different textures occurred. Beans near the back edge that are darker than those at the front suggest an oven or placement pattern. Beans that remain soft only in the center of the tray suggest crowding. A whole batch that is pale and damp points you back toward surface drying, oven temperature, or insufficient time.
Use a simple comparison rather than changing everything. On the next attempt, keep the same brand and quantity, but spread the beans more evenly and rotate the tray once. If that produces a more uniform result, you have learned something useful about the setup. Changing the beans, pan, temperature, oil, and spice blend together makes it difficult to know which adjustment helped.
Also compare beans at the same serving temperature. A hot sample taken directly from the tray is not equivalent to a fully cooled handful. Let each test sample cool briefly before deciding whether the batch needs more time. Avoid repeatedly sampling while distracted near the hot oven; use a small plate and a utensil so you can assess it comfortably.
Choose the batch size around how you will eat it
For one person wanting a topping tonight, a single can may be plenty. Divide the prepared beans between the immediate meal and a small refrigerated leftover rather than roasting several cans because the oven is already on. A smaller batch also gives you more freedom to try another seasoning next time.
For a shared snack, put out part of the batch and keep the remainder under the storage plan described below. A very large serving bowl encourages the whole batch to sit out, even when people only want a few spoonfuls. Use a clean serving spoon instead of letting everyone reach into the storage container.
For a soup topping, think in terms of contrast rather than replacing the soup’s main ingredients. A smaller amount can provide the texture you want. For a snack plate, combine the beans with foods you enjoy rather than trying to make a handful of roasted chickpeas do the work of an entire meal.
The useful question is not whether four portions is the only correct division. It is whether your chosen portion suits the occasion and whether the rest will be stored and used realistically. That is a more practical starting point than automatically making the largest batch your tray can hold.
Why roasted chickpeas stay soft
The beans were wet when the oil went on
Water on the surface has to evaporate before the surface can dry and brown effectively. Next time, give the towel-drying step more attention. Extra oil does not remove water and is not a substitute for drying.
The tray was too crowded
A heap of beans behaves differently from a single layer. Divide a double batch between trays or roast in separate rounds. If using two oven shelves, rotate the trays and check them individually; do not expect them to finish simultaneously.
The oven was cooler than expected
Let it preheat fully. If many recipes take longer than expected, an oven thermometer may help you identify the pattern. Avoid compensating by using the highest setting immediately, because the outer beans may scorch while the rest remain soft.
The beans went straight into a closed container
Warm food releases moisture. Serve a freshly cooled portion, and refrigerate leftovers promptly rather than using a tightly sealed warm jar as a crispness strategy. Texture and safe storage are different questions; you can accept a softer leftover without treating the whole batch as a failure.
The seasoning was wet
Lemon juice, hot sauce, and yogurt dressings are delicious, but they soften a crisp surface. Add them to an individual serving just before eating, or use dry seasonings on the beans and put the sauce elsewhere on the plate.
Three seasoning directions
Smoky and warm: use the base paprika and cumin mixture. Choose sweet paprika when you want warmth without much heat. Keep cayenne optional so people can season their own portions.
Lemon-pepper: replace the paprika and cumin with finely grated lemon zest and black pepper after roasting. Wash and dry the lemon before zesting. Save its juice for a dressing rather than soaking the whole tray.
Mild herb: use a small amount of dried oregano with garlic powder and pepper. Crush large dried leaves between your fingers before mixing so the coating is less uneven. Taste before adding salt if using a prepared herb blend.
Keep the first trial simple. Splitting one batch into two bowls after roasting lets you compare seasonings without changing the cooking method. Write down what went into each bowl; otherwise the version you liked may be difficult to repeat.
Use them as a topping, not only a snack
Add a small handful to a bowl of vegetable soup at the table, not while the soup simmers. The contrast lasts longer when the beans stay separate until the last moment. Our white bean soup guide provides one soft, creamy base for a contrasting topping; count the extra chickpeas separately if tracking the meal.
For a salad, dress the vegetables first and sprinkle on the roasted beans just before eating. If packing lunch, keep the topping in its own chilled container. A long soak in dressing changes the texture, even when the recipe was crisp when it left the oven.
You can also pair a small serving with toast, a vegetable plate, or a sandwich. The chickpeas do not have to replace every other part of the meal. For the broader differences between these pulses, see lentils versus chickpeas, which covers a different question from this roasting method.
Prefer a soft, saucy chickpea dinner rather than a crisp topping? Our tomato-based chickpea curry uses a different cooking method. Choose the dish for the texture you want rather than expecting roasted chickpeas to remain crunchy after sitting in sauce.
Portioning and nutrition without misleading numbers
Roasting removes water. That makes the finished beans lighter, but it does not make the entire tray’s protein disappear or create extra protein from nowhere. Comparing 100 g of cooked beans with 100 g of roasted beans can therefore be misleading unless the preparation basis is clear.
The practical approach is to calculate from the ingredients used, then divide the finished batch into portions. Include the chickpeas, oil, and any substantial extras. Use your package’s stated basis: a label for beans with liquid is not automatically a drained-bean label.
For a clearly hypothetical example, suppose a product provides 7 g protein per 120 g drained serving and you use 480 g on that same basis. That is four labeled servings and 28 g protein from the chickpeas in the entire batch. Dividing it into four equal portions gives 7 g from the beans per portion. Those are example numbers, not this recipe’s guaranteed nutrition.
If the finished batch weighs 320 g, four equal portions would weigh 80 g each. The water loss changes the portion weight, not the calculation based on the original ingredients. Oil contributes energy and should be included when calculating calories, even if you are chiefly interested in protein.
Our protein-label guide helps you check serving units. You do not need a full spreadsheet for every snack, but a consistent basis is more useful than borrowing numbers from an unrelated online recipe.
Safe storage comes before preserving crunch
Do not assume home-roasted chickpeas are shelf-stable because they feel dry. This method does not measure water activity or validate long room-temperature storage. Make a modest batch for eating soon, and treat the remainder as a cooked leftover.
Following FoodSafety.gov chilling guidance, refrigerate promptly in shallow containers within two hours, or one hour when conditions exceed 90°F/32°C. Keep the refrigerator at 40°F/4°C or below. For this recipe, plan to use refrigerated leftovers within three days; shorter package instructions take priority.
Refrigeration may soften them. You can warm a portion in the oven to improve texture, but re-crisping is not a way to rescue beans that were left out too long. For reheated leftovers, use the FoodSafety.gov 165°F/74°C endpoint, then let the serving cool enough to eat comfortably.
For travel without cooling, choose a commercially packaged product explicitly labeled for that use. Our no-fridge snack guide explains why homemade cooked foods and shelf-stable packaged snacks should not be treated as interchangeable.
A one-can trial before making a large batch
If you have not roasted this brand of chickpeas before, start with one can and half the oil and seasoning. Use the same large tray rather than a tiny bowl-shaped dish. The extra space makes it easier to see how the beans dry and brown.
Record three things: the drained weight, the time you first stirred, and the point at which a cooled sample tasted right. Add a brief note such as “pleasantly crisp outside, slightly tender center” instead of recording only “done.” The next batch can then be adjusted according to your preference.
For example, if the smallest beans browned too quickly, check sooner and separate broken pieces next time. If all beans were pale and soft, improve drying and verify the oven temperature before increasing the oil. One targeted adjustment is easier to learn from than changing every ingredient at once.
Frequently asked questions
Can I use chickpeas cooked from dry?
Yes, if they are already fully cooked and safely handled. Drain them well and use approximately the same drained quantity. Do not put raw dried chickpeas straight onto this tray and expect roasting to replace soaking and cooking. Our canned versus dried bean guide explains the preparation distinction.
Do I need baking soda?
No. It is not part of this recipe. Start with fully cooked beans that hold their shape. Adding another ingredient to the drying or roasting stage makes the result harder to compare without solving the main problems of moisture and crowding.
Can I skip the oil?
You can experiment with a dry-roasted version, but expect different browning and less seasoning adhesion. The small measured amount in this recipe is deliberate. Do not interpret a less glossy surface as proof of lower calories unless you actually measure the ingredients used.
Can I use an air fryer?
An air fryer is a different cooking environment. Follow the appliance’s instructions and use a recipe designed for its capacity, checking frequently. Do not transfer this oven time directly or fill a basket so deeply that the beans cannot move and heat evenly.
Why do some beans split?
Cooked beans vary in firmness and moisture. Some splitting is normal during drying and roasting. Remove small dark pieces early; a few split beans do not mean you need to discard an otherwise properly handled batch.
Keep the method repeatable
Dry the surface, leave room on the tray, check a cooled sample, and keep wet toppings separate. Those decisions give you more control than chasing one universal roasting time. For help organizing the exercise side of your week, explore Workit on the App Store. Choose meals and training habits that are practical enough to repeat.
Comments
2 responses to “Crispy Roasted Chickpeas: Drying, Roasting, and Better Crunch”
[…] you want chickpeas with a different texture for another meal, try crispy roasted chickpeas. Keep them separate from a wet sauce until serving: the dry-roasted texture will soften in curry, […]
[…] extra crunch served beside the toast, consider a small portion of roasted chickpeas. Keep the topping separate until you eat and include its ingredients separately when calculating […]