
Published October 13, 2026
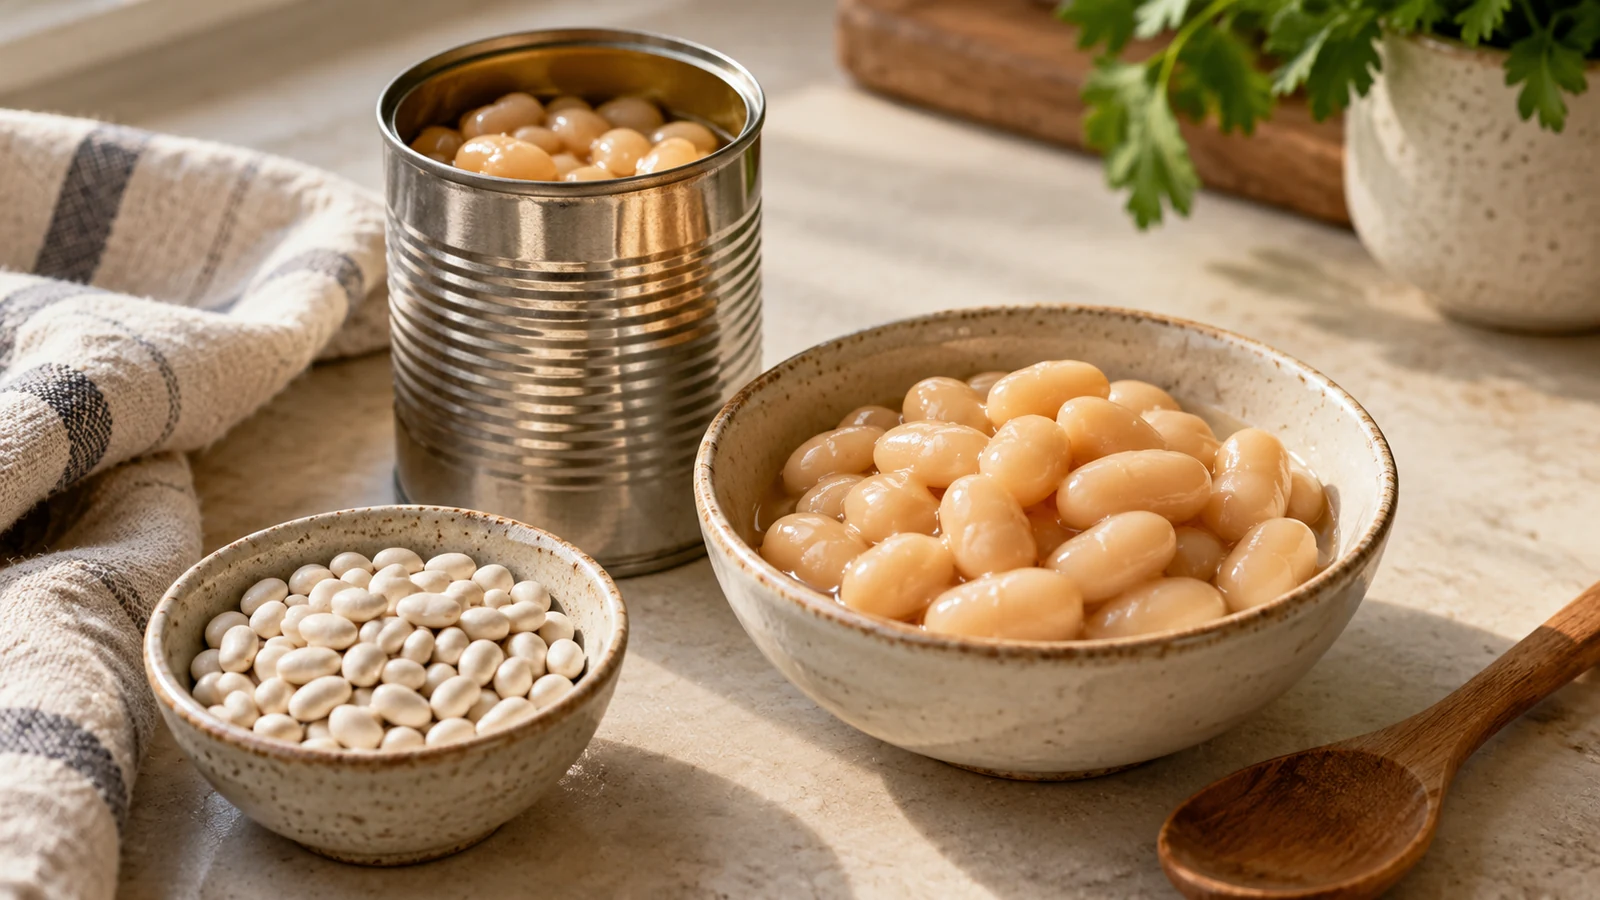
Canned and dried beans can both be useful, nutritious ingredients. Choose canned beans when you need a meal quickly or only a small amount. Choose dried beans when you want control over seasoning and texture, enjoy cooking a larger batch, or find that the cost per cooked portion is lower. Compare the same bean, in the same cooked or drained state, before deciding that one has more protein.
The most useful question is what will happen in your kitchen. A bargain bag that never gets cooked does not help dinner. Neither does a can whose remaining half disappears behind the milk. This guide compares convenience, nutrition labels, cost, cooking, and actual uses, with a special safety note for dried kidney beans.
Canned vs. dried beans: the practical differences
- Canned beans: Already cooked, usually ready after opening and draining, easy to portion into one or two meals. Their texture is set by the product, and sodium depends on the label.
- Dried beans: Uncooked, require sorting and cooking, sometimes soaking, and let you choose how soft the finished beans become. A small dry volume becomes a considerably larger cooked batch.
- Both: Work in soups, bowls, salads, spreads, and tacos. Both require refrigeration once prepared or opened, unless being eaten immediately.
For a cold lunch in ten minutes, canned beans usually win on practicality. For a weekend pot with a flavorful cooking broth, dried beans offer more control. Keeping one can in the pantry while occasionally cooking dried beans is a reasonable system. You do not need to commit to one format.
Bean type matters alongside packaging. A soft white bean behaves differently from a firm chickpea. Black beans and pinto beans also vary by variety, brand, age, and cooking method. When comparing formats, keep the variety as similar as possible so you are not attributing every texture difference to the can.
Are canned beans as nutritious as dried beans?
Both formats can contribute protein and fiber. USDA’s Protein Foods guidance includes beans, peas, and lentils among protein foods and encourages variety. Packaging alone does not tell you the full nutritional profile. Check the bean variety, serving size, liquid included in that serving, and added ingredients.
The biggest comparison mistake is placing 100 grams of dry beans beside 100 grams of drained canned beans. Dry beans contain much less water. Once they absorb water during cooking, their nutrients are spread through a heavier food. The dry number can look much larger without meaning that a serving of home-cooked beans is dramatically richer in protein.
Compare cooked with cooked, or compare what goes into the full batch and then divide it by your actual portions. If a tracking entry says “dry,” weigh before cooking. If it says “cooked, drained,” weigh after cooking and draining. Our raw vs. cooked food weight guide explains this distinction across other meal-prep ingredients.
A transparent protein example
The following numbers are illustrative label values for learning the calculation, not a claim about every bean product. Imagine a dry-bean label lists 10 grams of protein per 50 grams dry. You cook 200 grams dry, and the finished drained batch weighs 500 grams. The dry ingredients supplied 40 grams of protein: 200 divided by 50, multiplied by 10.
Divide that batch into four equal 125-gram portions. Each portion contains approximately 10 grams of protein, assuming the label-based total is distributed evenly. Water changed the batch weight. It did not create four additional servings of protein. This is an estimate because labels are rounded and cooking can change nutrient retention.
Now imagine canned beans labeled with 7 grams of protein per 100 grams drained. A 125-gram portion would provide 8.75 grams: 125 divided by 100, multiplied by 7. Those example portions are fairly close. Different beans and different labels could narrow or widen the gap. Use the package in your hand rather than treating either example as a universal figure.
Read what the serving actually includes
Some labels describe the beans as sold, including liquid; others explicitly use drained weights. The net weight on the front can include liquid you will pour away. If a recipe needs 240 grams of drained beans, a 400-gram can is not automatically 400 grams of usable beans. Check a stated drained weight or drain and weigh it.
Plain beans, baked beans, and beans in chili sauce are different products. A sauce can add sodium, sugar, fat, and flavor. That does not automatically make it unsuitable, but its nutrition cannot be substituted for a plain-bean entry. Our protein label-reading guide is useful when serving sizes and front-of-pack claims make comparison awkward.
Sodium: compare labels before comparing formats
Plain dried beans let you control the salt added during preparation. Canned products range from no-salt-added versions to heavily seasoned varieties. A no-salt-added can may fit your needs just as easily as home-cooked beans. Conversely, a home-cooked pot made with salty stock, cured meat, and generous seasoning can contain substantial sodium.
The FDA’s sodium guidance recommends comparing labels and rinsing sodium-containing canned foods such as beans. Rinsing can remove some sodium, but the exact reduction depends on the product and method. Do not deduct a fixed percentage from your label unless you have suitable data for that preparation.
For an easy comparison, convert both labels to the same weight. If one example product provides 360 milligrams per 130 grams, that is about 277 milligrams per 100 grams. Another providing 150 milligrams per 100 grams is lower on that basis. Comparing “one serving” without checking the grams would hide the difference.
Think about the whole meal, too. Beans, jarred salsa, cheese, seasoned meat, and bottled dressing can each contribute sodium. You may prefer a lower-sodium bean so you can use the sauce you enjoy. If a clinician has given you a sodium restriction, use that individualized advice rather than a generic meal-prep target.
Which is cheaper? Calculate the cooked portion
Dried beans often look cheaper on the shelf, but dry weight and canned net weight do not describe equivalent food. A useful comparison is price per edible cooked portion. Include how much you will actually use, and remember that time, cooking energy, freezer space, and convenience also have value.
Here is a worked example using invented prices, not a current grocery-price survey. Suppose a 500-gram bag of dried beans costs $2.40. You cook the entire bag and obtain 1,200 grams of drained beans. Your bean cost is $0.20 per 100 grams, or $0.30 per 150-gram portion. The actual cooked yield must be measured; it is not guaranteed.
Suppose a can costs $1.10 and gives you 240 grams after draining. That works out to about $0.46 per 100 grams, or $0.69 per 150-gram portion. On ingredients alone, the dried batch is cheaper in this example. It also requires preparation, cooking, containers, and a plan for eight portions.
Now suppose you only eat 600 grams of that cooked dried batch and discard the rest. The effective bean cost becomes $2.40 divided by four 150-gram portions, or $0.60 per portion actually eaten. Waste erased much of the apparent saving. Freezing promptly in useful amounts is what makes bulk cooking economical for many smaller households.
Write down three numbers for your own comparison: purchase price, edible cooked yield, and portions eaten. Repeat the calculation after a real batch rather than relying on a generic conversion. For shopping decisions beyond beans, see our budget high-protein grocery list.
How to make canned beans taste better
First decide whether you want to use the liquid. Draining and rinsing gives a cleaner starting point for a salad, rice bowl, or crisp vegetable filling. Keeping some liquid can help a soup or saucy skillet. Read the product instructions, and taste before adding salt because the liquid and beans may already be seasoned.
- Drain deliberately. Pour into a sieve, rinse under running water if desired, and let excess water drip away. Very wet beans can dilute a dressing or steam when you want browning.
- Build flavor separately. Soften chopped onion in a little oil, then briefly stir in garlic and spices. This gives the beans a flavorful base without requiring a long cooking time.
- Add beans gently. Fold them through the pan. Vigorous stirring can turn already-soft beans into a paste.
- Adjust the consistency. Add a spoonful of water for saucy beans, or simmer uncovered briefly if the pan is too wet.
- Finish with contrast. Lemon juice, lime, vinegar, fresh herbs, or something crunchy can make a simple can feel like a complete recipe.
For crisp-edged chickpeas, dry their surface thoroughly and spread them with space between them before roasting. Do not expect every canned bean to become crunchy: delicate white beans are better candidates for mashing or a creamy sauce. Choose a method that suits the structure you have.
How to cook dried beans without guessing
Start with the package directions for the specific bean and appliance. Sort through the dry beans for debris, rinse, and use an appropriately sized pot because they expand. A soak can make scheduling easier for some varieties. If soaking for an extended period or in a warm kitchen, use the refrigerator.
For ordinary stovetop preparation, keep the beans covered with enough water as directed and cook until fully tender. Test several beans from different parts of the pot. An older bag, hard water, altitude, and bean variety can all affect the time. A printed cooking estimate is a planning aid, not proof of doneness.
Add acidic ingredients such as tomato, lemon, or vinegar after the beans have softened if you want to avoid complicating tenderness. Season in stages so the finished cooking liquid is pleasant. If you plan to reduce the liquid substantially, hold back some salt until the final consistency is reached.
For a pressure cooker, follow the appliance’s bean-specific instructions, including liquid, maximum fill level, and release method. Beans can foam, so a pot’s ordinary maximum-fill mark may not apply. Do not invent a pressure-cooking schedule by copying the stovetop time. The manufacturer and a tested recipe are better starting points.
Important: dried kidney beans need special care
The FDA warns that raw or inadequately cooked kidney beans can contain harmful levels of the lectin phytohaemagglutinin. Its natural toxins guidance says to soak kidney beans for at least five hours, discard the soaking water, and boil them in fresh water for at least 30 minutes. Continue cooking until properly tender.
Do not put raw dried kidney beans straight into a slow cooker. The FDA’s Bad Bug Book explains that inadequate slow-cooker temperatures may not destroy the toxin. Canned kidney beans have already been properly processed and are the simpler option for a slow-cooker recipe. Do not taste raw or partly cooked kidney beans to check progress.
Three ways to use either format
For all three ideas below, bean amounts mean fully cooked, drained beans. If starting with dried beans, complete the cooking process first. The recipes are small, flexible meal components rather than promises of a particular calorie or protein total. Add the numbers from your own labels if you track them.
1. Lemon white-bean smash for two lunches
Use 300 grams cooked, drained white beans, 1 tablespoon olive oil, 1 tablespoon lemon juice, 1 teaspoon mustard, 1 small grated garlic clove, and black pepper. Mash about two-thirds of the beans with the seasonings, then fold in the remainder. Add a teaspoon of water at a time until spreadable.
Divide into two 150-gram bean portions before adding your bread or toppings. Serve one on toast with sliced tomato; use the other as a thick dip alongside vegetables and crackers. Add an egg, tofu, or another protein food if that better suits your meal. Start with less mustard if its flavor is strong.
Soft canned beans are especially convenient here. Home-cooked beans work well when they are tender enough to collapse under a fork. If they remain chalky inside, finish cooking them rather than using more oil to disguise the texture. Keep the finished smash refrigerated until serving.
2. Smoky black-bean skillet for two
Soften 100 grams diced onion and 150 grams diced bell pepper in 2 teaspoons oil. Stir in 1 teaspoon ground cumin and half a teaspoon smoked paprika. Add 300 grams cooked, drained black beans, 200 grams chopped canned tomatoes, and 60 milliliters water. Simmer gently until the vegetables are tender and the sauce coats the beans.
Divide the whole skillet equally. Each portion contains 150 grams of beans, plus half the vegetables and sauce. Serve with rice, tortillas, or a baked potato. Finish with lime and chopped herbs. If you want a thicker filling, mash a few beans against the side of the pan rather than cooking everything until dry.
This recipe is forgiving of a softer canned product because the sauce benefits from a little starch. If you want a bowl built around it, our high-protein rice bowls guide shows how to combine beans with other ingredients and calculate the portion.
3. Chickpea crunch salad for two
Combine 300 grams cooked, drained chickpeas with 150 grams diced cucumber, 150 grams tomatoes, and a handful of chopped parsley. Mix 1 tablespoon olive oil, 1 tablespoon vinegar or lemon juice, and a small pinch of cumin separately. Toss just before serving, then taste before adding salt.
For packed lunches, divide the chickpeas and chopped vegetables between two containers and carry the dressing separately. Add a whole-grain pita and a food you enjoy for extra protein, such as yogurt, tofu, or cooked chicken. If tomatoes release lots of juice, drain that before mixing so the dressing stays flavorful.
Firm beans are useful in this salad. If your canned chickpeas are unusually soft, fold them gently and skip aggressive tossing. If home-cooked chickpeas are very firm, make sure that firmness reflects a fully cooked texture rather than an undercooked center.
Portion a batch around actual meals
Choose a portion based on the role beans play in the meal. A 75-gram addition to a chicken salad is different from 180 grams forming the main ingredient in a vegetarian bowl. There is no universal “one portion” that must fit every appetite or recipe. Label the weight you actually packed.
If a cooked batch weighs 900 grams, you could divide it into six 150-gram portions. Alternatively, package three 200-gram portions for larger bowls and three 100-gram portions for soups. Both systems use the whole batch. The second is more useful if your meals vary, provided the different sizes are clearly marked.
Freeze portions with a little cooking liquid when you want soft beans for soup or a mash. Drain more thoroughly when you want salad-ready beans. Leave expansion space in freezer-safe containers. Label the bean variety and cooking date so that several pale-colored containers do not become a guessing game later.
USDA’s leftover guidance recommends prompt refrigeration in shallow containers, within two hours, or one hour above 90°F. Keep refrigerated leftovers at 40°F or colder and use within three to four days; freeze portions needed later. Reheat leftovers to 165°F.
Frequently asked questions
Do canned beans need cooking?
Plain commercially canned beans are already cooked. Follow the package instructions; most can be drained and used in a cold salad or warmed for a hot dish. Simmering improves flavor integration in some recipes, but it is not the same job as cooking raw dried beans.
Can I replace one can with a fixed dry weight?
Use the drained cooked amount requested by the recipe. Dry-to-cooked yield varies, and can sizes vary too. If the recipe needs 240 grams drained beans, cook enough dried beans to weigh out 240 grams after cooking, then portion any excess for another meal.
Are dried beans always better for meal prep?
No. They suit larger batches and people who enjoy cooking them. Canned beans suit limited time, limited equipment, and smaller portions. A practical meal-prep routine can use both, with dried beans for planned cooking and a can reserved for an unexpectedly busy evening.
Should I rinse every can?
Rinse when you want a cleaner flavor, less surface liquid, or some sodium removal. Keep suitable liquid when it helps a soup or sauce. The label, recipe, and your preference matter. Rinsing is not a reliable way to calculate an exact new sodium value.
What if beans upset my stomach?
Try a smaller serving and see how it fits your meals rather than forcing a large bowl. Individual tolerance differs. Persistent, severe, or new digestive symptoms deserve medical advice; changing bean packaging is not a diagnosis or a guaranteed solution.
A simple buying rule
Buy canned beans for the meal you need quickly. Buy dried beans when you have a cooking method, enough time, and a destination for the finished portions. Compare labels fairly, calculate cost using cooked yield, and choose the texture that suits the recipe. Those details matter more than declaring one format the winner.
Keep meal planning simple enough to support the rest of your routine. When you are ready to organize training too, Workit offers workout programs and a journal for weights, reps, and sets.
Comments
One response to “Canned vs. Dried Beans: Nutrition, Cost, Cooking, and Meal Prep”
[…] Canned lentils are convenient, while a home-cooked batch can be divided for several meals. Our canned vs. dried beans guide covers the same useful distinctions between dry, cooked, and drained […]