
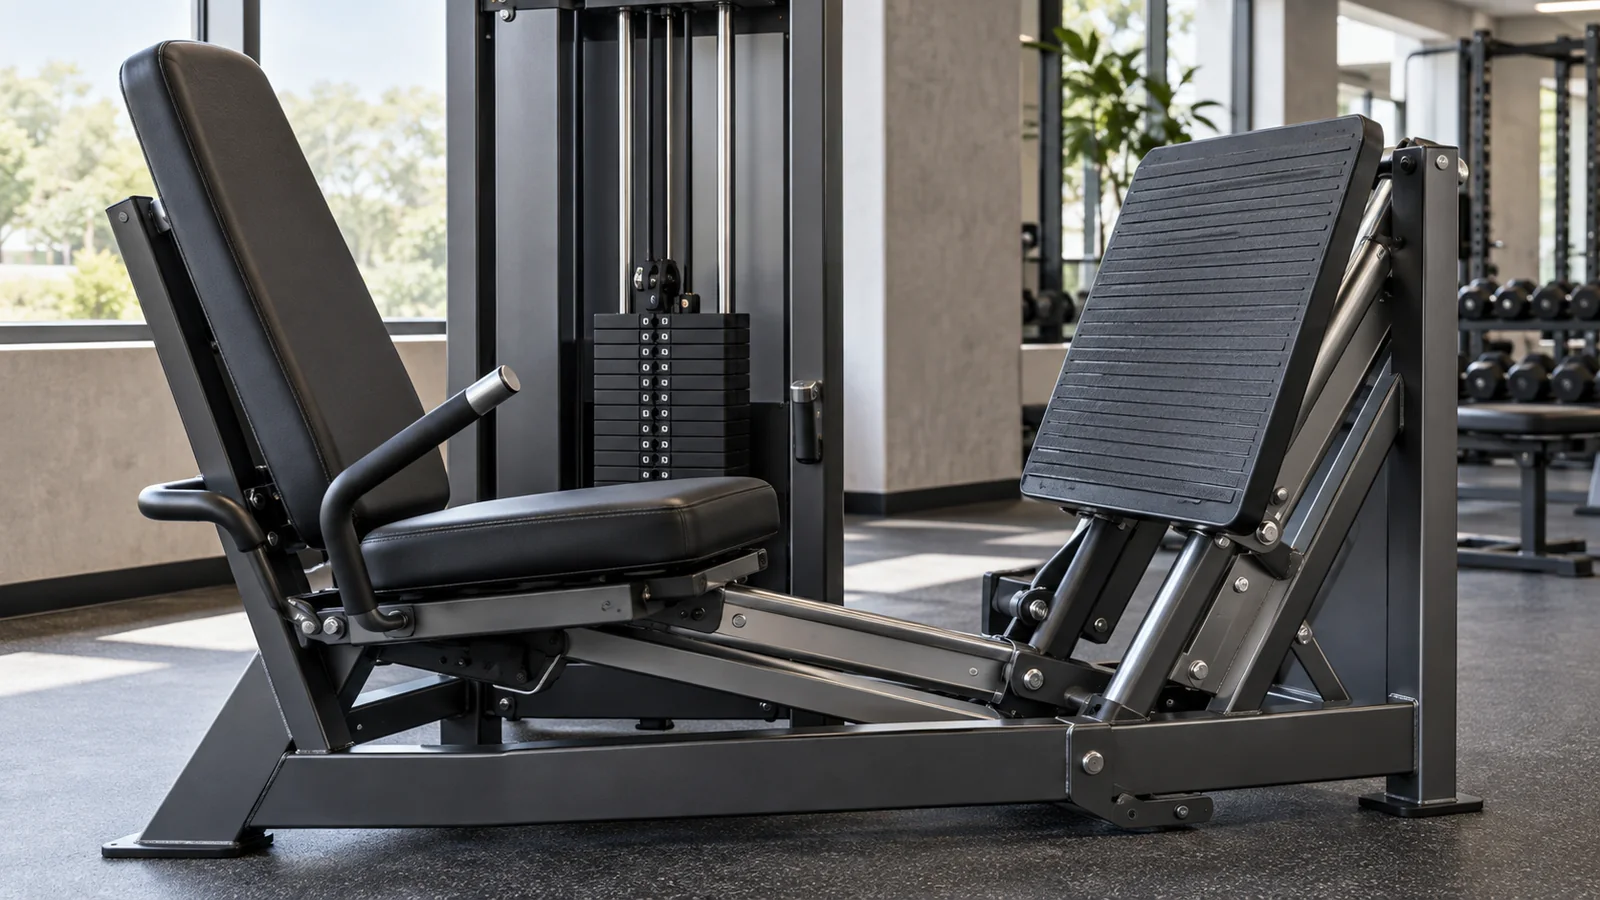
A seated leg press should let you bend and straighten your legs while your feet stay planted and your body stays supported. The most useful setup is the one that makes those conditions easy to repeat. Start with a light resistance, adjust the seat before the set, and choose a comfortable range rather than copying someone else’s seat number.
Published October 16, 2026
This guide focuses on the seated leg press commonly found in a gym’s weight-machine area, including machines where the seat moves away from a fixed platform. You will learn how to check the controls, position your feet, recognize an unsuitable seat distance, and build a beginner routine without guessing at a universal starting weight.
If you are deciding between different lower-body machines, our hack squat versus leg press comparison covers that choice. Here, the goal is narrower: make your next seated leg press session more controlled and easier to track.
Seated leg press: the quick setup
- Read the machine’s placard and ask a gym staff member to explain unfamiliar adjustment or release controls.
- Choose a light setting and lock every adjustable part into place before pressing.
- Sit with your hips settled against the support and both feet fully on the footplate.
- Start with a comfortable, roughly hip- to shoulder-width stance near the middle of the platform.
- Let your knees travel in the same general direction as your toes.
- Press smoothly, keeping a small bend at the knees at the farthest position.
- Return only as far as you can while maintaining foot contact and a stable pelvis.
These are general coaching cues, not a substitute for the instructions on your particular machine. A model with a moving seat may have different entry steps and adjustment rules from one with a moving footplate. Never test a release lever while the machine is loaded and moving.
What the seated leg press works
The exercise involves movement at both the knees and hips. Your quadriceps contribute to straightening the knees, while the muscles around your hips help press you and the platform apart. Mayo Clinic describes the leg press as an integrated lower-body exercise involving the quadriceps, gluteal muscles, hamstrings, and calves. See its seated leg press demonstration for a basic visual reference.
That list does not mean every muscle receives the same stimulus, or that one machine replaces every lower-body exercise. A leg curl, for example, asks you to bend your knee against resistance rather than press a platform away. The leg curl and leg extension guide explains how those separate movements fit into training.
The seated position also changes the task. You do not have to balance a free weight or stand with a bar on your shoulders, but you still need to manage your body position and the resistance. The support is helpful feedback: if you slide, lift your hips, or twist against the pad, something about the repetition needs adjusting.
First, identify how your machine moves
On some seated leg presses, your seat travels along rails while the platform stays fixed. On others, the seat stays still and the platform or lever arm moves. Either arrangement can produce a pressing movement, but the controls and resistance feel will differ.
For example, Precor’s Resolute leg press has a particular angled back pad, moving rail system, and entry ledge. Those features describe that model; they do not establish a required backrest angle for every exerciser on every machine.
Before choosing weight, locate the seat adjustment, the resistance selector, the handles, and any start-position or safety mechanism. Check whether the machine has a separate backrest adjustment. If you cannot tell which part a lever controls, leave it alone until someone demonstrates it.
Look at the weight-stack units too. A number may represent pounds, kilograms, or a numbered level. Linkages and moving components also affect how resistance feels. Your log should identify the machine, rather than treating its displayed weight as interchangeable with a different leg press.
How to adjust the seat and backrest
Set the seat before adding a challenging load
Use the machine’s specified resting position to make adjustments. Fully engage the seat pin or latch, then gently check that the seat is secure. Do not hold an adjustment handle open while you begin a set, and do not use loose pads or other improvised objects to change the fit.
Sit all the way into the intended support rather than perching forward. Your head and shoulders should feel comfortably supported where the machine’s design allows. Keep your neck relaxed; pressing your head forcefully backward does not help you find a better leg position.
Now place both feet on the plate. If you must round forward, pull your knees tightly into your torso, or lift your heels just to reach the start position, the setup may be too close or otherwise unsuitable. Move to an easier starting position according to the manufacturer’s instructions and test again.
Use a controllable knee bend as your starting point
A conservative beginner starting position often has the knees bent around a right angle, or less if needed for comfort and control. You do not need to force an exact angle. The machine placard, your available movement, and any individual professional guidance take priority over matching a photograph.
A seat that is too far away can create a different problem: you may barely bend your legs, struggle to reach the plate, or slide forward to finish the movement. Move the seat only when the mechanism is safely at rest. Make one small adjustment, then reassess instead of changing several controls at once.
Check the pelvis, not just the knees
Watch what happens as the knees come toward you. Your hips should stay settled, without the tailbone visibly rolling up and away from the seat. Do not chase extra depth after your pelvis starts changing position. Shorten the return and reassess the seat distance with a lighter load.
If you cannot find a comfortable position even at a light setting, stop trying to force the machine to fit. Ask a qualified trainer to assess the setup or choose another suitable exercise. A machine’s adjustment range does not automatically accommodate every body equally well.
Foot placement: find a stable starting position
Begin with both feet near the middle of the usable platform, approximately hip- to shoulder-width apart. A slight outward toe angle may feel natural. Keep the whole foot supported, with room around the edges of your shoes, and make sure the soles are dry and secure.
Think of maintaining contact through the heel and the front of the foot. Pushing only through your heels can encourage you to lift your toes; pushing only through the forefoot can encourage your heels to rise. Neither exaggeration is needed for this basic version.
Follow the feet with the knees
As you bend and straighten, let the knees move in the same general direction as your toes. Avoid deliberately squeezing your knees together or forcing them much farther apart than your feet. You are looking for a smooth path you can reproduce, not a perfectly rigid geometric line.
If one knee drifts abruptly while the other stays steady, reduce the load and check whether your feet are placed symmetrically. A trainer can help distinguish an inconsistent setup from a movement pattern that needs individual attention. Persistent pain or a sense of instability deserves professional assessment.
Avoid chasing a special foot position
You may see diagrams labeling very high feet as a glute exercise and very low feet as a quadriceps exercise. Foot placement can change joint positions, but a diagram cannot guarantee a specific result for your machine or anatomy. Extreme positions may also make it harder to keep your feet secure.
For your first several sessions, choose one comfortable position and keep it consistent. If you later experiment, use a lighter load, change one variable, and judge the entire repetition. A new position that produces pinching, heel lift, or reduced control is not an upgrade simply because it feels different.
How to perform each repetition
- Settle and prepare. Hold the provided handles without wrenching yourself into the seat. Keep your torso steady and take an easy breath.
- Begin smoothly. Press both feet into the platform without a sudden kick. The first few centimeters should be as controlled as the rest of the movement.
- Extend comfortably. Move until your legs are nearly straight, leaving a small knee bend rather than snapping into a hard lockout.
- Reverse direction without bouncing. Bend your knees and hips gradually. Keep both feet planted and your body supported.
- Stop at your chosen bottom position. Do not let the weight pull you farther inward than you can manage. Begin the next repetition from the same controlled point.
- Finish deliberately. Return the machine to its approved resting position. Let the mechanism settle before removing your feet or changing the selector.
Breathe throughout. An easy approach is to exhale during the press and inhale during the return. Avoid turning a beginner set into a prolonged breath-holding effort. Mayo Clinic’s weight-training technique guidance emphasizes suitable loads, controlled movement, and continued breathing.
A useful practice rhythm is a smooth press followed by a slightly more deliberate return. You can count quietly if it stops you rushing, but a particular second-by-second tempo is not mandatory. The important test is whether you can control the turnaround without letting the stack slam or using a bounce.
How much weight should a beginner use?
There is no reliable universal starting weight. Two machines with identical numbers can feel different, and two beginners can have very different training histories. Start with a light setting that lets you test the seat, foot position, and range without straining.
Try a short practice set of five to eight comfortable repetitions. If the movement is smooth and the effort is very low, rest and make the smallest sensible increase. You do not need to keep increasing until the last repetition becomes a struggle. The first session can simply establish a manageable baseline.
For an introductory working set, choose a load you can move for eight to twelve controlled repetitions while feeling that a few more good repetitions would still be available. That is an example of conservative effort management, not a strength test or a promise about the ideal dose for everyone.
If your tenth repetition is dramatically shorter than your first, the number ten is less useful than it appears. End the set when your technique or comfortable range changes. Our explanation of reps in reserve can help you describe effort without repeatedly testing failure.
A simple first-month approach
The following is an adaptable example for a generally healthy adult learning the machine. It is not a rehabilitation prescription. Repeat a stage as long as you need, and reduce the session if soreness or fatigue is interfering with normal activity.
First exposure: learn the settings
After an easy general warm-up, perform one or two light practice sets. Then, if everything feels comfortable, do one working set of eight to ten repetitions. Record the machine, seat setting, resistance, and anything about the foot position that helps you reproduce it. Finish without testing your limit.
Next sessions: repeat before adding
Use the same setup at your next suitable strength session, allowing recovery between sessions that train the same muscles. Aim to make the repetitions more consistent. If one working set is comfortable and recovery is manageable, you could build to two sets of eight to twelve repetitions.
Rest around one to two minutes between those beginner sets, or longer if you are not ready to repeat the movement calmly. Do not shorten the break just to make the exercise feel harder. Breathing, setup attention, and leg control should be ready before you begin again.
Later: change one thing
When both sets reach the upper end of your chosen repetition range with the same technique across more than one session, consider the smallest available load increase. Your repetitions may return toward the lower end. If the jump is too large, keep the previous resistance and improve consistency instead.
This is a practical use of double progression. It does not require a weekly increase. Travel, poor sleep, other training, or a different machine can all justify repeating or reducing the previous session rather than chasing a new number.
Common problems and useful adjustments
Your heels lift as the knees bend
Pause the set instead of pressing from the edge of your shoes. At rest, check the seat distance and foot position, then test a shorter return with less resistance. Do not place a loose object under your heels on the platform. If comfortable full-foot contact remains difficult, get help with the fit.
Your hips leave the seat
Reduce the depth first. A range that looks smaller but keeps your pelvis stable is a better practice range than a deep repetition that changes your body position. Check the seat setting before assuming you need to pull harder on the handles.
The weight stack crashes between repetitions
Slow the return and use less weight if necessary. Some designs may allow the plates to touch lightly at the intended endpoint; follow the machine’s instructions. The problem is losing control and slamming the load, not failing to maintain a tiny gap at all costs.
One side seems to do more work
Recheck foot height, stance width, and whether you are sitting squarely. Use a lighter bilateral set and notice whether the pattern persists. Do not immediately switch to a heavy one-leg variation as a self-diagnosis. An unfamiliar asymmetry, weakness, or pain may need individual guidance.
Your knees or back hurt
Stop the painful set. A muscle working hard and a painful joint are different experiences, but you do not need to diagnose the cause while sitting in the machine. Seek qualified advice for persistent or recurring symptoms, and follow any existing rehabilitation restrictions.
Where it belongs in a balanced workout
The seated leg press can serve as a main lower-body movement in a full-body session. If learning it is the priority, place it early enough that you can concentrate, after warming up. Avoid exhausting your legs with several unfamiliar exercises before trying to establish the setup.
A compact session might include the leg press, a suitable hip-hinge or leg-curl movement, an upper-body press, an upper-body pull, and a manageable core exercise. The exact selection depends on your experience and equipment. Our beginner gym-machine workout offers a broader framework.
The ACSM’s 2026 resistance-training guidance emphasizes regular training of the major muscle groups and an approach matched to the individual. It also notes that training to momentary failure is not consistently necessary for the average healthy adult. You can keep the first few leg press sessions straightforward.
Frequently asked questions
Should my knees reach my chest?
Not as a beginner target. Use the machine’s instructions and a range that lets your pelvis stay supported and your feet remain planted. Reaching farther is not helpful if it creates discomfort or makes your hips roll off the pad.
Do I need to lock my knees to finish a rep?
No. Finish near extension with a small bend, without snapping the knees backward or resting forcefully on the joint position. You can count a controlled repetition without forcing that endpoint.
Is the displayed weight my actual lifting weight?
It is the machine’s labeled resistance setting. Mechanical leverage and the moving parts differ across designs. Use it to compare sessions on the same machine with the same setup, rather than translating it directly into a squat weight or another gym’s stack.
Can I do the seated leg press every day?
A beginner usually benefits from recovery between challenging sessions for the same muscles. Daily hard sets are unnecessary for learning the movement. Fit the exercise into a balanced schedule you can recover from rather than adding it automatically every time you enter the gym.
Is it safe for an existing knee or back condition?
That cannot be decided from the exercise name alone. Your symptoms, diagnosis, permitted range, and the specific machine matter. Ask the professional overseeing your care whether this movement fits your plan and what adjustments they recommend.
Make the next session repeatable
A useful leg press log contains more than weight. Note your seat setting, repetitions, and whether the final rep matched the first. Those details make it easier to tell genuine progress from a shorter range or a different machine.
For example, a useful note could read: two sets of ten, same seat setting, both heels stayed down, last repetitions controlled. You can then decide whether to repeat that session or add a repetition next time. A note that you changed the backrest is equally important: treat that session as a new comparison point rather than assuming a larger stack number means more strength.
If you want a place to record your strength sessions, Workit lets you log workout sets, reps, and weights. A subscription is required. Start with a setup you can repeat, then build gradually from the work you actually completed.