
Published October 14, 2026
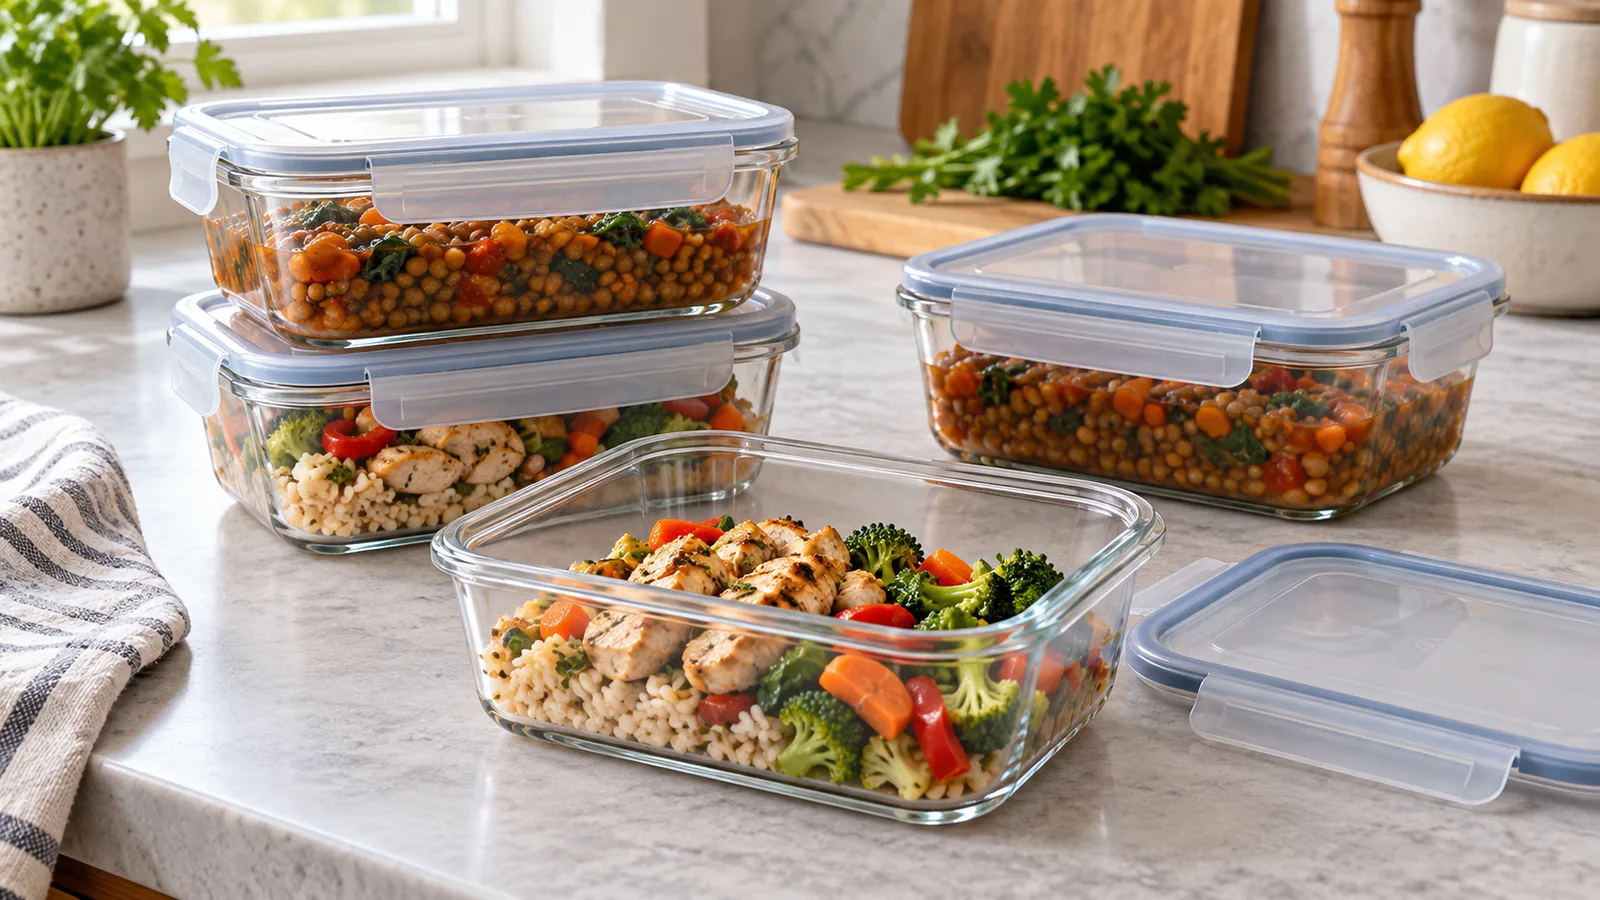
Good freezer meal prep starts with food you will enjoy after reheating, portions you can use in one sitting, and a plan to freeze extra servings early. Cook one or two dishes, cool them promptly, package them in meal-size portions, and label each with its contents, preparation date, freezing date, and reheating route. Keep sauces and fillings in the freezer; add fresh crunch, herbs, and creamy toppings when you serve them.
The freezer is most useful when it holds a small, understandable menu. Eight portions you know how to turn into dinner can be more practical than twenty unmarked containers. This guide focuses on texture, packaging, portioning, and getting meals back onto the table, with three original batch recipes and a starter plan.
Choose your freezer meal prep format first
Complete meals for minimal decisions
A complete portion works well when you want to open one container and eat. Thick soups, stews, and saucy mixed dishes are straightforward candidates. Pack the amount you normally finish rather than filling the largest container you own. Leave any garnish that should remain crisp or fresh out of the freezer.
The trade-off is flexibility. If every container includes the same side, you may tire of the combination. Start with two portions of a new complete meal and see whether you want to repeat it.
Cooked components for more variety
Freeze a chicken filling, tomato-tofu sauce, or lentil soup base, then choose the bread, potato, grain, or vegetable side on serving day. This reduces the number of ingredients that must survive freezing well. It also lets two people share a filling while choosing different portions or accompaniments.
Our meal prep for one guide is useful for matching batch size to a small household. A family-sized recipe does not have to become a family-sized frozen block.
Mixed storage for the coming week
Set aside the meals you will eat soon and freeze the rest promptly after cooling. For example, a four-serving batch can provide dinner tonight, one refrigerated lunch, and two frozen dinners. Decide that split before you start cooking so extra portions have a destination immediately.
What freezes well enough to earn freezer space?
Choose dishes whose appeal comes from tenderness, sauce, or a mixture of textures. A stew already has softened vegetables; a crisp dressed salad depends on something freezing is unlikely to preserve. The question is whether the thawed result works for its intended use.
The National Center for Home Food Preservation’s texture guidance flags raw salad vegetables, some dairy sauces, cooked egg whites, and crisp toppings as potential problems. That is a quality issue, distinct from safe handling.
- Useful starting points: tomato-based sauces, bean or lentil soups, cooked chicken in sauce, and thick vegetable stews.
- Freeze the base, finish later: soup without its cream, a filling without lettuce, or a casserole without its crisp crumb topping.
- Try one portion first: cooked pasta, plain rice, potato dishes, and recipes where you especially care about firmness or creaminess.
- Keep fresh for serving: cucumber, lettuce, delicate herbs, crunchy crumbs, and creamy cold toppings whose texture you want to preserve.
Freezing does not improve an already dry chicken breast or overcooked vegetables. Choose a pleasant starting texture and a recipe with enough moisture to reheat comfortably. If you usually serve a sauce thick, you can loosen it with a little water during reheating rather than freezing a very watery mixture.
Tofu deserves an intentional choice. Nasoya notes that freezing changes tofu texture, so a crumbled, saucy preparation is a reasonable place to start if you have not tried it before. Make one small trial portion, then decide whether you enjoy the result before multiplying the recipe.
For vegetable-focused meals, our frozen vegetable meal prep guide covers cooking methods that manage extra moisture. Freezing an entire finished dish is not always the easiest way to use the vegetables you already have.
Freeze early, before the refrigerator limit
Freezing is a storage choice to make while food is still safe. It cannot undo excessive time at room temperature or rescue leftovers with an uncertain history. Plan to freeze your extra portions on the day you cook them, once they have cooled safely, rather than waiting to see whether they get eaten.
Keep the refrigerator at 40°F, approximately 4°C, or below, and the freezer at 0°F, approximately −18°C, or below. Refrigerate perishable food within two hours, shortened to one hour above 90°F, approximately 32°C. Cooked leftovers generally have a three-to-four-day refrigerator window; freeze within that window, ideally earlier for quality. Do not leave a large pot on the counter until it feels cold.
These basics follow USDA leftovers guidance. For detailed cooling, transport, and cross-contamination advice, use the existing meal prep food safety guide. Here, the working rule is simple: mark freezer portions at the start of prep and put them away as part of that session.
Portion for the way you actually eat
Think about the next use before choosing the package. A lunch for one, dinner for two, and a spoonful of sauce require different portions. Freezing everything in one family-size container may save packaging but creates a larger thawing and reheating job each time you want a small serving.
For a mixed dish, divide the finished batch after cooking. Stir well so one container does not get mostly liquid while another gets all the chicken. If exact nutrition tracking matters, weigh the finished batch, subtract the pot’s weight, and divide the edible total by the planned servings.
A four-portion sauce that weighs 1,600 grams after cooking can be divided into four 400-gram portions. That example describes portioning, not a predicted recipe yield. Your actual yield changes with evaporation. Label each package as one serving so you can retrieve it without weighing it again.
For components, smaller portions often give more options. Freeze a single-serving filling rather than a whole assembled potato. Pair it with a freshly baked base using our high-protein baked potato guide. You can also combine two small portions for a larger meal.
If a household has different appetites, use one standard filling portion and flexible sides. That keeps the freezer system understandable without assuming everyone needs the same amount of food.
A six-step batch workflow
- Check your space. Clear enough room for the packages before cooking. Confirm the freezer temperature with an appliance thermometer. A large batch is not helpful if the food cannot fit without blocking everything else.
- Choose two compatible recipes. Share an onion, a can of tomatoes, or the oven, while keeping the final flavors distinct. Cooked fillings and soups are easier starter projects than several complicated assembled meals.
- Prepare packaging first. Set out clean, appropriately rated containers or freezer bags and write the labels before your hands are busy with hot food.
- Cook fully and portion promptly. Use shallow containers for cooked food. Divide a large batch rather than trying to cool the entire pot intact. Hot food can go into the refrigerator in smaller portions.
- Finish cooling under refrigeration, then freeze. Do not wait for room-temperature cooling on the counter. Seal suitable cooled portions for freezer storage and arrange them so cold air can move around the packages.
- Record the portions. Put the name, number of servings, and date on a short freezer list. Cross a portion off when you take it out.
Avoid loading the freezer with more unfrozen food than it can freeze promptly. The National Center for Home Food Preservation recommends spacing new packages for air circulation and keeping additions within the freezer’s capacity. Once frozen, packages can be moved closer together.
For your first session, make one batch and learn how its containers fit. Increase production only after you have eaten and liked the thawed meal. This is easier to manage than buying a large set of containers before you know your preferred portion size.
Three practical freezer meal recipes
These recipes are designed as cooked components or soups. Side dishes and fresh finishes are added when serving. Protein calculations, where shown, count only the specifically identified main protein ingredient; they are not full-meal nutrition panels. Use your own package label if you substitute products.
1. Smoky chicken and tomato filling
Makes four filling portions. Gather 336 grams fully cooked chicken breast strips, 800 grams canned chopped tomatoes with their juice, 200 grams diced bell pepper, 150 grams diced onion, two teaspoons oil, one teaspoon smoked paprika, half a teaspoon cumin, and black pepper.
Heat the oil in a large skillet. Cook the onion and pepper over medium heat for 8–10 minutes until softened. Stir in the spices, add the tomatoes, and simmer uncovered until the sauce is thick enough to sit on a spoon. Chop the cooked chicken into bite-size pieces, add it to the sauce, and heat thoroughly, reaching 165°F if reheating leftover chicken.
Stir well and divide the cooked filling into four shallow portions. Cool promptly under refrigeration, then freeze the portions you are saving. Leave yogurt, herbs, and shredded lettuce out of the frozen mixture.
To serve, reheat a portion until it reaches 165°F throughout. Spoon it into a baked potato, over a freshly cooked grain, or beside warm bread. Add lime juice and a cool yogurt topping at the table if desired.
Protein example: the Perdue cooked-chicken reference label lists 20 grams per 84 grams. A 336-gram batch provides approximately 80 grams from chicken, or 20 grams in each of four equal filling portions. This calculation does not apply unchanged to 336 grams of raw chicken.
2. Tomato-mushroom tofu sauce
Makes four generous sauce portions. Use 728 grams high-protein super-firm tofu, 300 grams chopped mushrooms, 100 grams diced onion, 800 grams canned crushed tomatoes, two teaspoons oil, one teaspoon dried oregano, and black pepper. Add garlic or chili flakes to taste.
Pat the tofu dry and crumble it. Heat the oil in a wide, deep skillet, then cook the mushrooms and onion until their released liquid has mostly evaporated. Add the tofu and cook, stirring occasionally, until some pieces take on color. Work in batches if the pan is crowded.
Add the tomatoes and oregano. Simmer for about 15–20 minutes, stirring and adjusting the thickness with a little water if necessary. Divide the finished sauce evenly into four shallow containers and cool promptly before freezer storage.
Reheat the thawed or frozen sauce in a saucepan, adding a little water as it loosens. Stir often and check that it reaches 165°F throughout. Serve with freshly cooked pasta or vegetables. Fresh basil, lemon zest, or a little grated cheese can be added after reheating, according to preference.
Protein example: the Nasoya super-firm tofu label lists 14 grams per 91 grams. The batch uses eight such servings: approximately 112 grams of tofu protein in total, or 28 grams per sauce portion. Other tofu products need a fresh calculation.
3. Red lentil, carrot, and tomato soup
Makes four meal-base portions. Combine 200 grams dry red lentils, rinsed; 400 grams canned chopped tomatoes; 200 grams finely diced carrots; 100 grams diced onion; two teaspoons oil; one teaspoon ground cumin; and approximately 900 milliliters low-sodium vegetable broth or water. Have extra water available to adjust the consistency.
Soften the onion and carrots in the oil for 7–10 minutes. Stir in the cumin, then add the lentils, tomatoes, and broth. Bring to a simmer and cook until the lentils and carrots are tender, stirring regularly. Start checking around 20 minutes, but use tenderness rather than the clock as the endpoint.
Add water if the soup becomes too thick before the lentils are cooked. Leave it moderately thick for storage, then loosen it when reheating. Portion into four shallow containers, cool promptly, and freeze with the headspace required by your container.
For serving, reheat with stirring, bring the soup to a rolling boil, and check that it reaches 165°F. Finish with lemon and fresh herbs, then add bread or another side according to appetite. Creamy toppings are best added at the table.
Red lentils soften into the soup, which suits this recipe. If you want beans that remain more distinct, see lentils versus chickpeas before making a substitution. To calculate this soup’s lentil protein, use the dry package value for the 200-gram dry quantity and divide the batch contribution by four; do not apply a cooked-lentil value to dry lentil weight.
Package for quality and easy reheating
Use packaging rated for the freezer, with a reliable seal. Freezer suitability and microwave or oven suitability are separate questions, so check the manufacturer’s instructions for each container and lid. Glass does not automatically tolerate a move from freezer to hot oven.
For liquids, leave the recommended expansion space rather than filling to the rim. For a thick filling in a freezer bag, gently press out excess air, seal, and freeze it flat on a tray. Keep the filled bag supported until solid. A shallow package is easier to store and divide into a sensible thawing plan than a thick, irregular lump.
The National Center for Home Food Preservation recommends moisture-resistant, durable, leakproof packaging. Ordinary tubs and thin wraps may not provide the same protection as materials intended for freezer storage.
A useful label might read: “Chicken-tomato filling. One of four portions. Cooked October 14; frozen October 14. Thaw in fridge or reheat in saucepan with water. Heat to 165°F. Add lime and yogurt.” Include allergens when meals will be shared. The finishing note helps the meal taste intentional rather than forgotten.
Choose a thawing route before you need dinner
Refrigerator: the easiest planned route
Move the required portion to the refrigerator on a tray or in a container that will catch leaks. A thin single portion may thaw overnight; a large dense container can take longer. Allow extra time rather than assuming every meal follows the same schedule. Keep the label with the food so you know what it is and when it was prepared.
Cold water: faster, with attention
Use a leakproof package submerged in cold water, changing the water every 30 minutes. Cook or reheat immediately after thawing. Choose this method when you can stay nearby and finish the meal, not as something to leave unattended while you go out.
Microwave: thaw and heat in one session
Transfer food to a microwave-safe container, use the appliance’s defrost instructions, and continue directly to cooking or reheating. Stir and rotate where possible, allow the specified standing time, and check several spots for an internal temperature of 165°F. A hot edge does not establish that the middle is ready.
These thawing methods follow USDA freezing and food safety guidance. Never thaw perishable meals on the counter. Some soups and cooked sauces can be reheated directly from frozen; use a suitable saucepan or microwave container, add a little liquid if needed, and heat evenly throughout.
Keep a small rotation that you will actually use
Start by choosing two freezer meals for the coming week. Write them into your ordinary meal plan and check which fresh finishes they need. For example, Tuesday’s chicken filling needs a potato and lime; Friday’s lentil soup needs bread and parsley. That short list makes the frozen portion feel like a planned dinner.
Put older portions where you can see them and add newer ones behind them. Count servings, not just containers: one tub may hold two meals while a small bag holds half a meal’s sauce. Update the list when a portion leaves the freezer, not when you remember several days later.
Continuously frozen food held at 0°F remains safe indefinitely, but its texture and flavor can decline; USDA separates those safety and quality questions. USDA gives three to four months as a broad quality recommendation for frozen leftovers. Individual dishes may lose appealing texture sooner. For a first batch, plan to eat the frozen portions over the next month, then adjust based on the result; that is a rotation goal, not a safety deadline. A date on a package is useful for rotation, but it does not prove safe handling before freezing.
For more combinations that fit this approach, explore our high-protein soup recipes. Choose one variation you already enjoy before filling the freezer with several unfamiliar dishes.
Troubleshoot the next batch
- Watery after thawing: reheat a sauce uncovered briefly after it is hot, stirring so it does not scorch. Next time, cook off excess vegetable moisture before packaging.
- Dry or chewy: add a small amount of water or broth during reheating and keep the dish covered when appropriate. Consider freezing the protein in sauce rather than by itself.
- Freezer burn: improve the seal, reduce unnecessary air, and use a package size that fits the portion. Freezer burn affects quality; it is different from food becoming unsafe through poor temperature control.
- Too much of one flavor: freeze smaller batches and change the fresh finish or side. Make less of a recipe you repeatedly avoid.
- Unclear storage history: discard the food if safe handling cannot be established. Smell and appearance cannot reliably rule out harmful contamination.
Your first freezer session
Pick one four-serving recipe, prepare four appropriate containers, and decide which portions you will eat now, refrigerate briefly, or freeze. Label the saved portions, make one clear space for them, and choose a date to eat the first frozen serving. Once you know how that meal reheats in your kitchen, repeat it or adjust the portion size.
The best freezer meal prep routine is one that gets food back onto your plate. Start with a small menu, freeze early, and keep the final serving steps easy to remember.
Comments
One response to “Freezer Meal Prep: Better Texture, Practical Portions, and Three Batch Recipes”
[…] frozen separately; watery vegetables and yogurt-based mixtures may lose texture after thawing. Our freezer meal prep guide helps you organize components for later […]