
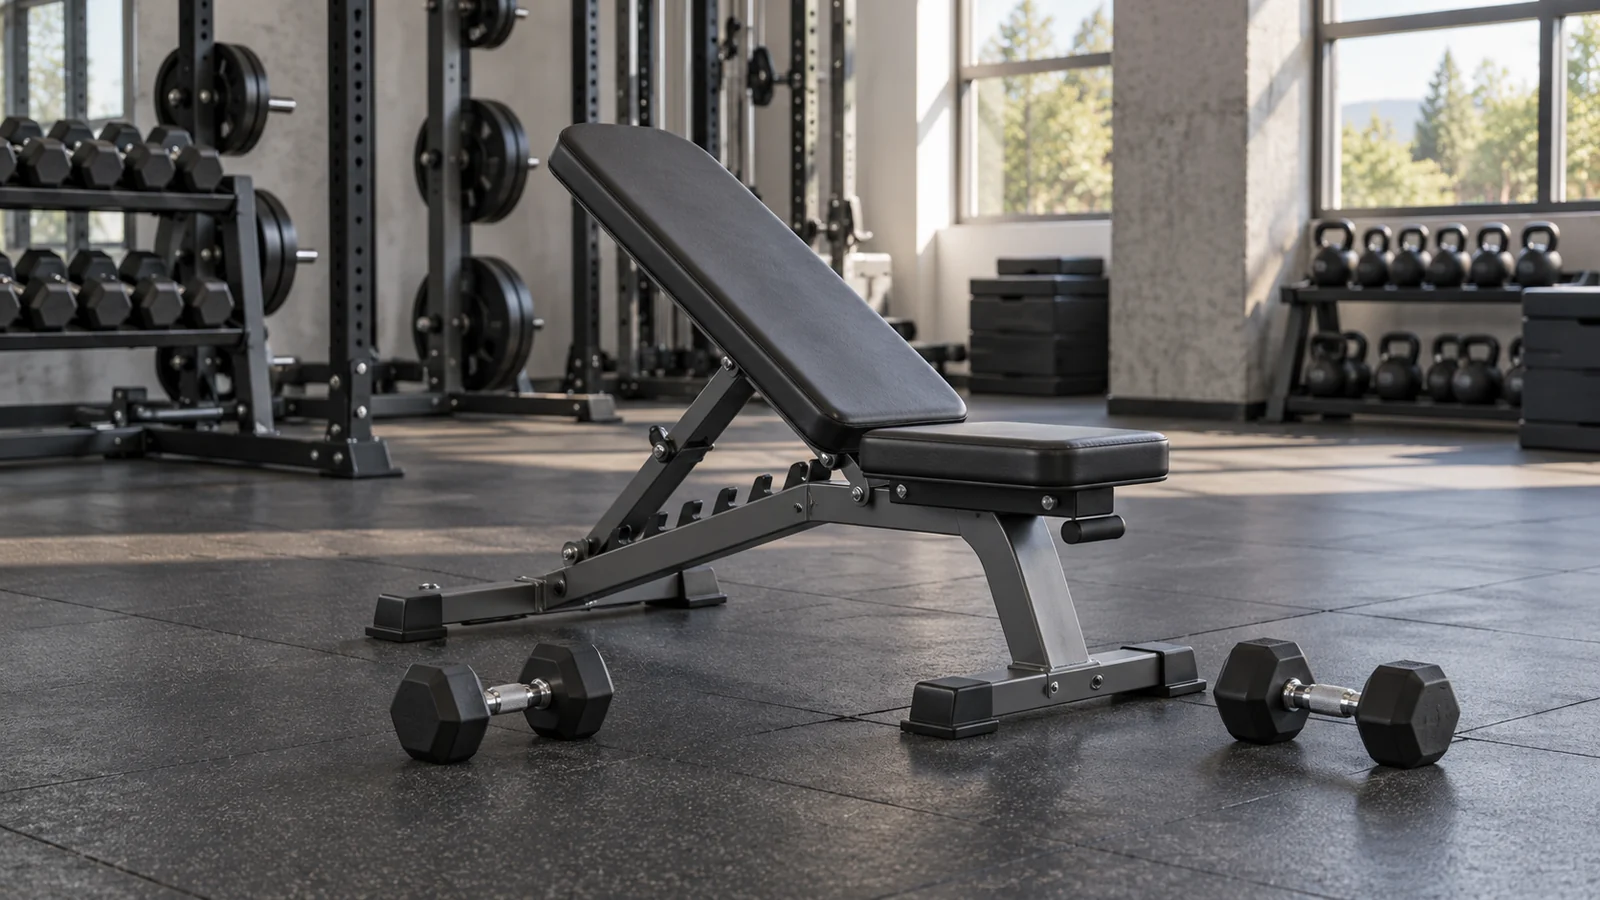
A chest-supported dumbbell row trains your back and arms while an incline bench supports your torso. Set a stable bench around 30 to 45 degrees, rest your chest on the pad, and pull the dumbbells toward your lower ribs without lifting your body away from the bench. Start with a light pair you can lower smoothly, and finish each set before you need to swing.
Published October 12, 2026
The appeal is straightforward: you can practice a rowing motion without spending the whole set holding an unsupported hip hinge. The detail that makes it work is the setup. Bench height, head clearance, foot position, and the route you use to pick up and put down the dumbbells all matter. This guide focuses on those decisions, then shows how to fit the exercise into a manageable beginner routine.
What makes a chest-supported row different?
In an unsupported dumbbell row, your legs and trunk help maintain your torso position while your arms move the weights. In this variation, the bench takes over much of that positioning task. Your feet still provide a stable base, and you still maintain control of your trunk, but you do not need to keep your upper body hovering above the floor.
That support can make repetitions easier to compare. If your chest stays against the same part of the pad, a heavier dumbbell cannot be lifted simply by standing a little taller. You still can cheat by bouncing or shrugging, but the bench gives you an immediate reference point.
The exercise is often called an incline dumbbell row or prone incline row. A seal row usually involves lying face down on an elevated horizontal bench with ample room beneath it. That is a different equipment arrangement. Do not try to turn an ordinary bench into a seal-row station by balancing it on loose plates or unstable boxes.
Support is a training option, not a medical claim. A chest-supported row is not automatically appropriate for someone with back, shoulder, rib, or neck pain. If pressure from the pad or the pulling movement hurts, stop and choose an appropriate alternative with qualified guidance.
Muscles worked and realistic benefits
The main movement combines pulling the upper arms backward with bending the elbows. Your latissimus dorsi, rear shoulders, and muscles around the shoulder blades contribute to the pull. Your biceps and other elbow flexors assist, and your hands and forearms hold the dumbbells. The exact emphasis changes somewhat with your arm path and individual proportions.
For a basic version, keep your elbows comfortably near your sides rather than forcing them tight against your ribs. A wider elbow path changes the exercise, usually making it feel more upper-back and rear-shoulder focused. Neither position isolates one muscle completely. Choose a repeatable path before worrying about tiny differences in muscle emphasis.
A practical benefit is being able to train a horizontal pull when your program already includes demanding lower-body work. For example, after squats or hinges, you may prefer a supported row instead of another exercise that requires a sustained bent-over position. That is a programming choice, not evidence that supported rows are universally better.
Rowing also does not replace every other back exercise. A vertical pull has a different movement path. Our comparison of rows and pull-ups explains that broader distinction. You do not need every variation in one workout; you need a small selection you can perform consistently.
Set up the bench before you pick up a weight
Choose a stable bench and a workable incline
Check that the bench is designed for resistance training, sits firmly on the floor, and has its adjustment mechanism fully engaged. Confirm the manufacturer’s load limit accounts for you and the weights. Test the pad with your hands before lying against it. A rocking base or partly engaged adjustment pin is a reason to use another bench.
Thirty to 45 degrees is a useful starting range, not a requirement. A slightly higher setting may improve floor clearance for a taller lifter or a low bench. A lower setting changes your torso angle and may make the weights touch the floor. Use the nearest sensible setting the bench actually offers rather than trying to reproduce an exact number.
PureGym’s incline-row demonstration uses a 45-degree setup. Treat that as one example of the movement, then adjust for secure support, free arm movement, and comfortable breathing on your own equipment.
Find chest and head clearance
Position your upper chest on the back pad with your head clear of its top edge. The pad should support your torso without pressing into your throat. Keep your neck in a comfortable continuation of your spine, with your eyes toward the floor ahead rather than craning up toward a mirror.
Bench shapes vary. Some people can straddle the seat and place both feet firmly on the floor; others use a standing, chest-against-pad position. Your feet must remain stable throughout the set. If you have to balance on one toe, slide repeatedly, or compress your chest so much that you cannot breathe normally, change the arrangement or select a machine row.
Plan the pickup and landing space
Place light dumbbells on the floor beside the bench where you can reach them without twisting deeply or trapping your fingers beneath the frame. Clear bags, bottles, and spare weights from the landing area. Practice entering and leaving the position with no load first.
Do not assume a heavier pair is usable just because you can row it once someone places it in your hands. You also need a controlled setup and finish. If the only way to start is an awkward floor reach or the only way to finish is dropping the weights, use a lighter pair, an equipment-specific safe setup taught by a coach, or another rowing station.
How to do the chest-supported dumbbell row
- Start light. Settle your chest on the pad, secure your feet, and hold a dumbbell in each hand with palms facing inward.
- Let the arms lengthen. Allow the weights to hang beneath your shoulders without yanking the joints downward or losing your position.
- Row toward the lower ribs. Bend your elbows and guide them backward in a comfortable path. Keep your wrists roughly in line with your forearms.
- Finish within your controlled range. Stop when you have completed the pull without rolling the shoulders forward or lifting your chest. The dumbbells do not have to touch your ribs.
- Lower deliberately. Return the weights to the starting position while keeping the same bench contact and foot placement.
- End the set early enough to dismount. Lower the weights to the cleared landing area under control, then come upright without twisting against the load.
A simple breathing pattern is to breathe out during the pull and breathe in as you lower. Avoid holding your breath through several repetitions. If the pad makes each breath difficult, fix the setup rather than treating restricted breathing as part of the exercise.
The lowering phase should look intentional. You do not need a stopwatch or a special tempo formula; simply avoid letting the dumbbells fall. On the way up, move smoothly enough that an observer could identify the start and finish without seeing a bounce from your torso.
Three technique decisions that cause confusion
Should the shoulder blades stay squeezed together?
No. The shoulder blades can move naturally as you reach and row. Keeping them clamped together for an entire set may make the movement unnecessarily rigid. Think about a controlled reach at the bottom and a comfortable gathering of the shoulder blades during the pull, while your chest remains supported.
You also do not need to exaggerate the reach until the front of the shoulder feels stretched or unstable. The goal is a usable range you can repeat, not the largest possible movement. If you cannot distinguish shoulder-blade movement from lifting your whole torso, reduce the load and practice slowly.
How far back should the elbows travel?
Use the endpoint at which your upper arms finish the pull without your shoulders tipping forward or your chest leaving the pad. For some lifters the elbows end near the torso; others comfortably move a little beyond it. There is no need to force them as far behind you as possible.
A useful check is whether the final few inches come from the intended rowing motion or from arching, shrugging, and jamming the dumbbells upward. If the endpoint changes dramatically as you tire, stop the set rather than redefining a full repetition halfway through.
Does the grip need to stay neutral?
A palms-in grip is an uncomplicated place to start. It allows the wrists to sit comfortably and often makes a moderate elbow path easy to find. An overhand grip can work too, but changing it may also change your arm path and the amount you can lift.
Avoid treating grip variation as a shortcut to an entirely different back. Start with the position that feels secure. If you later experiment, change one variable at a time and use a lighter practice set so you can tell what actually changed.
Common problems and practical fixes
Your chest lifts off the bench
The most direct fix is less weight. Also check whether you are chasing dumbbell contact with your ribs when your natural range ends earlier. Keep the same torso contact throughout the repetition. If you can only complete the last few reps by bouncing against the pad, those repetitions are outside the standard you established.
Your neck feels tired before your back
First check your gaze. Looking forward at a mirror can encourage you to lift your head for the whole set. Let your head follow the angle of your torso and keep your jaw relaxed. Shorten the set if neck tension continues. Pain, tingling, or persistent symptoms deserve individual assessment rather than more forceful posture cues.
The weights hit the floor or bench
Check bench height, incline, and where your chest sits. A modest adjustment may provide enough clearance. Do not shorten every repetition simply to avoid a collision and then record it as the same exercise. If the geometry still does not work, a purpose-built chest-supported row machine is a sensible substitute.
Your grip gives out first
Use a weight you can hold securely for the full set and the controlled finish. Rest adequately between sets, and keep the handles centered in your palms. You may still feel your forearms working because gripping is part of the exercise. Straps introduce another skill and are not necessary for learning the movement.
You mainly feel your arms
Your elbow flexors are supposed to help. The absence of a dramatic back sensation does not prove that your back is inactive. Review the motion instead: stable chest, comfortable elbow path, deliberate lowering, and an appropriate load. A lighter practice set may make coordination clearer, but chasing a burn should not replace those checks.
Beginner sets, reps, rest, and weekly frequency
For an otherwise healthy beginner, try two working sets of 8 to 12 repetitions, once or twice weekly as part of a balanced plan. Finish with roughly two or three good repetitions still possible. These are conservative starting suggestions, not a personalized prescription or a minimum needed for results.
Rest around 90 to 120 seconds between working sets, taking longer if your breathing or grip has not recovered enough to repeat the movement well. Perform an easier practice set first. That set helps you test the bench and movement; it is not an invitation to exhaust yourself before the planned work.
The American College of Sports Medicine’s 2026 resistance-training summary emphasizes regular training of the major muscle groups and gradual progression. It also notes that training to momentary failure is not consistently necessary for the average healthy adult. That supports starting with manageable work rather than making every set an all-out test.
Two row sets on Monday and two on Thursday equal four direct sets of this exercise each week. Other rows and pulling exercises also add work to overlapping muscles. Do not automatically add this exercise on top of a full back routine without considering what is already there.
A clear progression example
Keep the same bench setting, grip, and rep range while you learn. Suppose you choose two sets of 8 to 12. In one session you complete 10 and 9 controlled reps. In the next you reach 11 and 10. Later you reach 12 and 12 with a couple of good reps left. You can then consider the smallest available weight increase.
After that increase, dropping back toward 8 to 10 reps is reasonable. If you cannot reach eight without lifting your chest or losing control, return to the previous pair. Dumbbell jumps can be large relative to your current strength, especially at lighter loads. There is no deadline for moving up.
Our double-progression guide explains this reps-then-weight approach in more detail. Here, the key is that progress only counts when the rowing standard stays comparable. Twelve shorter, bouncier repetitions are not automatically an improvement over ten controlled ones.
Record the weight per dumbbell, not just a combined number. For example, “two 6 kg dumbbells, 45-degree bench, 11/10 reps” is clear. “12 kg row” could mean either one dumbbell or both together. Note any setup change so the next session’s comparison remains useful.
Where it fits in a full-body workout
One simple session could include two sets each of a squat pattern, a press, a chest-supported row, and a comfortable hinge, followed by a small amount of trunk work. That is eight working sets before the trunk exercise. Warm-up sets are additional and should remain easy enough to prepare you.
For example, use a goblet squat, dumbbell floor press, this row, and a lightly loaded hip-hinge movement you already know. If all four are new, simplify further and learn fewer exercises at once. The goal is a session you can repeat, not a long checklist that makes the final exercises rushed.
Place the row earlier if learning or improving it is a priority. If your main goal that day is another lift, perform that first and row afterward. Our guide to exercise order helps organize those trade-offs without requiring a complicated split.
A reverse fly is a different, lighter accessory that moves the arms outward rather than rowing the elbows back with substantial elbow bending. You might include it in a later training phase, but beginners do not need to add it simply because both exercises use the same bench.
Alternatives when the setup does not suit you
A chest-supported row machine offers torso support with less need to manage loose dumbbells. Adjust its seat and pad so you can reach the handles without rounding or stretching uncomfortably. Learn its release mechanism and weight-stack controls before loading it heavily.
A seated cable row is another option, although it does not always support your chest. It requires its own setup and torso control. See our seated cable row form guide for those details rather than assuming the dumbbell instructions transfer exactly.
A one-arm supported dumbbell row may work when a suitable incline bench is unavailable. Because one arm moves at a time, you need to control rotation and establish a stable hand support. Choose a proper exercise bench or another support rated for the task, not a rolling chair or light household table.
Questions before your next set
Is a higher incline better for the upper back?
Changing the incline changes the movement geometry, but it also affects clearance and comfort. Start with a setting that lets you remain supported and move freely. A precisely measured angle is less useful than consistent, comfortable repetitions and a sensible overall training plan.
Can you do chest-supported rows every day?
You can practice the unloaded setup more frequently, but hard daily rowing is unnecessary for a beginner. Start with separated training days and see how you recover. If soreness or fatigue repeatedly changes your technique, reduce the work and allow more recovery rather than adding another session.
Do they replace lower-back training?
No. The support changes how much your torso must hold itself in position. That can be useful, but it does not make this row a complete trunk or lower-body program. Select other movement patterns according to your goals, experience, and any individual restrictions.
What if one arm finishes sooner?
Keep both dumbbells under control and end the set when the less capable side can no longer match your chosen standard. Do not add several rushed repetitions on one side while the other weight hangs awkwardly. Small differences in coordination can become more noticeable when an exercise is new. Use the same load in both hands initially and let consistent practice show whether the difference persists.
If one shoulder feels painful, unusually weak, or restricted, that is a different situation from ordinary effort. Stop and seek individualized advice. A generic article cannot tell you why one side behaves differently. Even without pain, a qualified trainer can help check whether your chest is centered on the pad and whether you are unintentionally rotating as you pull.
Your first-session checklist
Choose a stable bench, test the angle without weights, clear the pickup and landing area, and use a light pair. Perform an easy practice set, then up to two controlled working sets. Keep your chest supported, allow comfortable shoulder-blade movement, and stop before swinging or straining changes the motion.
Write down the setup and repetitions so your next session starts with less guesswork. If you would like to explore another resource for your fitness routine, explore the Workit app. The immediate goal is simple: make the next row look as deliberate as the first.
Comments
One response to “Chest-Supported Dumbbell Row: Form, Bench Setup, and Progression”
[…] for a complete resistance-training program. A seated rowing machine workout also differs from a chest-supported dumbbell row: similar names do not make the cardiovascular session and the loaded strength exercise […]