
Published October 9, 2026.
Good seated cable row form starts with stable feet, slightly bent knees, and a torso you can hold steady. Pull the handle toward your lower ribs or upper abdomen, let your elbows travel back comfortably, then return until your arms are extended without letting the cable drag you forward. Use a load that keeps the first and last repetitions recognizably similar.
The most useful corrections are often small: changing your distance from the pulley, reducing the weight, choosing a better-fitting handle, or stopping the pull before you roll the shoulders forward. This guide walks through setup and technique, then troubleshoots the common reasons rows feel awkward or turn into a lower-back workout.
The seated cable row in six steps
- Secure the attachment, select an easy starting load, and sit facing the low pulley.
- Plant your feet on the intended supports and keep a comfortable bend in the knees.
- Take the handle and establish a tall, comfortable torso position with your arms reaching forward.
- Pull smoothly toward your lower ribs or upper abdomen while keeping the wrists approximately straight.
- Finish before you need to throw the chest upward, push the head forward, or force the elbows far behind you.
- Let the arms extend and the shoulder blades move forward under control, then repeat.
Think “steady torso, smooth pull, controlled reach.” That is enough to organize an introductory set. You can refine grip and elbow position later without trying to remember ten cues during every repetition.
What the seated cable row trains
The seated cable row is a horizontal pulling exercise. Your upper arms move backward, your elbows bend, and the muscles around your shoulder blades help manage the movement. The lats, middle back, rear shoulders, and elbow flexors contribute in different amounts depending on the setup.
Your trunk muscles also work to resist being pulled toward the cable. That stabilizing demand is normal, but it should not require a large repeated backbend to move the handle. Your legs provide a stable base rather than a repeated push that launches each repetition.
The ACE cable row instructions use a narrow handle, bent knees, and a controlled pull toward the abdomen. This is a sensible baseline for learning. Other grips and elbow paths are valid variations, so an exercise video with a wider handle does not necessarily show the same version you are practicing.
Rows can help you build upper-body strength, but they do not guarantee a particular posture or resolve a shoulder problem. If you are training around an injury, get individualized guidance rather than assuming that every back exercise is corrective.
Set your distance from the pulley
On many cable row stations, you adjust your position by moving along the bench. Sit where you can reach the handle with your arms extended, your knees comfortably bent, and your torso in a position you can maintain.
If you sit too close, the stack may settle before you have finished reaching forward. The cable can go slack, then tug abruptly when you start the next pull. If you sit too far away, you may struggle to collect the handle or find yourself pulled off balance before the set begins.
Use a very light load to establish your position. If you need to hinge forward to pick up the attachment, do that deliberately, then settle into the intended rowing position before starting your counted repetitions. Avoid combining an awkward reach, heavy initial tug, and sudden backward lean.
Foot supports and cable heights differ between machines. Follow the equipment’s intended setup rather than copying someone’s exact bench location. The useful test is whether you can move the handle through your chosen range while keeping stable contact with the seat and foot supports.
Choose a handle that fits the movement
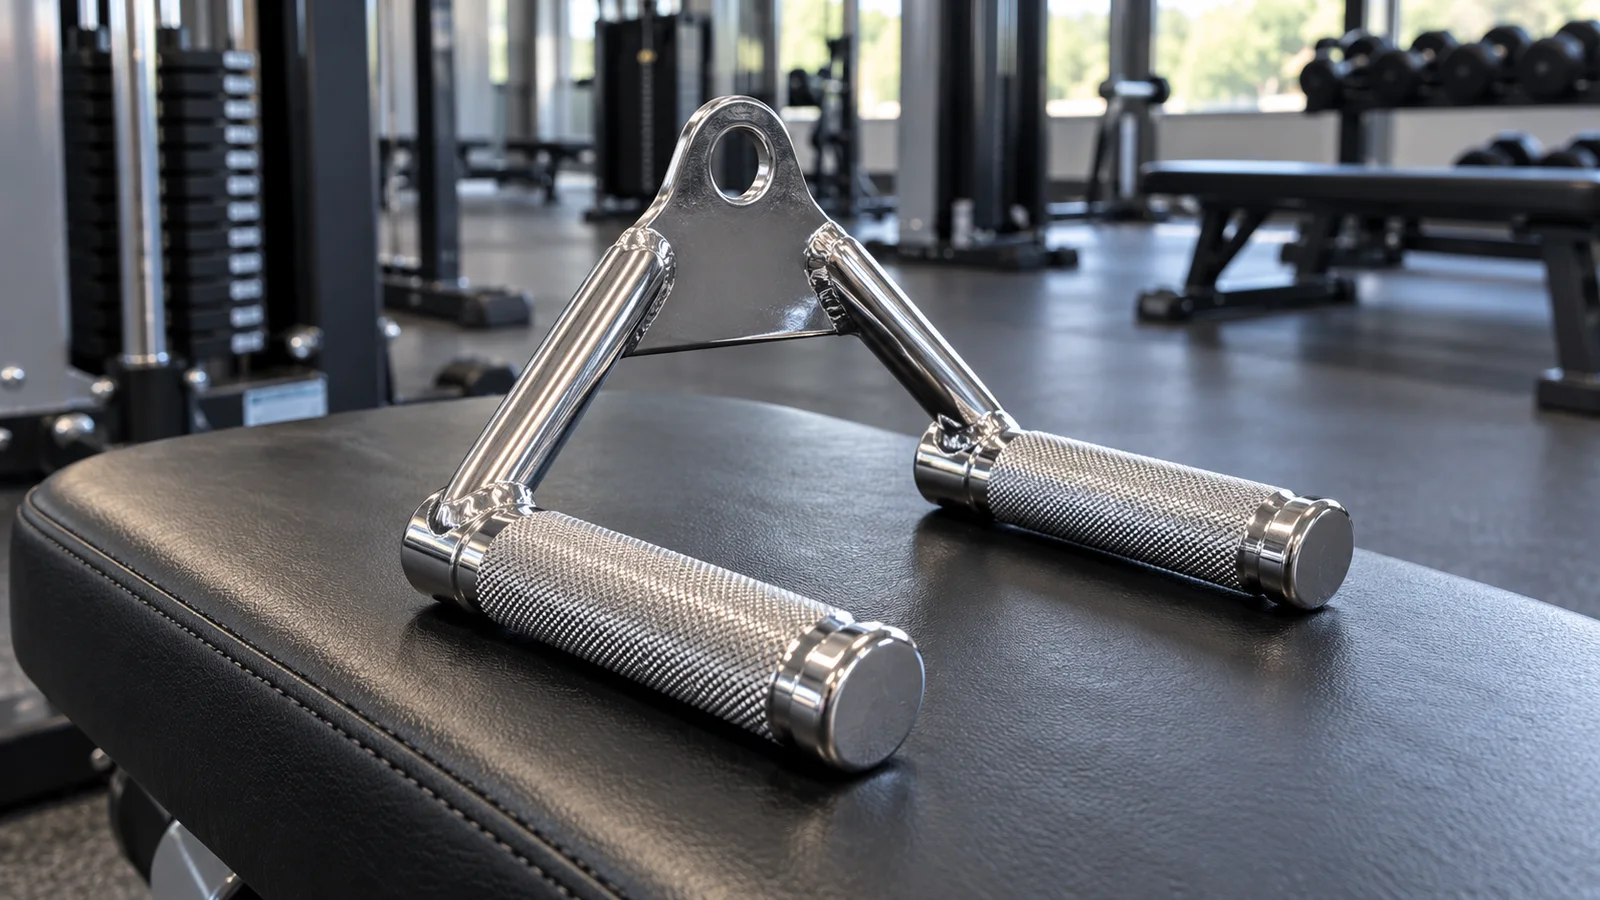
A neutral-grip handle, with palms facing each other, is a convenient starting option. It often lets the elbows travel near the torso and the handle approach the upper abdomen. A very narrow handle may feel cramped for some people; a wider parallel attachment may fit better.
A straight or angled bar can place the palms downward and allow the elbows to travel farther out. This changes the row’s feel and finish position. You may naturally pull somewhat higher than with a close neutral handle.
Neither version requires forcing your upper arms into a precise angle. Let the attachment, your proportions, and comfortable shoulder movement guide the path. Keep the hands secure and avoid bending the wrists sharply to complete the last few inches.
For now, pick one attachment and repeat it for several sessions. Comparing your performance becomes easier when you are not changing handle width, grip, cable height, and body position simultaneously.
Find a torso position you can actually maintain
Begin tall without exaggerating “chest up.” Your rib cage should not have to flare dramatically or your lower back arch hard to look upright. Imagine keeping your shirt logo facing generally forward as you row.
A small fixed lean can be comfortable, depending on the machine. The goal for this learning version is a broadly consistent torso angle. You do not need to hold your body unnaturally rigid, but avoid repeated rocking that grows as the set becomes difficult.
Brace enough to resist the cable while continuing to breathe. If you cannot breathe normally between repetitions, ease the load and reset. A comfortable starting rhythm is to exhale during the pull and inhale as the handle returns.
Some experienced lifters intentionally add a controlled hip hinge. That is a separate execution choice and should be programmed deliberately. When you are troubleshooting a row, a steadier torso removes one variable and makes it much easier to see what your shoulders and arms are doing.
What should your shoulder blades do?
Your shoulder blades can move around your rib cage as your arms reach and pull. In a controlled cable row, a modest forward movement during the reach and backward movement during the pull can happen naturally. You do not need to hold a maximal squeeze for the entire set.
Distinguish this shoulder-blade movement from collapsing the whole trunk. You can let your shoulders reach forward slightly while your pelvis and lower back remain broadly stable. If the cable pulls your chest down toward your knees, reduce the reach or load until you regain control.
At the finish, let the shoulder blades come toward each other without trying to crush an imaginary object as hard as possible. An exaggerated squeeze can encourage an unnecessary backbend or make you pull farther than your shoulders comfortably allow.
Different coaching approaches use different introductory cues. ACE’s chest-supported machine row guidance, for example, begins with a more constrained shoulder position while teaching control. The practical priority is a comfortable, repeatable movement rather than the biggest possible shoulder-blade excursion.
Pull to the right place for your attachment
For a close neutral handle, aim toward the lower ribs or upper abdomen. Think of your elbows traveling back beside your torso rather than your hands curling upward toward your chest.
Stop when you have completed a comfortable pull. Touching your body is optional. A bulky handle, a different torso shape, or a shorter comfortable shoulder range can all change where the movement ends.
Watch for a common finish-position error: the elbow keeps traveling behind the body while the front of the shoulder tips forward. If you need that movement to make the handle touch, finish slightly earlier. More handle travel is not automatically better technique.
A wider, elbows-out row can finish higher. Keep it comfortable and make it a consistent variation. Do not use a low-pull cue for every attachment, or force a wide bar into a destination that makes the wrists and shoulders awkward.
Control the return without making it a separate event
Let the handle travel away smoothly as your elbows straighten. Keep enough control that you could slow the movement if needed. Finish the return before the stack yanks your body forward or the cable goes unexpectedly slack.
A gentle reach is useful; hanging passively on a heavy cable is a different situation. Use the range you can manage today rather than chasing the deepest stretch you have seen online.
There is no need to count an elaborate tempo unless it helps you learn. As a practice drill, take roughly two seconds to return the handle and notice whether your torso moves with it. Once the movement is familiar, maintain control without turning every repetition into a timing exercise.
For a similar basic movement using tubing, Mayo Clinic’s seated row demonstration emphasizes smooth repetitions and a neutral back position. Cable resistance behaves differently from a band, but the emphasis on controlled movement remains useful.
Troubleshooting common seated cable row problems
You feel the exercise mainly in your lower back
First check whether your torso rocks on each repetition or your ribs lift sharply at the finish. Reduce the load and perform a short practice set with a stable torso. If maintaining your position remains the main challenge, a chest-supported row may let you practice the pulling action more comfortably.
A mild sense of trunk effort can occur because you are stabilizing against the cable. Pain, a catching sensation, or symptoms that persist after the set are reasons to stop and seek advice rather than simply brace harder.
Your shoulders rise toward your ears
Check the load and pull height. Try a lighter set and let the elbows travel back without deliberately lifting the shoulders. Keep your neck comfortable. Do not respond by forcing the shoulders as far downward as possible; that can create another strained position.
Your biceps tire before your back
The elbow flexors are active participants. Keep your wrists steady and let the upper arms travel back while the elbows bend. A lighter load can help you coordinate the movement. A lack of dramatic back sensation alone does not establish that your back is doing no work.
The handle hits your knees
Recheck where you sit, the amount of knee bend, and the cable path. You may need a different attachment or station. Do not repeatedly lift the hands around your knees, because that changes the movement into a path you did not intend.
You cannot finish the repetition without leaning back
End the pull slightly earlier and lower the load. If the first few repetitions look controlled but the final ones require a large lean, that is a useful set-ending signal. Count the clean repetitions rather than assigning the same value to increasingly different movements.
The cable or stack jerks at the start
Make sure you begin with the slack taken up gently and your body already in position. If the machine feels rough or catches even with a light load, ask staff to inspect it. Do not try to overpower a machine that may need maintenance.
One arm pulls farther than the other
Check that you are centered and holding the attachment evenly. Use a lighter set and watch whether the torso rotates. A single-arm cable row can make each side easier to observe, but it adds an anti-rotation demand and does not automatically fix the underlying cause.
How to check your own form
If gym rules and other people’s privacy allow it, film one light set from the side. Position the camera so your feet, hips, torso, and handle are visible. You are looking for repeatable movement, not a particular appearance.
Compare the first and last repetition using four questions:
- Does the torso keep roughly the same angle?
- Do the knees stay similarly bent, without a repeated leg drive?
- Does the handle follow approximately the same path?
- Can you control the final part of the return?
A front or slightly diagonal view can help identify obvious twisting, but do not rotate your head toward a mirror while pulling. Keep your neck comfortable and review the video after the set.
Choose one correction at a time. If you notice rocking, wrist bending, and a rushed return, first lower the weight and stabilize the torso. Recheck before adding more cues. Too many simultaneous instructions make it harder to tell which change helped.
A practical two-session form reset
Use this example when your current row has become inconsistent. Keep the load conservative and avoid testing your maximum strength during the reset.
Session one: After your general warm-up, perform one light practice set of eight repetitions. Adjust the seat position and handle if needed. Rest, then complete two sets of 8–10 repetitions, stopping with about three controlled repetitions still available. Review one set from the side if practical.
Session two: Repeat the same machine, handle, and setup. Use the same load if session one felt controlled and comfortable. Add a repetition only when it fits the same range and torso position. If technique still changes substantially, use a lighter load and get a qualified trainer’s feedback.
The goal is to establish a setup you can repeat. Once that exists, increasing the work becomes much simpler. A short reset can also reveal that the problem was equipment fit or fatigue from earlier exercises rather than a lack of strength.
Sets, reps, and rest for regular training
A reasonable starting prescription is two working sets of 8–12 repetitions, with roughly two minutes of rest between them. Use an effort that leaves two or three good repetitions available. Add more work only when it fits your goals, recovery, and the rest of your program.
Rest is part of technique. If you begin the next set still struggling to breathe or hold the attachment, your form may deteriorate before the target muscles receive the work you intended. The guide to rest between sets explains how to adjust that interval.
For a simple weekly example, perform two row sets on Monday and two on Thursday. That is four direct row sets each week. If you already perform other rows, count them too before adding this prescription on top.
Rows can sit after a main lower-body exercise or alternate with a pressing exercise when equipment access allows. Avoid racing between stations if that removes the rest you need to keep the movement controlled.
How to increase the weight without losing your form
Use a repetition range rather than demanding a heavier stack every workout. With two sets of 8–12, begin at a load that allows both sets to stay in the range with comfortable technique.
For example, you might record 10 and 9 repetitions, then 11 and 10 at a later session. When both sets reach 12 with similar control and effort, try the smallest practical weight increase. Your repetitions may return toward eight.
If the next increment causes immediate rocking or cuts your range dramatically, go back to the previous load. Some machines have large jumps. You can spend longer consolidating the current weight rather than forcing progress the machine cannot conveniently provide.
Keep a separate record when you change machines or attachments. Cable routing, handle weight, and machine design can affect the resistance you experience. The stack label is most useful for comparing your own sessions on the same setup.
This approach follows the basic idea of double progression: build repeatable repetitions, then add resistance. If fatigue is hard to judge, use the reps in reserve explanation to describe how much clean work remained.
When to use a different row variation
A chest-supported machine or bench-supported dumbbell row can be useful when stabilizing the trunk distracts from learning the pull. Support changes the exercise demand, so establish a fresh starting load rather than transferring your cable-row number directly.
A one-arm cable row offers more freedom to position the handle and observe each side. Begin light, keep the torso from rotating unintentionally, and allow enough time to train both sides. It is a variation, not a requirement for correcting asymmetry.
A resistance-band row may work when you train at home. Use an undamaged band and a manufacturer-approved secure anchor, and follow the product’s instructions. Resistance increases as the band stretches, so the experience will differ from a cable stack.
A pulldown adds a different pulling direction. If you want to pair the row with an overhead pulling exercise, our lat pulldown grip guide explains how to choose a comfortable attachment without overcomplicating the decision.
Frequently asked questions
Should I lean forward during a seated cable row?
You can allow a controlled reach through the shoulders while keeping the trunk steady. A deliberate hip hinge is used in some variations, but it is unnecessary for learning the baseline row. Avoid being pulled suddenly forward or using an increasingly large rock to move the weight.
Should my elbows stay tucked against my body?
They can travel near your sides with a close neutral handle, but they do not have to be pinned there. Wider attachments usually require more space. Choose a comfortable path and keep it reasonably consistent across the set.
Is it wrong if my shoulder blades move?
No. Shoulder-blade movement can accompany a controlled reach and pull. The issue is whether you manage that motion comfortably or lose control of the whole torso. Different coaching drills may temporarily limit movement to simplify learning.
How far back should I pull my elbows?
Only as far as you can without forcing the front of the shoulders forward, throwing your chest up, or changing the torso angle substantially. There is no universal distance behind the body that every lifter must reach.
Should rows make my back sore?
Soreness is not required for a useful workout. Judge your training by controlled performance, tolerable recovery, and progress over time. Persistent joint pain, radiating symptoms, numbness, or sudden weakness are different from ordinary muscular effort and should be assessed.
Your next cable row workout
Pick one comfortable handle, use a light setup set, and keep the torso steady while the arms move. End each set before repeated compensations take over. Record the machine and attachment alongside your repetitions and load so you can repeat what worked.
Track your workouts with Workit and build a training history you can use. A repeatable row gives every future weight increase a clearer meaning.
Comments
One response to “Seated Cable Row Form and Common Technique Fixes”
[…] use a familiar chest-supported row or seated cable row when suitable equipment is available. Our seated cable row form guide explains that alternative. Adjust the schedule if moving to the machine takes […]