
Published November 7, 2026
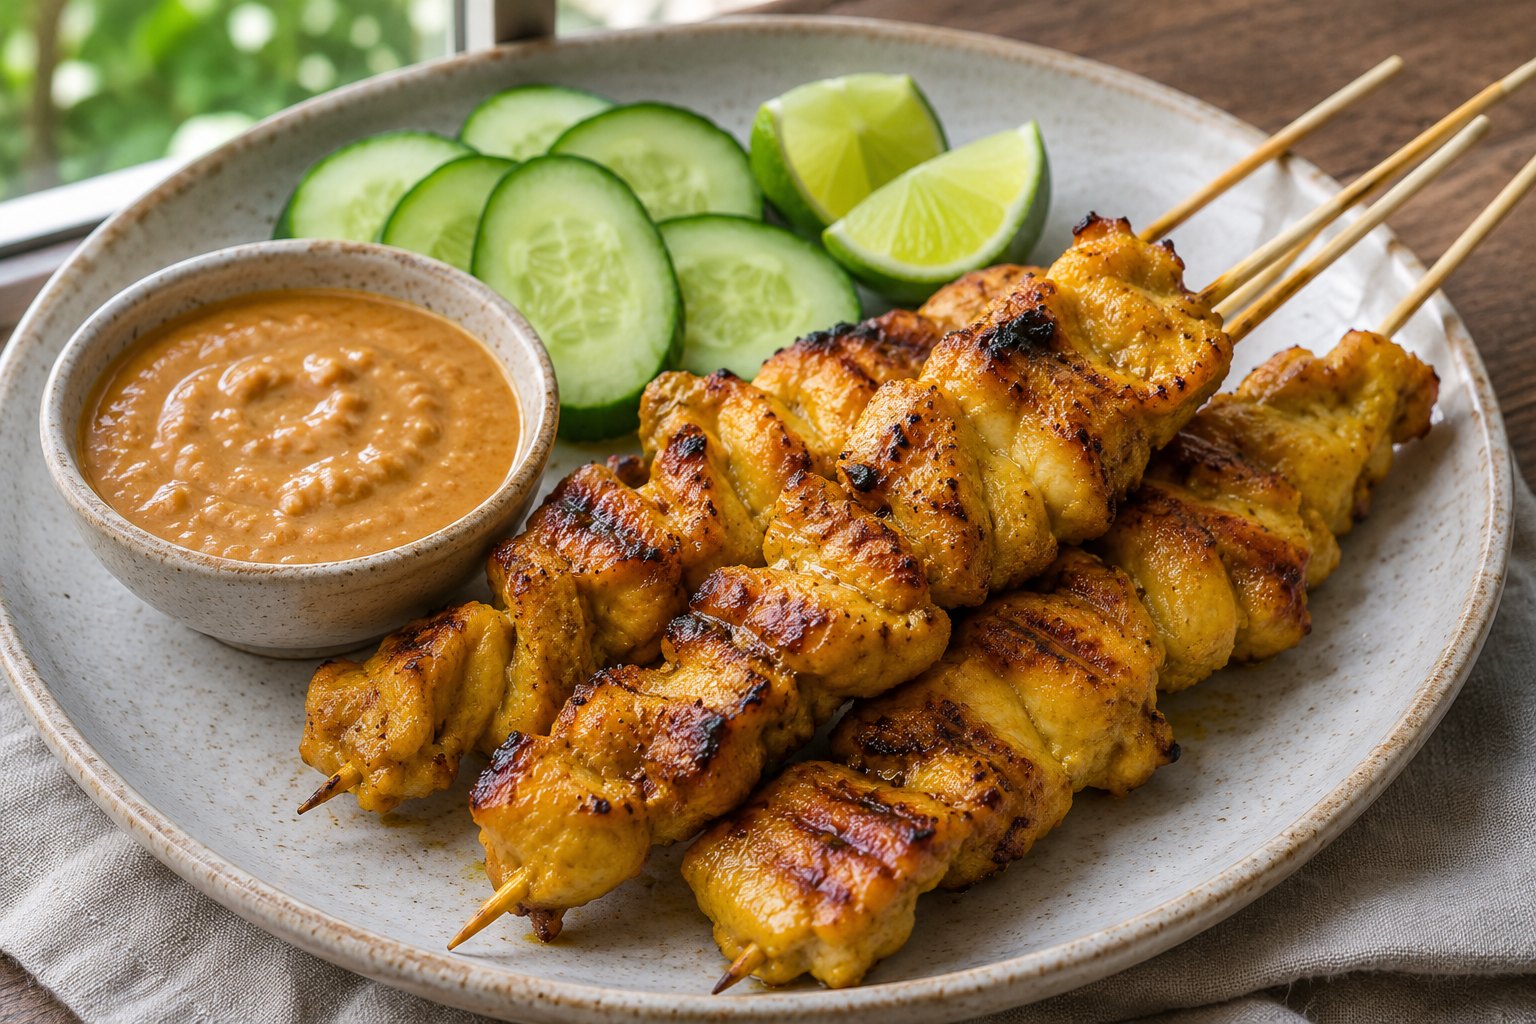
For chicken satay with a browned surface and a juicy center, cut the chicken into evenly sized strips, use a light coating of marinade, and cook the skewers over controlled heat. Serve the peanut sauce separately so it stays creamy instead of burning on the grill. This recipe uses boneless chicken thighs, coconut milk, turmeric, coriander, and lime, with a warm peanut sauce that can be adjusted a spoonful of water at a time.
Satay belongs to a broad family of skewered dishes with many regional preparations. This is an accessible home-kitchen adaptation, not a claim to represent every Indonesian, Malaysian, or Thai version. Its purpose is to provide a clear starting method with ordinary supermarket ingredients, sensible portions, and practical checks for the chicken and sauce.
Recipe overview
- Yield: four servings, approximately twelve short skewers, depending on how you cut and thread the meat.
- Chicken quantity: 700 g raw boneless, skinless thighs, weighed after trimming.
- Active preparation: about 25 minutes.
- Marinating: 30 minutes to 4 hours in the refrigerator.
- Cooking: approximately 10–15 minutes per batch, depending on thickness and heat.
- Total: about 65–80 minutes with the shortest marinade and one cooking batch; allow longer for multiple batches.
- Equipment: food-safe container, knife, separate raw-poultry board, skewers, grill or grill pan, small saucepan, whisk, tongs, and food thermometer.
- Main allergens: peanuts and soy; wheat in many soy sauces. Check coconut milk, spices, and every packaged ingredient.
These times are planning estimates rather than results from a documented kitchen test. Your cooking surface, skewer material, and chicken thickness will influence the schedule. Prepare a clean serving platter before cooking begins so finished skewers do not return to the plate that held raw chicken.
Ingredients
Chicken and marinade
- 700 g raw boneless, skinless chicken thighs.
- 80 ml unsweetened canned coconut milk, stirred before measuring.
- 1 tablespoon reduced-sodium soy sauce.
- 1 tablespoon fresh lime juice, approximately 15 ml.
- 2 teaspoons neutral cooking oil, plus a small amount for the cooking surface if needed.
- 2 teaspoons brown sugar, approximately 8 g.
- 2 garlic cloves, about 6 g peeled, finely grated.
- 10 g peeled fresh ginger, finely grated.
- 1 teaspoon ground coriander.
- ½ teaspoon ground turmeric.
- ½ teaspoon ground cumin.
- ¼ teaspoon ground black pepper.
Peanut sauce
- 100 g smooth peanut butter, stirred well if the oil has separated.
- 120 ml unsweetened canned coconut milk.
- 1 tablespoon reduced-sodium soy sauce.
- 1 tablespoon fresh lime juice, plus more only to taste.
- 2 teaspoons brown sugar, approximately 8 g.
- 60–120 ml warm water, added gradually to reach the desired consistency.
- ¼ teaspoon chili flakes, optional; omit or adjust for your preference.
To serve
- 250 g cucumber, trimmed and sliced.
- 1 lime, cut into wedges.
- 2 tablespoons chopped fresh cilantro, optional.
- Cooked rice or another side, optional and measured separately from the base recipe.
The coconut milk amounts total 200 ml for the recipe. Stir the can thoroughly because the thick cream can separate from the thinner liquid during storage. Measure from the mixed product rather than using only the solid top layer in one component and watery liquid in the other. Refrigerate any unused coconut milk promptly in a suitable covered container and follow its label instructions.
Choose ordinary smooth peanut butter, not powdered peanut butter, for the baseline sauce. Powder absorbs liquid differently and does not provide the same texture. If your peanut butter already contains sugar and salt, the finished sauce may need less of both, so taste it before making any final adjustment.
How to make chicken satay
1. Prepare the skewers and vegetables
If using bamboo skewers, follow the package’s soaking instructions and keep exposed ends away from the hottest part of the grill. Soaking does not make wood fireproof. Metal skewers avoid that issue but become very hot, so handle them with suitable protection. Make sure the skewer length fits your cooking surface before threading any meat.
Slice the cucumber and cut the serving lime first, then refrigerate them while you handle the chicken. Keep ready-to-eat garnishes away from raw poultry, its board, and its utensils. If working in a small kitchen, completing the vegetables first makes it easier to clean the work area thoroughly before the next stage.
2. Cut the chicken evenly
Open each thigh flat and remove any obvious tough connective pieces or excess loose fat. Cut into strips roughly 2 cm wide, aiming for similar thickness rather than identical length. Fold very thin ends back on themselves when threading later, but avoid creating dense bundles that cook much more slowly than the surrounding meat.
Do not rinse the chicken. Keep it and its juices contained, then wash your hands and clean the work surface after handling. Small pieces cook quickly, but they also create many surfaces and utensils that need attention. Having the marinade container ready before cutting reduces unnecessary movement around the kitchen.
3. Mix and refrigerate the marinade
In a food-safe container, mix coconut milk, soy sauce, lime juice, oil, brown sugar, garlic, ginger, coriander, turmeric, cumin, and pepper. Add the chicken and turn until lightly coated. Cover and refrigerate for 30 minutes to 4 hours for this recipe. Do not marinate on the counter while you prepare the grill.
The marinade should coat rather than submerge the chicken in a large pool. Longer is not automatically better: the lime and salt continue affecting the surface as the chicken sits. The shortest option still gives the spices a chance to distribute. If you need a different make-ahead schedule, prepare the sauce and measured dry spices first and add the raw chicken closer to cooking.
4. Make the peanut sauce separately
Place the peanut butter, 120 ml coconut milk, sauce soy sauce, sugar, and optional chili in a small saucepan. Add 60 ml warm water and whisk over low heat until smooth. The mixture may initially look thick or slightly uneven; continue whisking gently before adding more liquid. Do not let it boil vigorously.
Remove from the heat and stir in the lime juice. Add more warm water one tablespoon at a time until the sauce flows from a spoon in a thick ribbon. Taste using a clean spoon and adjust lime or chili if desired. Keep the sauce separate from every utensil that has touched raw chicken. It is a serving sauce, not a way to reuse the raw marinade.
5. Thread the skewers
Lift chicken strips from the marinade and let excess coating drip back into the container. Thread onto the skewers in a loose back-and-forth shape, using approximately equal amounts per skewer. Leave a small amount of space between thick folds so heat can reach the meat evenly. Do not pack the strips into a solid cylinder.
Place the threaded skewers on a tray designated for raw chicken. Discard the remaining marinade rather than using it as a table sauce. If you want more flavor at serving, use the separately prepared peanut sauce and fresh lime. This keeps the workflow simpler than trying to manage a second cooked sauce made from raw-poultry liquid.
6. Grill over controlled heat
Preheat the grill or grill pan to medium-high heat, then lightly oil the cooking surface if appropriate for the equipment. Arrange skewers with room between them. Cook for approximately 10–15 minutes, turning several times so the coating colors without burning. Reduce the heat or move the skewers to a cooler zone if dark patches appear before the centers are cooked.
Check several of the thickest pieces with a food thermometer inserted from the side, avoiding the skewer. Chicken must reach at least 165°F/74°C, according to the FoodSafety.gov minimum temperature chart. Small pieces can be awkward to measure, so use a thin-tip thermometer and take your time. Color, grill marks, and clear-looking juices do not replace the temperature check.
7. Serve with the sauce and cucumber
Move cooked skewers to the clean platter using clean tongs. Let them stand briefly while you loosen the peanut sauce with a splash of warm water if it has thickened. Serve with cucumber, lime wedges, and optional cilantro. Divide the sauce into four portions if you want the serving size to stay consistent across plates.
Metal skewers remain hot after leaving the grill. Warn anyone eating directly from them, or slide the chicken onto plates before serving. For younger diners, remove the meat from pointed skewers and cut it into appropriate pieces. The presentation should fit the people at the table rather than making the skewer itself essential to the meal.
Indoor cooking options
Using a stovetop grill pan
A ridged grill pan gives contact marks but does not reproduce an outdoor grill exactly. Preheat gradually and use ventilation appropriate for your kitchen. Cook in batches if necessary. A packed pan can cool rapidly and collect liquid, leaving the chicken pale even while it cooks through.
If the ridges blacken the coating too quickly, lower the heat and turn more often. Do not press the meat hard into the ridges to force stronger marks. The useful target is cooked chicken with some browning, not a uniformly dark exterior that hides an undercooked middle.
Using an ordinary skillet
You can cook the marinated strips without skewers in a lightly oiled skillet over medium-high heat. Shake off excess marinade, spread the chicken in a single layer, and turn as needed. Work in batches and check the thickest pieces to 165°F/74°C. Serve the cooked strips with the same sauce and cucumber.
This approach is often easier in a small kitchen and avoids trying to fit long skewers into a short pan. The name of the dish does not require you to force equipment you do not have into the process. Keep the pieces reasonably even and use the same separation between raw chicken and serving ingredients.
Building a smooth peanut sauce
Peanut butter thickens and loosens differently depending on its formulation and temperature. A newly opened jar of separated natural peanut butter may be very oily at the top and stiff at the bottom. Stir the jar thoroughly before weighing so the sauce starts with the product’s intended balance.
Water is an ingredient here, not a sign that the recipe has failed. Add it gradually until the sauce suits the way you plan to serve it. A dipping sauce can be a little thicker than a sauce intended to coat rice or vegetables. The sauce also thickens as it cools, so check it again just before serving.
If it becomes grainy or appears oily, take it off the heat and whisk in warm water a little at a time. Hard boiling can make the texture less pleasant and evaporate liquid faster than expected. Workit’s peanut tofu noodles use a similar practical focus on sauce consistency in a different meal format.
Substitutions and allergy considerations
Chicken breast: Use the same raw weight, cut into evenly sized strips, and begin checking earlier. Breast is less forgiving of extra cooking than thighs. Keep the temperature requirement unchanged and control dryness by timing, not by serving undercooked meat.
Soy sauce: For a gluten-free version, choose a specifically labeled gluten-free soy sauce or tamari and check every other ingredient. Tamari is not automatically gluten-free in every formulation. Replacing ordinary soy sauce removes neither soy nor peanut from the dish.
Peanut allergy: Do not describe this recipe as suitable by simply leaving peanuts off the garnish. Peanut butter is the main sauce ingredient. A seed-butter sauce would be a separate variation with a different flavor and requires products and preparation practices appropriate to the person with the allergy.
Coconut milk: A lighter canned coconut milk produces a thinner, less rich sauce. Begin with less added water and adjust gradually. Coconut drinks sold in cartons are usually much thinner and may be sweetened or flavored; they are not the baseline ingredient used here.
Heat level: Keep chili out of the main sauce and offer it separately if preferences differ. You can add heat at the table, but you cannot remove chili once it is stirred throughout the batch. Lime wedges offer brightness without increasing heat.
Serving the meal and planning portions
The four-serving yield divides 700 g raw chicken across four people before cooking losses. The finished cooked weight will be lower and will vary. Three skewers per person is only a visual guide if you make twelve evenly filled skewers; one unusually large skewer should not be counted as equivalent to one very small one.
Rice, noodles, or flatbread can make the meal more substantial. Add vegetables according to preference, such as a cabbage salad or steamed broccoli. Keep any dressing for a raw salad separate from the chicken marinade. If preparing lunches, pack the sauce in a small separate container so you can control how much is added after reheating.
For another chicken dinner with a different seasoning profile, try yogurt-marinated chicken. If you want a meat-free meal elsewhere in the week without repeating peanut sauce, lentil bolognese offers a tomato-and-mushroom direction. Those are alternative recipes, not ingredients to combine into this marinade.
Safe storage and reheating
Keep raw marinating chicken refrigerated and contained so it cannot drip onto ready-to-eat food. Follow the chicken’s use-by information and safe storage instructions; marinating does not reset its storage life. Do not hold raw skewers on the counter while waiting for guests or while a second cooking session is delayed.
Refrigerate cooked chicken and sauce promptly in separate shallow containers. USDA leftover guidance specifies refrigeration at 40°F/4°C or below, a two-hour limit at room temperature or one hour above 90°F/32°C, and using refrigerated leftovers within three to four days. Store cucumber separately so it stays crisp.
Remove chicken from skewers before storing if that makes the containers easier to close safely. Reheat the chicken to 165°F/74°C, adding a little water and covering loosely as appropriate for the method. Warm leftover sauce gently, stir frequently, and ensure it also reaches the safe leftover temperature. Add water afterward if necessary to restore a spoonable consistency.
For longer storage, freeze cooked chicken in meal-sized portions. Freeze sauce separately if desired, recognizing that its texture may change and need whisking after thawing. Aim to use within about two months for eating quality. Thaw in the refrigerator, not on the counter, and keep the fresh cucumber for the day of serving.
Keeping a batch cooking session organized
If your pan fits only six skewers, cook in two batches and keep the uncooked second batch refrigerated until needed. Set out separate utensils for moving raw skewers onto the heat and lifting fully cooked chicken onto the serving platter. This prevents the rush of turning and checking from undoing the separation you established during preparation.
Before serving, count the skewers and divide them evenly, then distribute any noticeably larger pieces across the plates. Pour the sauce into individual bowls if some people prefer more or less. Keeping sauce portions separate also prevents a communal dip from becoming mixed with partially eaten food that you intended to save.
Troubleshooting
- Black outside, cool center: The heat is too strong or the chicken is folded too densely. Move to lower heat and continue until safely cooked. Next time thread more loosely and let excess marinade drip away.
- Pale and wet chicken: The pan may be crowded or insufficiently preheated. Cook fewer skewers at once and avoid pouring leftover marinade into the pan.
- Sauce is too thick: Whisk in warm water gradually. Check again after a minute because peanut butter takes a little time to incorporate liquid evenly.
- Sauce tastes too salty: Add unsalted peanut butter, coconut milk, and water in small amounts, then rebalance lime. Adding sugar alone does not remove salt.
- Skewers stick: Give the first side enough time to set before turning, use a suitable lightly oiled surface, and loosen gently rather than tearing the meat away.
Frequently asked questions
Can I make the sauce ahead?
Yes. Make it separately from the raw chicken, refrigerate promptly, and use within the leftover window above. It will usually thicken when chilled. Reheat gently and whisk in water until it returns to the consistency you want.
Can I use the marinade as a dip?
No. The marinade in this method has contacted raw chicken and is discarded. The peanut sauce is mixed in a separate clean saucepan specifically for serving. Keeping the two components separate avoids uncertainty about whether raw-poultry liquid has been handled and cooked adequately.
Do I need to add sugar?
The small measured amount balances the salty and sour ingredients and helps the coating color. You may reduce it, particularly with sweetened peanut butter, but the flavor and browning will change. Do not replace it with a large amount of an unfamiliar sweetener without considering its cooking behavior.
How should I log the ingredients?
Use the labels for the raw chicken, peanut butter, coconut milk, soy sauce, oil, and sugar. Some marinade is discarded, so counting every marinade ingredient gives an approximation rather than an exact consumed total. Divide the cooked chicken and sauce consistently, and log rice or other sides separately. No precise macro figure is claimed for this variable preparation.
For a simple place to organize training alongside your cooking routine, explore Workit for workout planning and logging. Keep meal choices flexible and build a routine you can actually repeat.