
Published November 7, 2026
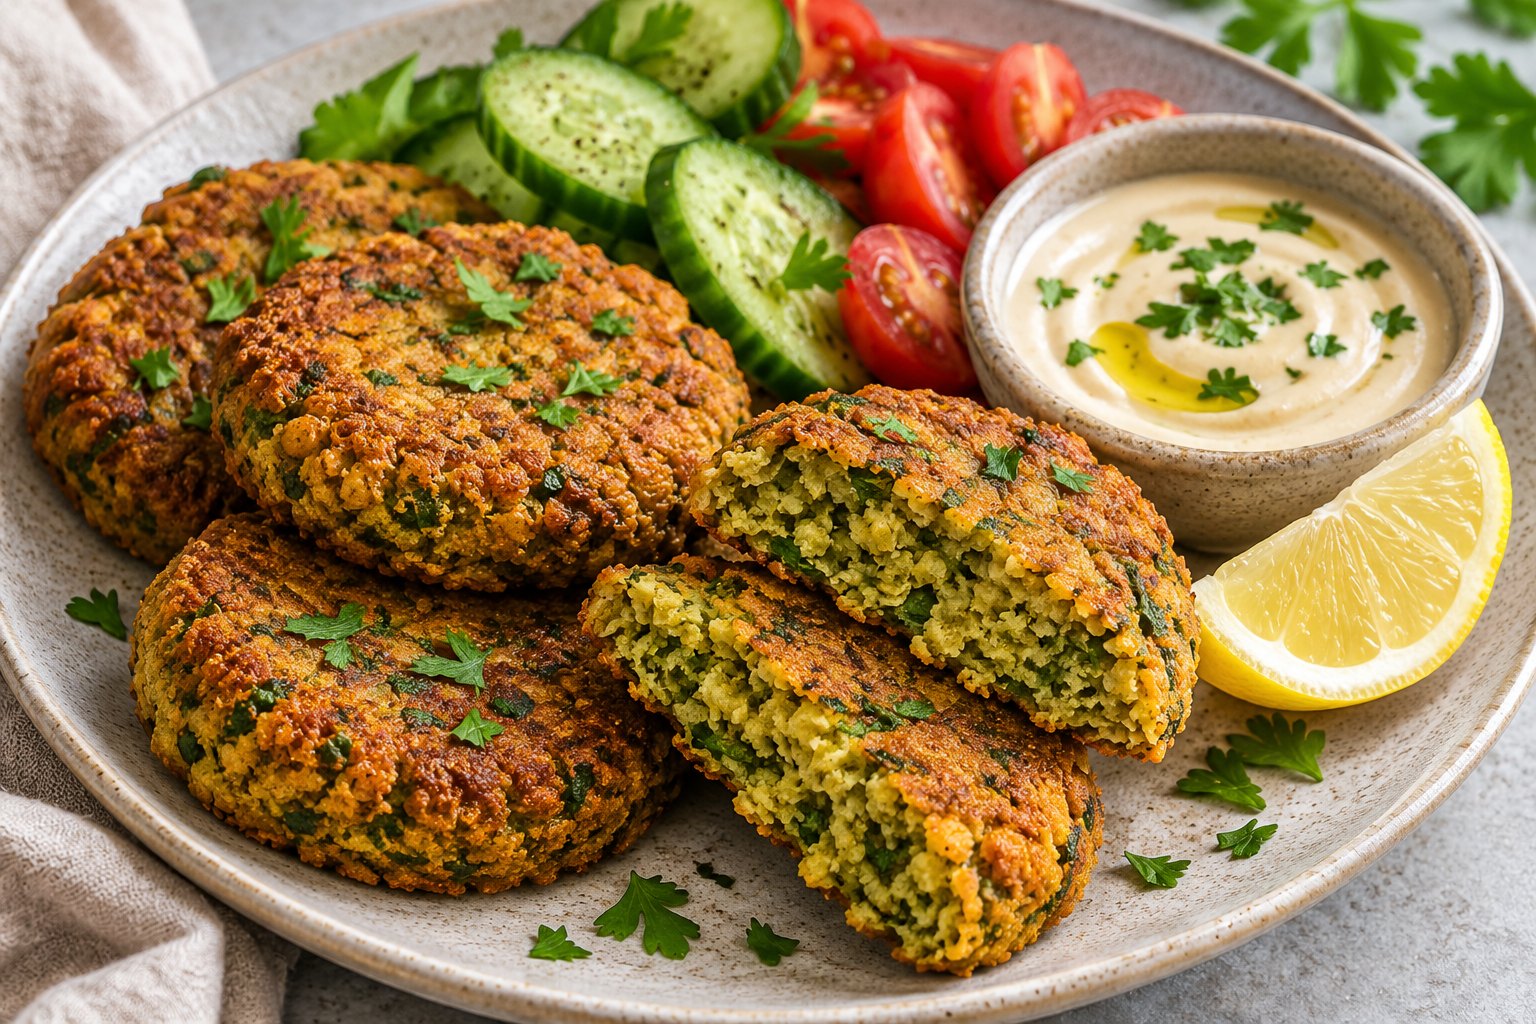
Baked falafel works best when you build the mixture for the oven: soaked dried chickpeas, plenty of fresh herbs, a fine but distinct crumb, and relatively thin patties. A light coating of oil helps the surfaces brown while the centers cook. The result is a practical filling for pita, a substantial addition to salad, or a component you can prepare ahead for several different lunches.
This recipe uses chickpeas weighed dry before soaking. They are not boiled before processing, and canned chickpeas are not a direct replacement. That distinction matters more than any spice adjustment. If you already have cooked chickpeas open, put them toward chickpea curry instead and save this method for a bag of dried chickpeas.
The recipe below is an original home-cooking formulation, with estimated timings rather than a claim of kitchen testing. Use the shaping, browning, and doneness checks alongside the clock. Ovens, chickpea age, and food processors vary enough that a single fixed minute count cannot describe every batch.
Baked falafel recipe at a glance
- Yield: approximately 16 patties, or four portions of four patties.
- Preparation: about 25 minutes of hands-on work.
- Soaking: 12–18 hours in the refrigerator.
- Chilling: 30 minutes after mixing.
- Baking: approximately 28–36 minutes.
- Oven: 200°C / 400°F conventional, or 180°C fan.
- Equipment: food processor, fine-mesh strainer, kitchen scale, rimmed metal baking tray, and thin spatula.
Allow roughly 90 minutes after the soaked chickpeas are ready, including draining, mixing, chilling, shaping, and baking. Some of that time is hands-off. A large tray should hold the batch with space between patties; if yours does not, use two trays and rotate their positions during cooking. Avoid packing the patties tightly together.
Ingredients and exactly how to measure them
For the falafel
- 250 g dried chickpeas, weighed before soaking; use the entire soaked, drained batch.
- 100 g peeled onion, roughly chopped.
- 30 g fresh parsley leaves and tender stems, washed and dried.
- 15 g fresh cilantro leaves and tender stems, washed and dried; substitute additional parsley if preferred.
- 12 g peeled garlic, approximately three medium cloves.
- 2 teaspoons ground cumin.
- 1 teaspoon ground coriander.
- ¾ teaspoon fine salt, plus a small adjustment after baking if desired.
- ¼ teaspoon ground black pepper.
- ½ teaspoon baking powder.
- 15 g chickpea flour, plus up to 10 g more only if needed.
- 30 ml olive oil, divided: 10 ml in the mixture and 20 ml for the tray and patty tops.
- Cold water for soaking, enough to cover the chickpeas generously.
Optional lemon-tahini sauce
- 60 g tahini, stirred thoroughly in its jar before measuring.
- 30 ml lemon juice.
- 45–75 ml cold water, added gradually.
- 1 small garlic clove, finely grated, optional.
- A pinch of fine salt.
The soaked chickpeas will weigh substantially more than 250 g because they absorb water. There is no need to force them to a particular finished weight. Drain them thoroughly and use everything that came from the measured dry amount. Do not weigh out only 250 g after soaking: that would create a smaller batch with too much onion, seasoning, and flour.
Fresh herb weights refer to usable leaves and tender stems, not a whole bunch with thick stalks attached. Dry the washed herbs in a salad spinner or clean towel. Water clinging to a large bunch can make the mixture wetter than intended. The onion weight similarly excludes peel and root ends.
Why the chickpeas start dried
Soaked dried chickpeas remain firm enough to form a granular mixture. Canned chickpeas have already been cooked until soft, so they behave differently when chopped with onion and herbs. They can be used in delicious chickpea patties, but substituting them here changes the structure and often calls for a different amount of binder.
Oldways’ oven-baked falafel guidance also uses soaked dried chickpeas rather than cooked ones. That supports the ingredient choice, not a promise that an oven version will reproduce deep-fried falafel exactly. Baking gives a flatter, more evenly exposed patty, with a crust concentrated on the two broad sides.
Buy dried chickpeas from a shop with reasonable turnover and keep them sealed in a cool, dry place. If they remain unusually hard after a full refrigerated soak, extend the soak within the next several hours and reassess. A very old bag is a poor starting point for this method. Do not rely on extra flour to solve inadequate hydration.
How to make baked falafel
1. Soak the chickpeas overnight
Pick over the dried chickpeas and remove any debris or damaged pieces. Rinse, place in a large bowl, and add plenty of cold water, at least several centimeters above the chickpeas. Cover and refrigerate for 12–18 hours. Use a bowl large enough for expansion and check that the chickpeas remain submerged.
Drain the soaking water, rinse the chickpeas, and leave them in a strainer for about 10 minutes. Spread them briefly on a clean towel to remove surface water. They should look plump but still feel firm. These soaked chickpeas are not ready to eat as a snack; they still need cooking in the patties.
2. Chop the aromatics before processing
Cut the onion into small chunks and roughly chop the herbs and garlic. Add them to the food processor with the cumin, coriander, salt, and pepper. Pulse a few times to chop them more evenly. Starting with smaller aromatic pieces reduces the temptation to overprocess the chickpeas later just to eliminate a large onion chunk.
Add the drained chickpeas and 10 ml olive oil. Pulse in short bursts, scraping down the bowl between rounds. If the processor is small, work in two batches and combine them in a mixing bowl. The blade needs room to circulate the ingredients rather than compressing them into an uneven mass.
3. Stop at a fine, cohesive crumb
Aim for particles resembling damp coarse sand, with tiny chickpea pieces still visible. When you squeeze a spoonful in your hand, it should stay together, though the edges may look slightly rough. Large pieces that roll apart need more pulsing. A smooth, shiny paste has gone too far for the texture this recipe aims to produce.
Transfer the mixture to a bowl. Stir in the baking powder and 15 g chickpea flour. Cover and refrigerate for 30 minutes. This pause lets the flour absorb moisture and gives you a clearer picture of the mixture before shaping. Do not taste the uncooked mixture, which contains uncooked chickpeas and flour.
4. Check the mixture before shaping the whole batch
Compress a small handful into a patty. If it holds its shape with light pressure, proceed. If it falls apart because visible chickpea pieces are still large, return part of the mixture to the processor and pulse finer. More flour cannot fully compensate for a coarse, disconnected grind.
If the grind is fine but the mixture is distinctly wet and slumps, add 5 g more chickpea flour, wait five minutes, and check again. Repeat once if necessary. If it is dry and sandy instead, add cold water one teaspoon at a time, mixing thoroughly after each addition. The goal is workable cohesion, not a stiff bread dough.
5. Prepare the tray and form thin patties
Preheat the oven fully. Lightly oil a rimmed metal tray with about half the remaining oil. If using baking parchment, choose paper rated for the oven temperature and oil its surface lightly. A dark tray may brown the bottoms faster than a pale one, so check earlier rather than changing the recipe immediately.
Divide the mixture into 16 roughly equal portions. Compress each into a patty approximately 5 cm wide and 1.5 cm thick. Smooth deep cracks with your fingers without making the patties dense and hard. Arrange them with gaps around each one, then brush their tops with the remaining oil. Consistent thickness matters more than perfectly round edges.
6. Bake, turn, and check the centers
Bake for about 15–18 minutes, until the undersides have browned enough to release with a thin spatula. Turn gently, supporting the whole patty rather than lifting from one edge. Return to the oven for approximately 13–18 minutes. Rotate the tray if one area of your oven browns faster.
The patties should feel set and show browned patches on both sides. Open a patty from the thickest part of the batch: its center should be cooked through, tender, and granular rather than hard or chalky. If the exterior is already dark while the center needs more time, reduce the oven to 180°C / 350°F and continue cooking, shielding loosely with foil if necessary.
Let the falafel stand on the tray for five minutes before serving. This short rest makes fragile hot patties easier to handle. Serve promptly for the best contrast between the browned exterior and the softer middle. A sealed container will soften the crust as steam collects, even when the falafel was crisp when it left the oven.
Make a sauce that pours rather than clumps
Combine the tahini, lemon juice, optional garlic, and salt in a small bowl. Add 45 ml water gradually while whisking. Tahini may tighten at first when it meets lemon juice; continue whisking and add more water a teaspoon at a time until it becomes smooth and spoonable. Different jars need different amounts.
Taste the finished sauce and adjust with a little more lemon or salt if needed. Keep it separate from the falafel until serving so the patties do not absorb liquid. If making the sauce ahead, refrigerate it and stir before using. It may need another small splash of water after chilling.
Tahini contains sesame. For a sesame-free option, use plain yogurt with lemon and herbs if dairy is suitable, or a suitable unsweetened plant-based yogurt. Check those products for their own allergens. Simply leaving out the sauce also works; chopped tomato, cucumber, and a squeeze of lemon provide moisture.
Troubleshooting texture and browning
The mixture falls apart in my hands
Check the particle size first. If you can clearly see large chickpea fragments, process the mixture more finely in short pulses. If the grind is already fine, check whether it feels wet or dry. Those problems need opposite corrections. A wet mixture may benefit from the small extra flour allowance; a dry mixture may need teaspoons of water.
The patties stick when I try to turn them
They may need a few more minutes for the first surface to set. Slide a thin spatula underneath rather than forcing the patty upward. Also check whether the tray had an even film of oil. A bare patch under one patty can cause sticking even when its neighbors release cleanly.
The outside is brown but the middle is firm
Thick patties, an oven running hot, or insufficiently soaked chickpeas can create this mismatch. Finish the current batch at a lower temperature until cooked through. For the next batch, confirm the soak and shape thinner patties. Avoid increasing the oven temperature in an attempt to finish the center faster.
The falafel tastes dry
Excess flour, long baking, and very thin patties can all contribute. Measure the initial flour rather than adding it freely, and check the batch toward the beginning of the estimated baking window. Serve with moist accompaniments. Adding sauce is useful at the table, but it should not replace fixing an excessively dry mixture next time.
The tops are pale
Oven-baked falafel does not brown as uniformly as deep-fried falafel. Check the undersides before extending the baking time just for color. If the patties are cooked through, a few pale flecks are preferable to a dried-out center. An even, light oil coating and adequate spacing help more than a heavy final drizzle.
Substitutions that preserve the method
Use all parsley if cilantro is not your preference. Keep the total fresh herb weight similar, and avoid swapping the entire amount for dried herbs. Dried herbs are more concentrated and do not supply the same bulk or moisture. A small amount of fresh mint can replace part of the parsley, but it will noticeably change the flavor.
Chickpea flour keeps the ingredient list based on legumes, but it still requires an allergy check for anyone avoiding chickpeas. A small amount of plain wheat flour can serve as a binder if gluten is suitable, though absorption varies. Start with the listed amount and judge the mixture after resting. This version would contain wheat.
Do not substitute dried kidney beans or a random mixed-bean packet for the chickpeas. Different legumes have different preparation and cooking requirements. For a comparison of the two common pantry staples used in Workit recipes, see lentils versus chickpeas, then choose a recipe designed for the legume you actually have.
Serving ideas for different appetites
For a pita meal, tuck warm falafel into bread with shredded lettuce, chopped cucumber, tomato, and a little sauce. Keep the bread and salad separate when packing ahead. Assemble close to eating so the pita does not become wet. Pita size varies widely, so decide how much bread suits your meal rather than assuming every pocket is one standard portion.
For a bowl, combine falafel with cooked rice or another grain, roasted vegetables, and lemon-tahini sauce. For a lighter-feeling plate, use more vegetables and a smaller grain portion. Neither format needs a rigid label. Four patties is the recipe’s planning portion, not a universal recommendation for every person or training day.
If you want an additional crunchy chickpea preparation for another day, crispy roasted chickpeas use a different approach and work well as a topping. Avoid adding every chickpea dish to the same meal simply because the ingredients overlap; variety can make a prepared week more appealing.
Meal preparation, storage, and reheating
For the simplest schedule, soak the chickpeas the evening before baking. Prepare the washed, dried herbs and onion while the chickpeas drain. If you need to pause after mixing, keep the mixture covered in the refrigerator and plan to bake it within 24 hours. Do not leave raw falafel mixture on the counter while doing other meal-prep tasks.
Once baked, divide leftovers into shallow containers and refrigerate promptly. Keep the refrigerator at 4°C / 40°F or below. Following USDA leftover guidance, refrigerate perishable food within two hours, or within one hour when the temperature is above 32°C / 90°F, and use refrigerated leftovers within three to four days.
For longer storage, freeze cooked falafel in a single layer, then transfer to a sealed freezer container with the date and portion count. Aim to use within two to three months for quality. Freeze sauce separately, or make a fresh small batch. The freezer meal-prep guide can help organize portions so older meals do not disappear behind newer ones.
Reheat in an oven until hot throughout, checking that leftovers reach 74°C / 165°F with a food thermometer. A microwave is convenient but gives a softer exterior. When reheating from frozen, allow extra time and check the center rather than relying on surface heat. Reheating does not make food safe after it has been left out too long.
Nutrition and portioning without false precision
Chickpeas supply carbohydrate, fiber, and plant protein; oil and tahini contribute fat. The final meal also depends on bread, grain, sauce, and other additions. This recipe does not provide a precise calorie or protein claim because brands, drained yields, retained oil, and portion size have not been measured in a kitchen-tested nutrition analysis.
If tracking intake, enter the dry chickpeas and measured ingredients once for the full recipe, then divide by the number of patties or the finished cooked batch weight. Include the oil used and record sauce separately if not everyone uses the same amount. Do not count both dry and soaked chickpeas as separate ingredients.
Frequently asked questions
Can I skip the overnight soak?
No. This formulation depends on thoroughly hydrated dried chickpeas. A brief rinse does not replace soaking. If dinner needs to happen immediately, choose a cooked-chickpea recipe instead of trying to compensate with a longer bake, which can dry the outside before the center is ready.
Do I need baking powder?
The small amount is included to help keep the texture from feeling overly compact. It is not the main binder and will not repair an underprocessed mixture. Check that your baking powder is suitable for any dietary requirements, and measure it level rather than adding a heaped spoon.
Can I make the patties larger?
You can increase the diameter while keeping the thickness similar, but the yield and baking behavior will change. Very thick falafel balls are less suited to this oven method. If you change the shape, use the center check carefully and allow extra time rather than assuming the original range still applies.
Is this recipe vegan and gluten-free?
The base ingredients are plant-based and contain no wheat, but packaged flour, spices, and baking powder need label checks when gluten avoidance matters. Tahini adds sesame, yogurt adds milk, and ordinary pita adds wheat. Dietary suitability depends on the complete plate and cross-contact precautions, not only the falafel mixture.
Can I use an air fryer?
An air fryer changes airflow, available space, and how quickly the surface dries. This recipe provides oven instructions rather than an unverified conversion. If adapting it, keep patties in a single layer, consult your appliance guidance, and check the centers. Do not assume a shorter time guarantees that the chickpeas are cooked through.
Keep the meal routine manageable
A batch of falafel is useful because the same cooked component can become several meals without requiring a new recipe every day. Keep the patties, vegetables, bread, and sauce separate, then assemble what you want. For the training side of your routine, use Workit to plan and log workouts while keeping food preparation practical and flexible.