
Published October 28, 2026
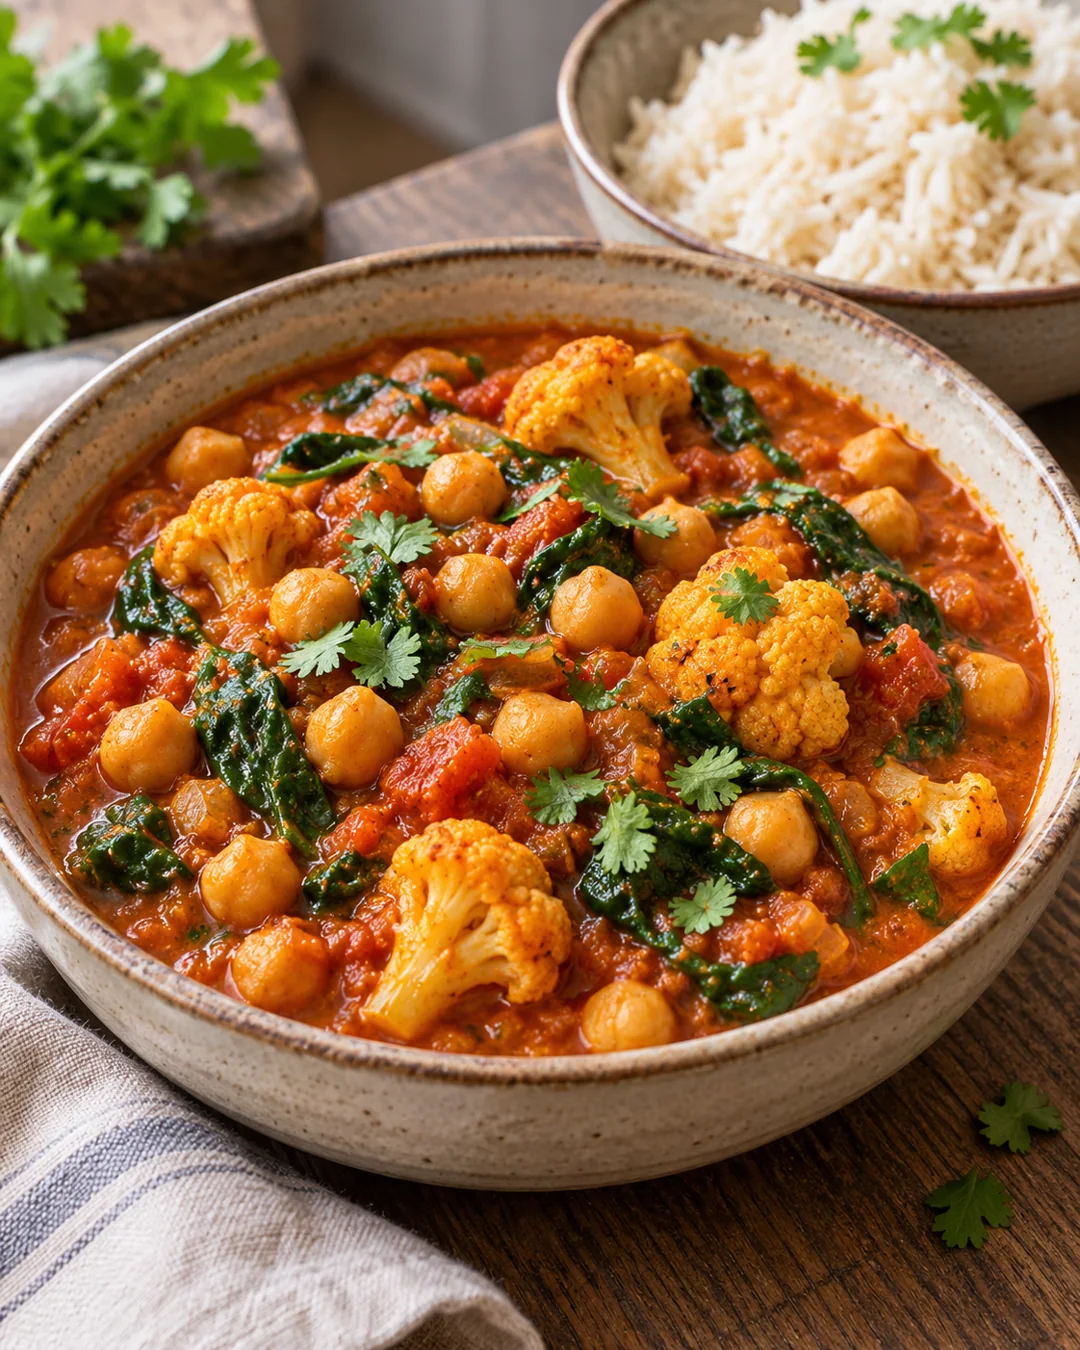
To make chickpea curry with a thick, flavorful sauce, soften the onion first, briefly stir in the spices, then simmer canned chickpeas in tomatoes before adding spinach and lemon. Mash a small spoonful of chickpeas into the sauce rather than adding a large amount of flour or extra oil. This tomato-based version makes four portions and uses everyday pantry ingredients without requiring coconut milk.
The aim is a spoonable curry with tender chickpeas and a sauce that stays with them, not a thin tomato soup or a dry pan of beans. You can serve it with rice, bread, or another accompaniment you enjoy. The recipe is an original weeknight approach, not a claim to represent one traditional regional curry. Curry dishes have many different ingredients, techniques, and histories.
Chickpea curry at a glance
- Yield: four portions of curry, excluding accompaniments.
- Preparation: approximately 15 minutes.
- Cooking: approximately 30–35 minutes, with extra simmering if needed.
- Equipment: a wide saucepan or deep skillet, lid, spoon, colander, knife, and chopping board.
- Main texture: intact chickpeas in a thick tomato sauce with wilted spinach.
- Dietary notes: the listed base contains no meat, eggs, or dairy. Check packaged spices, stock, and serving additions for allergens.
Use these times to plan dinner, then let the food tell you when to move on. Onion size, pan width, tomato thickness, and the starting temperature of the ingredients can change the cooking time. A small saucepan may need a longer uncovered simmer than a wide skillet, even with identical quantities.
Ingredients for four portions
- 480 g canned chickpeas, weighed after draining and rinsing
- 400 g canned chopped tomatoes, including their juice
- 1 large onion, approximately 180 g after peeling, finely diced
- 1 red bell pepper, approximately 160 g after trimming, diced
- 200 g cauliflower, cut into small bite-sized florets
- 150 g fresh spinach, washed and drained
- 3 garlic cloves, finely chopped
- 15 g fresh ginger, peeled and finely grated
- 1 tablespoon olive oil or another cooking oil
- 2 teaspoons mild curry powder
- 1 teaspoon ground cumin
- 1/2 teaspoon ground turmeric
- 1 tablespoon tomato paste
- 150 ml water, plus small additions as needed
- 1/4 teaspoon fine salt initially, with more only if needed
- 1–2 tablespoons lemon juice, added gradually
- Chopped fresh coriander or parsley, optional
The drained weight matters more than the number of tins. Two tins may provide approximately the amount you need, but sizes and liquid-to-bean ratios differ. Drain and weigh them if you want repeatable portions. Do not replace 480 g of drained canned chickpeas with 480 g of dry chickpeas: those are very different amounts of food after cooking.
Choose mild curry powder for the first batch. Blends vary in heat and salt, so there is no universal equivalent between two brands. If yours contains salt, omit the initial added salt and taste later. The cumin and turmeric let you adjust the blend gently without needing a shelf full of individual spices.
How to make the curry
1. Prepare before you heat the pan
Drain and rinse the chickpeas. Dice the onion and pepper into pieces small enough to soften in the sauce, and prepare the garlic and ginger. Measure the spices into a small bowl. Keep the tomatoes and water close to the stove so you can add liquid promptly after the spices go in.
Wash hands and produce, use clean utensils, and keep the vegetable preparation area separate from any raw meat being prepared for another meal. This recipe does not need raw animal ingredients, but that does not protect it from contamination introduced by a board, knife, or hand.
2. Soften the onion and pepper
Warm the oil over medium heat in your wide pan. Add the onion and pepper with the initial salt, if using. Cook for roughly 8–10 minutes, stirring regularly, until the onion looks translucent and the pepper is beginning to soften. Lower the heat if the edges darken before the centers soften.
If the pan looks dry, add a tablespoon of water and stir to release the vegetables rather than automatically pouring in more oil. You are building a soft sauce base, not trying to produce deeply browned onion in the shortest possible time. A little color is fine; scorched pieces will carry bitterness into the finished curry.
3. Add aromatics and spices briefly
Stir in the garlic and ginger for about one minute. Add the curry powder, cumin, turmeric, and tomato paste, then stir for another 30 seconds or so. Keep the mixture moving and reduce the heat if it sticks. The spices should smell fragrant without turning dark or smoking.
Add the tomatoes and 150 ml water promptly. Stir along the bottom of the pan to incorporate the paste and any softened vegetable bits. Do not leave dry ground spices in a hot empty patch while you look for the can opener.
4. Simmer, then judge the sauce
Add the chickpeas and cauliflower and bring the sauce to a gentle simmer. Cook partly covered for approximately 15 minutes, stirring occasionally. The chickpeas are already cooked; this stage combines the ingredients and softens the cauliflower. Check a floret with a fork before finishing; extend the simmer until tender if needed. Check that the sauce is not catching around the edges.
Remove the lid and continue for another few minutes if liquid pools freely around the chickpeas. If the sauce instead looks pasty or begins sticking, add water one or two tablespoons at a time. The useful endpoint is a sauce that coats a spoon and settles slowly, not one that must be scraped out like a paste.
5. Thicken gently and finish
Press about two tablespoons of chickpeas against the side of the pan with a spoon and stir them back into the sauce. Add the spinach in two batches, folding it through until wilted. Simmer for a few minutes, then turn off the heat and add one tablespoon of lemon juice.
Taste a cooled spoonful. Add the remaining lemon only if the sauce needs more brightness, and adjust salt cautiously. Scatter over the optional herbs just before serving. If the curry thickens while you prepare the plates, a small splash of hot water will loosen it without requiring another long simmer.
Why this version uses tomatoes rather than coconut milk
Tomatoes give the curry body and acidity while keeping the ingredient list short. That does not make this version inherently better than a coconut-based curry; it simply produces a different sauce. A tomato sauce can feel sharper, while coconut milk changes its flavor, texture, and nutrition.
If you want to experiment with coconut milk, replace part of the measured water with it rather than adding a whole can on top of the existing liquid. Begin with a small amount, simmer, and assess the thickness before adding more. Use the product label if you track the change: canned coconut milk and thin coconut beverages are not interchangeable.
For comparison, Health Canada’s chickpea and vegetable curry demonstrates another vegetable-forward approach. Its ingredients and portions differ from this recipe, so its serving information should not be treated as the nutrition of the curry described here.
Choosing chickpeas and checking their texture
Canned chickpeas are convenient because the long cooking step has already happened. Some brands are very soft, while others stay firmer. Taste one after rinsing to understand your starting point, provided the can and contents are in normal condition. A firm chickpea may need a little extra simmering; an already fragile one needs gentle stirring.
Do not spend time removing every loose skin. A few skins in a rustic curry are normal. If your chickpeas fall apart immediately, skip the deliberate mashing step and shorten the final simmer once the vegetables are tender. The sauce can still be satisfying without perfectly intact beans.
Home-cooked chickpeas also work when fully cooked before they enter the curry. Weigh the cooked, drained amount and keep the same 480 g starting point. Cooking dry chickpeas directly in this tomato sauce is not a like-for-like shortcut. Our canned-versus-dried beans guide explains the practical differences between purchasing, cooking, and weighing legumes.
Fixing sauce problems without changing everything
The curry is too thin
First remove the lid and give the sauce space to reduce over a gentle simmer. Stir often enough to prevent sticking. If the vegetables are already tender, avoid a hard boil that breaks them apart while the liquid evaporates. A wide pan is helpful here, but you do not need to transfer everything unless the original pan is very crowded.
If reducing alone is taking too long, mash another small spoonful of chickpeas. Add only a little at a time: you can always mash more, but you cannot turn a purée back into whole beans. Do not add a large amount of flour directly to the finished pan, which can leave dry lumps and a raw taste.
The sauce is too thick
Add a measured splash of water, stir thoroughly, and reassess. A cold curry can look much thicker than the same curry when hot, so warm a refrigerated portion before deciding how much liquid it needs. Use a small saucepan for one serving rather than spreading it thinly in a giant skillet where water evaporates quickly.
The flavor is harsh or bitter
Decide whether the issue is acidity, heat, or burning. A tomato-forward sauce may simply need a few more minutes of gentle cooking, followed by a small seasoning adjustment. A painfully hot spice blend may be better served in a smaller portion alongside plain rice and other foods rather than repeatedly adding salt.
Burned spices are different. If the bottom scorches, do not scrape the blackened layer into the food. Transfer the unburned upper portion to a clean pan if it has not acquired a strong burned flavor. Preventing the problem next time—lower heat, measured ingredients ready, and prompt liquid addition—is more reliable than trying to hide bitterness.
Make the portion fit the meal
Four portions is a practical way to divide this pan, not a statement that every person needs the same amount of curry. Each quarter contains approximately 120 g of the starting drained chickpeas before accounting for uneven distribution. Stir before dividing and use similar containers if you want reasonably consistent portions.
Serve with a portion of rice, bread, or potatoes according to appetite and the rest of the meal. A cucumber salad or cooked vegetables can add a different texture without being mixed into the pot. Keep optional yogurt, nuts, and other toppings separate so people can choose them and account for their allergens.
If you need a larger dinner, increase the accompaniment or add another suitable food rather than assuming a bigger bowl of sauce will necessarily meet your needs. Conversely, a smaller curry portion may suit lunch alongside something else. Our vegetarian meal-prep guide offers a broader framework without requiring every individual dish to do everything.
If you want chickpeas with a different texture for another meal, try crispy roasted chickpeas. Keep them separate from a wet sauce until serving: the dry-roasted texture will soften in curry, and any topping adds its own ingredients to the meal.
A transparent way to estimate nutrition
This recipe does not present a universal calorie or protein total. Chickpea labels can describe drained beans, beans with liquid, or different serving sizes, while oil measurements and accompaniments also change the result. Use the information for the ingredients you actually buy instead of borrowing a number from another curry.
For a clearly hypothetical example, suppose your chickpea label reports 7 g protein per 100 g of drained beans. The 480 g used here would contribute 4.8 × 7 = 33.6 g protein to the whole pan, or 8.4 g per quarter from the chickpeas alone. Those numbers illustrate the calculation; they are not an asserted label value for every chickpea product.
The onion, pepper, spinach, and other ingredients also contribute nutrients. A complete estimate needs all ingredients plus any rice, bread, yogurt, or toppings. Our guide to reading protein labels explains how to check the serving basis before multiplying. More decimal places do not make an uncertain starting value more accurate.
Vegetable changes that preserve the method
Frozen spinach: thaw and drain it according to the package, then add near the end. Start with a modest amount and loosen the curry if it becomes too dense. A large frozen block added directly can cool the pan and release more water than expected.
More cauliflower: increase the small florets modestly and allow enough simmering time for all of them to become tender. You may need more water and a partly covered cooking period. Do not assume a large floret will soften in the same time as a handful of spinach.
Courgette or zucchini: add small pieces later in the simmer so they soften without disappearing. Their released moisture can thin the sauce. Start with less extra water and adjust after they cook, rather than thickening a watery pan with a large amount of mashed beans.
Carrot: finely dice it and add with the onion. Larger pieces need longer than thin spinach leaves, so make the size decision before cooking. Keep the chickpea quantity steady while testing a vegetable change; otherwise you cannot tell which adjustment altered the result.
Cooling, storing, and reheating
Divide leftovers into shallow containers promptly and refrigerate at 40°F/4°C or below within two hours, or within one hour if the surrounding temperature exceeds 90°F/32°C. Do not leave the whole pan on the counter overnight. NSF’s leftovers guidance recommends using properly handled refrigerated leftovers within three to four days and reheating to 165°F/74°C.
Freeze portions you will not use in that window, label them, and thaw in the refrigerator. Reheat only the amount you intend to serve, adding a little water if needed and stirring to remove cold spots. Handle rice and other accompaniments according to their own storage guidance, not merely the curry’s schedule. See our meal-prep food-safety guide for the wider workflow.
A workable plan for two people
Cook the four-portion batch, serve two portions at dinner, and refrigerate the other two promptly. Pack the second pair with an accompaniment chosen for the next meal rather than automatically repeating the same plate. Bread one day and rice another can change the eating experience without requiring a different curry.
If both people prefer different heat levels, keep the shared pot mild and offer an appropriate hot sauce or chili condiment at the table. That is easier to control than trying to remove heat after the whole batch has been seasoned. Keep shared serving utensils clean and avoid returning tasted spoons to the stored food.
Scaling the pan without losing control
For two portions, halve the chickpeas, vegetables, tomatoes, oil, and spices. Start with about half the water, but keep a little extra nearby because evaporation does not necessarily halve when the ingredient quantities do. A smaller pan helps keep the sauce from drying around a thin layer of food. Use half an onion by weight if your onions vary greatly in size.
For eight portions, use a larger pot or two pans rather than compressing twice the vegetables into the same small skillet. The onion stage may take longer because a deeper pile releases moisture before it softens. Stir the bottom thoroughly and add water gradually. Do not double every cooking time: check tenderness and sauce thickness instead.
When serving a group, set out the accompaniments separately and identify any allergens in them. A dairy-free pot does not make a meal dairy-free if yogurt is mixed into every bowl without asking. Keep a clean ladle for the curry and avoid using a bread or topping utensil in the shared pan.
For a first attempt, the four-portion batch is useful because it leaves room to observe the method without an oversized pot. Once you know the pan and spice blend, scaling becomes a practical quantity change rather than a guess about how the ingredients will behave.
Frequently asked questions
Can I make it without curry powder?
You can build a different spice mixture, but the result will not taste identical. Start with a small, deliberate blend using spices you know, rather than replacing two teaspoons of curry powder with two teaspoons of the hottest spice in the cupboard. Record the quantities so a successful batch can be repeated.
Do I need sugar?
Not automatically. Tomato brands and spice blends vary, so finish cooking and taste before deciding. Lemon adds acidity rather than sweetness; do not add the full amount if the sauce is already sharper than you prefer. A small adjustment is easier to assess than several changes at once.
Can I blend the whole curry?
You can choose a smoother dish, but this recipe is designed around intact chickpeas and diced vegetables. Mashing a small amount gives body while preserving contrast. If using a blender for a different texture, follow its hot-liquid instructions and avoid sealing steaming liquid in a container not designed for it.
Is this the same as chickpea shakshuka?
No. This is a spiced chickpea curry with spinach and no eggs. Shakshuka uses a different seasoning and cooking structure, with eggs set in the sauce. Keeping the dishes distinct gives you two useful methods rather than the same dinner under different names.
Keep one useful note for next time
Write down the curry-powder brand, whether you needed extra water, and the accompaniment you enjoyed. If the sauce was too loose, start with slightly less water next time; if the flavor was too hot, change the spice blend before changing every vegetable. One well-chosen adjustment is enough to improve a familiar meal.
For the training side of a repeatable routine, explore Workit’s workout planning and logging tools on the App Store. Choose meals and workouts that fit your actual week, without expecting one recipe to deliver a complete fitness plan.
Comments
One response to “Chickpea Curry: A Thick Tomato Sauce With Spinach and Vegetables”
[…] a soft, saucy chickpea dinner rather than a crisp topping? Our tomato-based chickpea curry uses a different cooking method. Choose the dish for the texture you want rather than expecting […]