
Published November 7, 2026
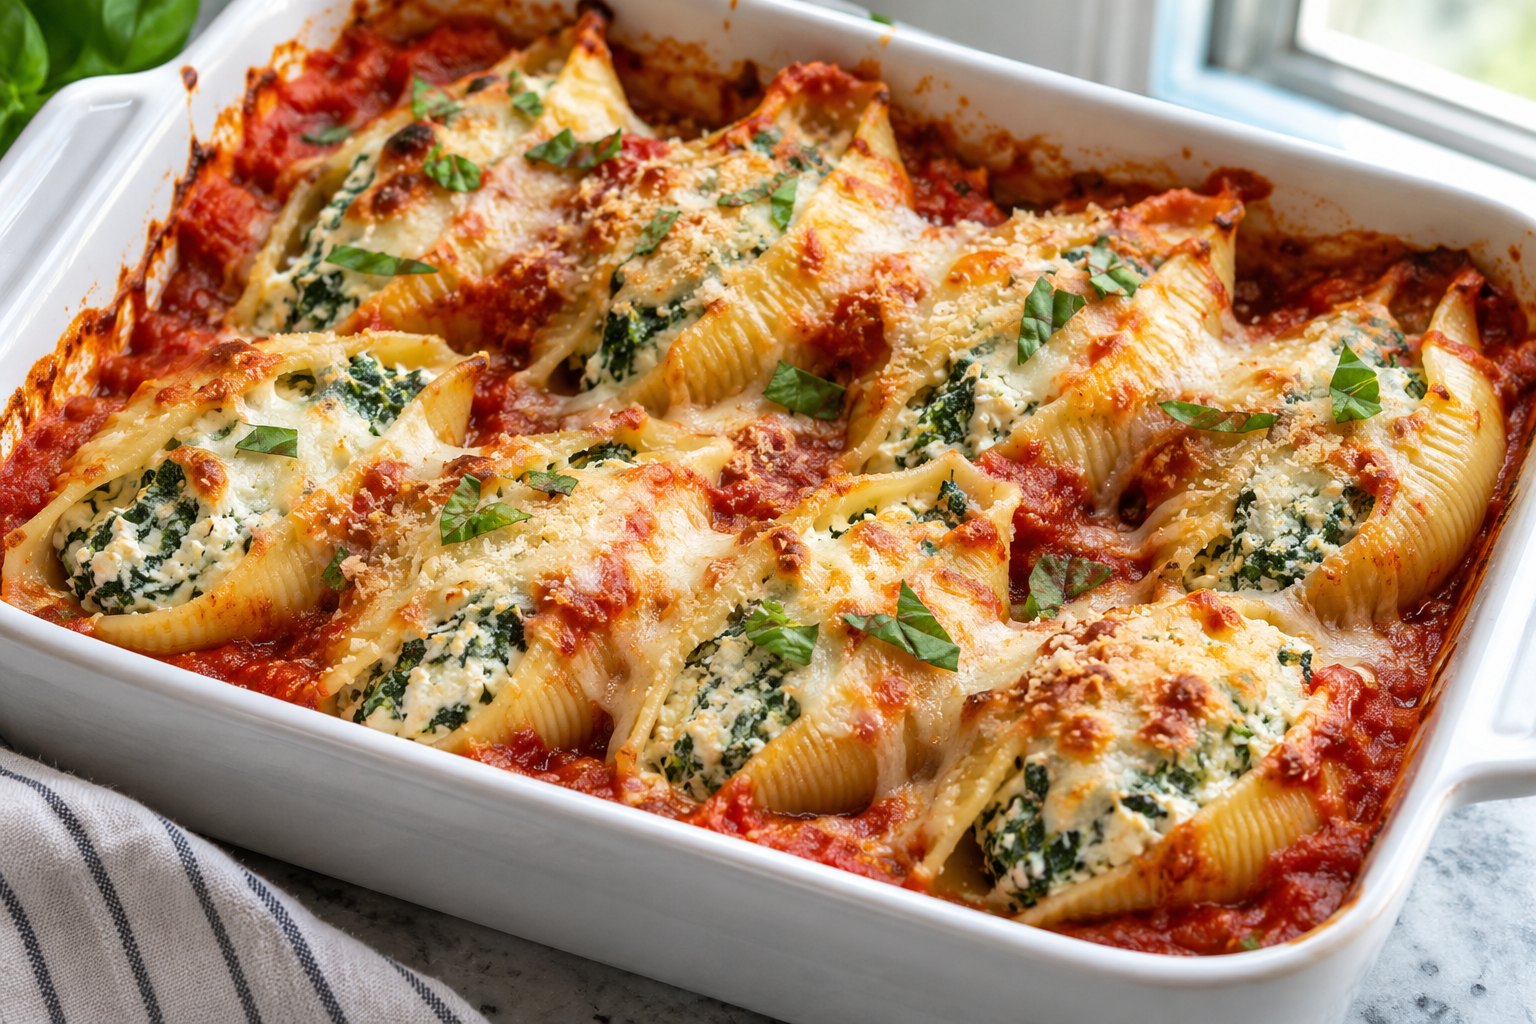
Spinach and ricotta stuffed shells work best when the filling is creamy but not wet, the pasta is flexible without being fully softened, and enough tomato sauce surrounds the shells to protect them in the oven. This version makes a generous tray of twenty-four shells with spinach, lemon zest, mozzarella, and a straightforward tomato sauce. It is designed for six servings, with room to adjust portions to appetite and side dishes.
The main preparation task is managing water. Spinach can carry a surprising amount into the filling, and ricotta varies from firm and spoonable to very loose. Deal with those ingredients before assembling the tray. The oven should finish cooking the pasta and heat the filling, rather than having to evaporate a puddle hidden under the cheese.
Before starting, clear a landing space beside the stove for the drained pasta and place the baking dish nearby. Filling shells is easier when the sauce, filling bowl, and tray are within reach, especially if you are cooking alone.
Recipe overview
- Yield: twenty-four filled shells, or six servings of four shells.
- Preparation: about 30–40 minutes, including pasta cooking and filling.
- Baking: approximately 30–40 minutes; allow another 10 minutes to rest.
- Total: about 70–90 minutes, depending on your assembly pace.
- Oven: 375°F/190°C conventional.
- Equipment: large pasta pot, colander, bowl, clean kitchen towel, saucepan, spoon, food thermometer, and a roughly 9-by-13-inch baking dish.
- Main allergens: wheat, milk, and egg. Check pasta and cheese labels.
These are planning estimates, not results from a documented kitchen test. Pasta sizes, dish depth, ingredient temperature, and ovens differ. Use the texture cues and the final temperature check rather than relying on the clock alone. A metal roasting pan may heat differently from a thick ceramic casserole, even when their outside dimensions look similar.
Ingredients
Shells and spinach filling
- Approximately 250–300 g dry jumbo pasta shells, enough to select twenty-four intact cooked shells plus a few spares; check the package because shell sizes vary.
- 450 g frozen chopped spinach, weighed frozen before thawing; squeeze after thawing and use the resulting spinach, usually much lighter than its starting weight.
- 450 g whole-milk ricotta, weighed after pouring off any obvious separated liquid.
- 1 large egg, about 50 g without the shell.
- 150 g low-moisture mozzarella, grated, divided into 50 g for the filling and 100 g for the top.
- 40 g finely grated Parmesan or a vegetarian hard cheese, divided equally between filling and topping.
- 1 teaspoon finely grated lemon zest, avoiding the bitter white pith.
- ¼ teaspoon ground nutmeg.
- ¼ teaspoon black pepper.
- ¼ teaspoon fine salt, optional, depending on your cheeses.
Tomato sauce
- 1 tablespoon olive oil.
- 120 g peeled onion, finely diced.
- 3 garlic cloves, about 9 g peeled, finely chopped.
- 800 g canned crushed tomatoes, including all the juice; do not drain.
- 100 ml water, plus a little more only if needed.
- 1 teaspoon dried oregano.
- ¼ teaspoon fine salt, then adjust the sauce to taste before assembly.
- 2 tablespoons chopped fresh basil or parsley, optional, for serving.
Use low-moisture mozzarella rather than fresh mozzarella packed in liquid for this baseline recipe. Fresh mozzarella can work, but it introduces another source of water and melts differently. Likewise, buy actual jumbo stuffing shells, not ordinary small pasta shells. The dry weight is a shopping guide; the finished yield is twenty-four filled pieces, not every piece in every possible package.
How to make spinach and ricotta stuffed shells
1. Start the sauce
Heat the olive oil in a saucepan over medium heat. Add the onion and cook for approximately 6–8 minutes, stirring, until softened. If the edges begin browning while the center is still hard, lower the heat and add a spoonful of the measured water. Stir in the garlic for about 30 seconds, just until fragrant.
Add the crushed tomatoes, remaining water, oregano, and the sauce salt. Bring to a gentle simmer, then cook uncovered for approximately 12–15 minutes while you prepare the other ingredients. Stir occasionally, especially near the bottom. The sauce should be spoonable and fluid enough to settle around the shells, not reduced to a thick paste. Taste and adjust before it comes into contact with the uncooked filling.
2. Thaw and squeeze the spinach
Thaw the spinach in the refrigerator or use the package’s microwave instructions. If using the microwave, allow it to become cool enough to handle safely. Transfer it to a clean kitchen towel or several layers of sturdy cheesecloth, gather the edges, and squeeze over the sink. Work in two batches if that gives you a better grip.
Unwrap and separate the compressed spinach with a fork. You want a damp, leafy mass without liquid streaming out when pressed. Do not try to hit an invented drained weight by leaving water in or removing actual leaves. The ingredient starts at 450 g frozen; its final weight varies with the product and how much water it contains. Chop through any long strands so the filling divides cleanly between shells.
3. Cook the pasta until flexible
Bring a large pot of water to a boil and cook the shells according to the package’s instructions for pasta that will be baked, if provided. Otherwise begin checking a few minutes before the normal stated time. The shells should open without snapping but still feel firm enough to withstand filling and another period in the oven.
Drain gently and spread the shells in a single layer on a lightly oiled tray. Separate any that are nesting together while they are still warm enough to move easily. Let them cool until comfortable to handle. Avoid leaving them piled in the colander, where they can stick, tear, and hold pockets of water that later dilute the filling.
4. Mix the filling
Heat the oven to 375°F/190°C. In a large bowl, stir together the ricotta, egg, 50 g mozzarella, 20 g hard cheese, lemon zest, nutmeg, pepper, and optional filling salt. Fold in the squeezed spinach until evenly distributed. A flexible spatula makes it easier to break up spinach clumps without whipping the mixture.
The filling should sit on a spoon rather than pour from it. If your ricotta is unusually loose, drain it briefly in a fine sieve before mixing, not after adding the egg. Do not taste the uncooked filling. If you want to assess seasoning beforehand, taste a little ricotta and cheese separately, then adjust conservatively; the sauce and topping will add their own seasoning.
5. Fill and arrange the shells
Spread about one-third of the tomato sauce across the bottom of the baking dish. Divide the filling loosely into four portions in the bowl, then use each portion to fill six shells. This makes distribution easier than filling the first shells generously and discovering that the last row has almost nothing left.
Spoon the mixture into each shell without forcing the opening wider than it wants to go. Arrange the shells open side up in the dish, close together but not stacked. Spoon the remaining sauce around and partly over them, allowing some filling to remain visible. Scatter the remaining mozzarella and hard cheese over the top. A torn spare shell can patch a small gap, but a severely broken shell is better saved for a different use.
6. Bake covered, then uncover
Cover the dish with a lid or foil, tenting the foil slightly so it does not press into the cheese. Bake for about 20–25 minutes, then uncover and continue for approximately 10–15 minutes. Look for sauce bubbling around the center as well as the edges, and cheese that has melted into the surface. If the top colors too quickly, cover it again.
Check the filling in several central shells with a food thermometer, avoiding contact with the dish. The center should reach at least 165°F/74°C, the temperature listed for meatless casseroles in the FoodSafety.gov minimum temperature chart. A golden top is not a substitute for checking the middle. Continue baking if needed, keeping the dish covered if the surface is already browned.
7. Rest and serve
Let the dish stand on a heat-safe surface for about 10 minutes before serving. This makes the shells easier to lift and gives the sauce a moment to settle. Sprinkle with the optional herbs. Use a broad serving spoon to lift each shell from below rather than pinching its top edge with tongs.
Serve four shells per person as the stated six-serving yield, then adapt the meal to the people eating it. A crisp cucumber salad, roasted broccoli, or simply some extra vegetables works well alongside the soft pasta and cheese. Bread is optional rather than a requirement. If serving a larger buffet, smaller portions are reasonable, but they change the amount of the recipe each person receives.
Getting the filling and pasta texture right
Why squeezing spinach matters
Water trapped in spinach moves into the cheese mixture as it heats. A filling that seemed thick when cold can become loose once it is baked. That is why adding more cheese on top rarely fixes the underlying problem. Squeeze first, mix second, and check the consistency before committing the filling to the shells.
Fresh spinach is an alternative, but it should be wilted and squeezed before adding it. Start with roughly 600–700 g fresh leaves as a practical shopping estimate, cook them in batches, then assess the amount of drained greens against the ricotta. This is a variation rather than a claim of exact equivalence to every frozen brand. A little less spinach creates a cheesier filling; a crowded bowl of wet leaves creates a different dish.
How much sauce is enough?
The base layer should cover the bottom of the dish so exposed pasta does not sit against a dry hot surface. The remaining sauce should reach into the spaces between the shells. If your sauce has become so thick that it sits in mounds, stir in a little water before assembly. If it runs like tomato juice, simmer it briefly before adding it.
The covered stage protects the edges while the filling heats through. Removing the cover later lets some moisture escape and gives the cheese a more appealing finish. Starting uncovered for the whole bake can produce leathery shell tips before the center is hot, especially in a shallow dish or an oven with a strong top element.
Substitutions that preserve the basic method
Cottage cheese: Drain obvious liquid, then blend or mash it before measuring 450 g for the filling. It will taste and feel different from ricotta, and some brands are saltier. Keep the egg and spinach preparation unchanged for your first attempt. Workit’s cottage cheese frittata is another useful option when you want a savory recipe built around a tub of cottage cheese.
Egg-free filling: Omitting the egg leaves a softer filling that depends more heavily on well-drained ricotta and spinach. It may still sit inside the shells, but it should not be described as an identical substitution. Check that the pasta is egg-free as well. For a meal that does not depend on dairy or an egg binder, consider lentil bolognese instead.
Gluten-free pasta: Choose large shells specifically labeled gluten-free and follow their package instructions. Some are more fragile after boiling or reheating, so cook a few extras and handle them gently. Replacing the pasta does not remove milk or egg allergens from the filling. Check sauces and seasoning blends if avoiding a particular ingredient.
Different greens: Finely chopped cooked kale or chard can replace some spinach after tough stems are removed. These leaves may need longer cooking before squeezing and chopping. Do not assume a quick wilt will soften thick stems. Start by replacing half the spinach so you can evaluate the stronger flavor and firmer texture without changing the entire filling.
Make-ahead planning and leftovers
For the simplest preparation split, make the sauce and prepare the spinach first, refrigerating them promptly in separate covered containers. Assemble and bake the shells the following day. This approach keeps the pasta from sitting in sauce longer than necessary and leaves only boiling, mixing, and filling for the main cooking session.
You can also assemble the dish ahead and refrigerate it overnight, covered. Expect a cold tray to take longer to heat than one assembled with warm sauce. Follow the baking dish manufacturer’s instructions about moving it between cold and hot temperatures. Never place a refrigerator-cold glass dish in a hot oven unless the manufacturer specifically permits that use.
After baking, transfer leftovers into shallow containers and refrigerate promptly. USDA leftover guidance calls for refrigeration at 40°F/4°C or below within two hours, or within one hour above 90°F/32°C, and using refrigerated leftovers within three to four days. Do not leave the full tray on the counter until it feels completely cold.
For longer storage, freeze cooled portions in suitable containers with sauce around the shells. Label the contents and preparation date. For best eating quality, aim to use them within about two months; this is a practical quality target, not a guarantee about every freezer. Thaw in the refrigerator, then reheat covered until the center reaches 165°F/74°C. Add a spoonful of water if the sauce has become very thick.
Scaling the recipe without crowding the dish
For a half batch, use twelve shells and approximately half of each ingredient in a smaller baking dish. Beat the egg in a cup, then weigh or measure half for the filling; reserve the rest for another promptly cooked preparation. Keep the shells in one layer with sauce underneath. A smaller batch does not necessarily take half as long to bake because the filling still needs to reach the same temperature.
For a double batch, use two dishes rather than stacking shells in a deep pot. Rotate the dishes if your oven heats unevenly, and check each separately before serving. Fill one dish fully, then the other, so you can track how much filling and sauce remains. This also lets you serve one tray while the other stays covered and hot, or cool one promptly for future meals.
Troubleshooting
- The shells split while filling: They may be undercooked, stuck together, or opened too aggressively. Choose intact extras and use a smaller spoon. A little firmness is useful; a brittle opening is not.
- The filling leaks water: Look first at spinach preparation and ricotta consistency. Rest the baked dish briefly and serve with a slotted spoon if necessary. Next time remove moisture before assembly rather than adding more pasta to absorb it.
- The pasta edges are tough: Add a small amount of hot water around the dish, cover, and return to the oven. For the next batch, spread sauce more evenly and keep the first stage covered.
- The top is brown but the center is cool: Cover again and continue baking. Check more than one central shell. Surface color develops much faster than heat travels through a crowded refrigerated casserole.
- The flavor seems flat: Taste the cooked sauce separately if possible. A little extra grated cheese, fresh herbs, or lemon zest at serving can sharpen the overall flavor without changing the filling’s moisture balance.
Frequently asked questions
Can I use jarred marinara?
Yes. Replace the homemade sauce with about 800–900 g jarred marinara, adjusting with a little water if it is very thick. Choose a flavor you enjoy and check the label for allergens and salt content. There is no need to add the onion, garlic, oregano, or sauce salt automatically when using an already seasoned product.
Can I skip boiling the shells?
Not with ordinary dry jumbo shells in this method. They need enough initial cooking to open for filling, and this sauce quantity is not designed to hydrate completely dry pasta. A package specifically designed for no-boil stuffing requires its own method and liquid amounts.
Are these shells vegetarian?
They can be if you choose cheeses made with vegetarian rennet and check the pasta and sauce ingredients. Traditional Parmesan may use animal rennet. The recipe is not vegan because it includes milk products and egg, and replacing only the Parmesan does not change that.
How should I estimate nutrition?
Use the labels from the pasta, cheeses, egg, spinach, tomatoes, and oil you actually use. Add the totals for the ingredients that enter the tray, then divide by six for the stated portion. Exclude spare shells that were cooked but not served. If you divide the tray differently, change the calculation instead of keeping a six-serving estimate attached to every plate.
What can I cook with leftover spinach?
Keep any uncooked leftover spinach separate from the egg-containing filling. A small amount can go into a soup or a vegetable side; a larger amount can support another planned meal. For a different chicken-and-vegetable dinner, yogurt-marinated chicken gives you a contrasting roasted main rather than another baked pasta dish.
For a simple place to organize training alongside your cooking routine, explore Workit for workout planning and logging. Keep meal choices flexible and build a routine you can actually repeat.