
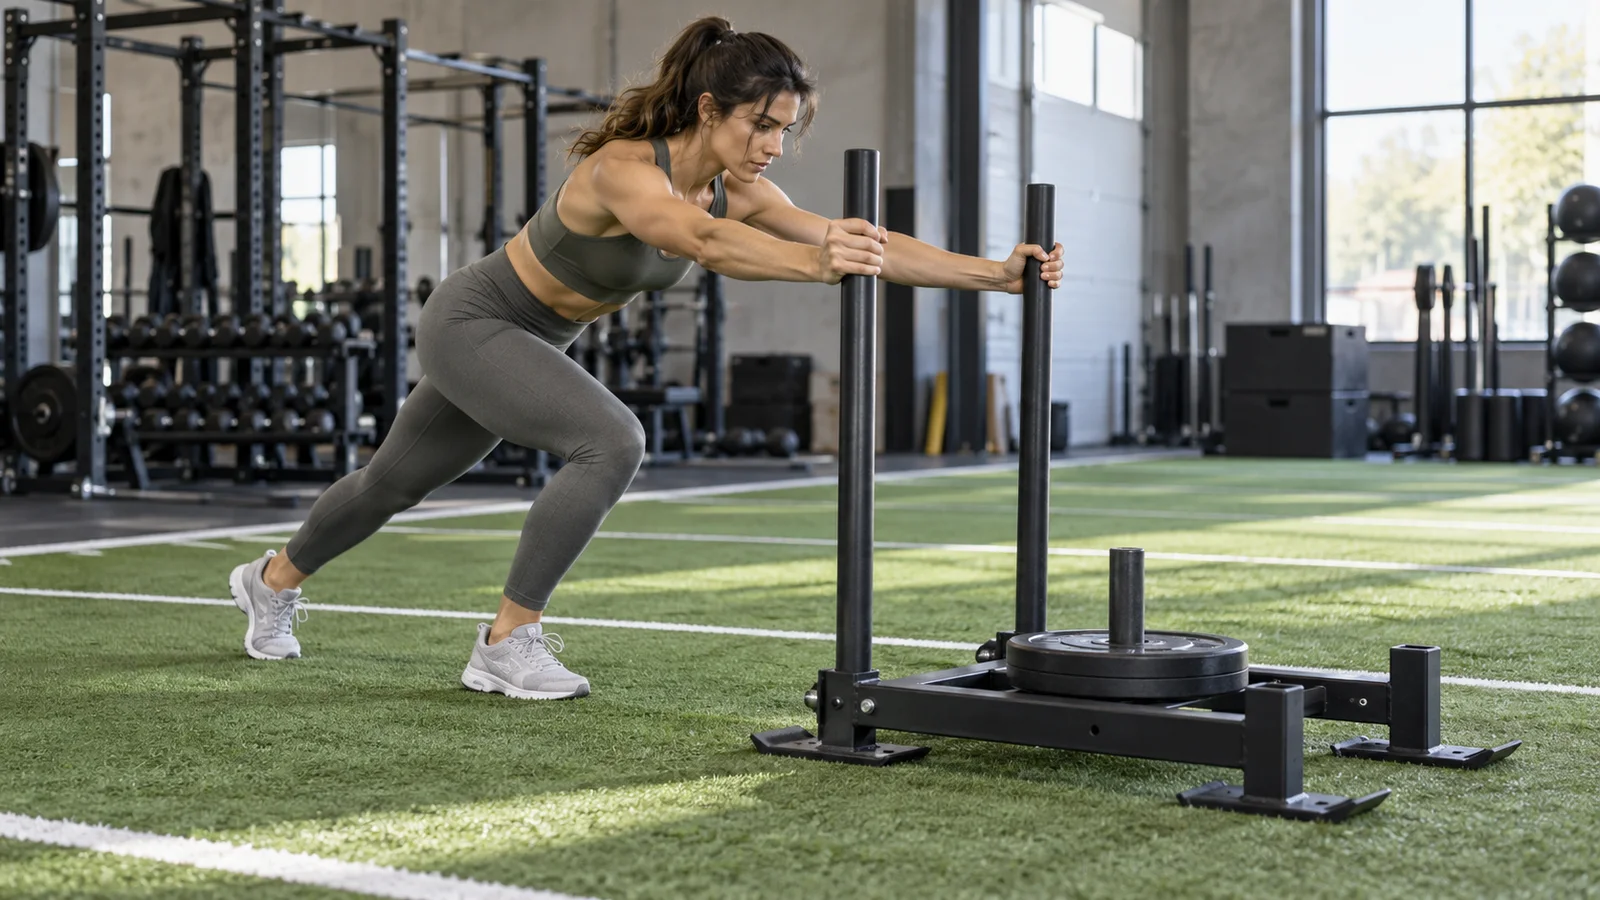
For a beginner sled push, use a purpose-built push sled on an approved, clear surface, choose a load you can move at a controlled walking pace, and take short, steady steps while holding the handles firmly. Start with three short pushes of about five to ten meters, resting until your breathing and legs feel ready between efforts. An empty sled may already be heavy enough; the first goal is a repeatable push, not a large stack of plates.
Published October 19, 2026
A sled is simple to understand but easy to misjudge. The same plates can feel very different on another strip of turf, and one long push can become much harder than its first few steps suggest. This guide explains how to calibrate the actual setup, choose a manageable body position, count your work accurately, and build a small beginner session without turning it into an all-out finisher.
What a sled push actually asks you to do
You apply force through the handles while your feet move against the ground to drive the sled forward. Your legs provide much of the propulsion. Your trunk helps maintain your body position, and your shoulders and arms transmit force to the sled rather than repeatedly pressing the handles away and back.
As the effort continues, breathing can become a limiting factor alongside leg strength and grip comfort. That makes the sled useful for different training purposes, but it does not mean every push must be a sprint or every workout must leave you exhausted.
The exercise also differs from a conventional repetition in which you lower a weight and lift it again. You move the sled along the floor instead of catching it on a lowering phase. Still, claims that sled training cannot cause soreness, cannot irritate joints, or needs no technique are too broad. Load, fatigue, body position, and your individual response all matter.
This article describes forward walking pushes. Backward drags, harness sprints, low-handle racing technique, and competition-specific sled work are separate tasks. Learn this basic version before deciding whether any of those variations belongs in your training.
Why plate weight is not enough to choose a load
A sled’s resistance depends on more than the plates. The sled itself has mass, and its contact with the surface affects how hard it is to start and keep moving. Turf condition, skid material, and direction of travel can change the experience even within one gym.
Rogue’s sled guide distinguishes push-capable sleds from drag-only designs and emphasizes matching the sled to the surface. That manufacturer guidance supports two practical checks: use equipment designed for pushing, and confirm that the gym approves the combination of sled and flooring.
The NSCA’s discussion of resisted sled training also cautions that prescribing load from body weight alone overlooks factors including training status and friction. Its context is athletic sprint training, not this walking plan. The relevant takeaway is the limitation of a one-size-fits-all loading number.
Therefore, avoid rules such as “every beginner should push a fixed percentage of body weight.” Calibrate the specific sled you have today. A small person on smooth turf may move a certain plate load easily, while a stronger person on a different surface finds the same label unexpectedly difficult.
Before pushing: check the sled, shoes, and lane
Inspect the equipment
Ask staff which handles and direction of travel the sled is designed to use. Check that removable posts are seated and secured as specified. Inspect for loose parts, damaged grips, sharp edges, or a loading post that does not appear stable. Do not try to solve an equipment fault by gripping harder.
Load plates only where the manufacturer permits and distribute them as instructed. Keep fingers clear when stacking or removing plates. Do not balance a loose dumbbell on an unsuitable platform or ask a person to stand on the sled to create resistance.
Choose a clear, level route
Use the gym’s designated sled lane. Make sure the whole route and stopping area are clear, including the space your body occupies behind the sled. Keep bags, ropes, benches, and loose plates out of the path. Do not start a push while another person is crossing the lane.
Use a level surface for this beginner version. A slope changes both the resistance and the stopping problem. If the turf is folded, wet, loose, or catching under the sled, stop and ask staff to address it rather than trying to power through.
Check traction before adding load
Wear secure shoes suitable for the approved surface. Tie laces and check that the soles are not wet or packed with debris. Your feet should be able to push without repeatedly slipping. If traction is poor, fix the footwear or surface problem before deciding you need a different technique.
Keep hands and handles dry enough for a reliable grip. Gloves are optional if permitted and comfortable, but they are not a solution for a loose handle or an unsuitable hand position.
Choose a handle height you can control
For a first session, the higher handles often make it easier to find a less crouched walking position. They are a starting option, not a guarantee of comfort. Grip at a height that lets your wrists, elbows, and shoulders remain comfortable while you lean into the push.
Keep your arms comfortably long without aggressively jamming the elbows into their end range. Some sled designs and techniques use bent arms, but switching between a long-arm push and a tightly folded position on every step makes the task less repeatable. Choose one manageable position and maintain it.
Lean forward as a coordinated body position rather than collapsing your chest while leaving your hips far behind. You do not need to be horizontal. The angle will depend on the handles, your proportions, the load, and how easily the sled moves.
Do not chase a low position just because it looks athletic. If lower handles force uncomfortable shoulder or back positions, use the higher option, reduce the load, or choose another exercise. The beginner goal is a steady walking push, not copying a race photograph.
How to do your first controlled sled push
- Set the route. Identify a short endpoint and enough space to stop before any wall or equipment. Confirm the lane is free.
- Take your grip. Hold both handles securely with wrists comfortable. Place one foot slightly ahead so you can start without a sudden lunge.
- Organize your torso. Firm your trunk while continuing to breathe. Keep your head in line with your body and look toward a safe patch of the route rather than craning upward.
- Apply pressure smoothly. Lean into the handles and begin with a deliberate step. Avoid charging into the sled or snapping your arms straight to get it moving.
- Walk with short, consistent steps. Push through the ground and let each foot recover underneath you. Do not reach so far forward that you repeatedly lose traction or stall.
- Keep the sled moving steadily. Maintain a body angle you can control. If every step becomes a strained restart, stop and reassess the load.
- Finish before the space runs out. Gradually reduce your drive and let the sled come to a complete stop within the clear lane. Keep control of your position rather than suddenly letting go while stumbling forward.
- Recover and reset. Stand comfortably, breathe, and check that the next direction is clear. Reposition handles only when the sled is stopped and according to its instructions.
The steps should feel purposeful rather than frantic. There is no required stride length, heel position, or torso angle that suits every sled. If a cue makes you less stable, return to a lighter load and ask a qualified trainer to check the actual setup.
Use a short calibration push before the workout
Start with the empty sled or the lowest resistance setting the equipment permits. Push a short distance at a walking pace. If you cannot get it moving smoothly without straining, do not assume you must add momentum or lower yourself farther. The empty sled may already be too demanding on that surface.
After that short test, assess three things: whether your feet gripped, whether your body position stayed manageable, and whether you could breathe without a prolonged breath hold. If all three were comfortable, you have a reasonable first setup. You do not need to add plates just because there is room on the post.
If the empty sled is genuinely very easy, add the smallest practical, approved increment and repeat a brief test after resting. Avoid turning calibration into several tiring rounds. The purpose is to find a workable starting point, not to discover the heaviest load you can move once.
For example, suppose a gym confirms its sled weighs 30 kilograms and you add two 5-kilogram plates. The total mass is 40 kilograms, with 10 kilograms added. Record both numbers when known. If the base mass is unknown, write “empty sled plus 10 kilograms” rather than guessing a total.
A small first-session plan
Begin with about five minutes of easy walking or another comfortable warm-up, followed by a short calibration push. Then use the following original practice example. It is not a validated protocol or a requirement to complete every effort.
- Distance: Pick one short route of five to ten meters. Use the shorter end if you are unsure of your tolerance.
- Work: Complete three controlled walking pushes over that route.
- Rest: Take at least roughly 60 to 90 seconds between pushes, and longer whenever you need it to recover your breathing and steady steps.
- Effort: Finish each push feeling that you could have continued a little farther with the same form. Stop before you reach grinding or sprinting effort.
- Finish: Walk easily for a few minutes if comfortable, then unload and return the equipment according to gym rules.
Three pushes of ten meters equals thirty meters of loaded travel. Three pushes of five meters equals fifteen meters. The calibration push is additional practice, so include it if you are recording the entire session’s distance.
A return trip counts as work if you push the sled back. It is not a rest interval just because you are heading toward the starting point. If you do three out-and-back trips on a ten-meter lane, that is six lengths and sixty meters, twice the work of three single lengths.
How hard should you be breathing?
Keep the first sessions comfortably submaximal. You may breathe faster, but the goal is not to finish unable to speak. Use a simple effort scale from zero to ten, where zero is rest and ten is your hardest possible effort; staying around four or five is a practical early target, not a medical threshold.
The CDC’s talk-test guidance describes moderate aerobic activity as allowing conversation but not singing, and vigorous activity as allowing only a few words before pausing for breath. Short sled pushes combine local muscle effort with breathing demand, so the talk test does not precisely classify every push. It can still help you notice when a supposedly easy session has become much harder.
During recovery, wait until you can speak comfortably and your legs feel steady before starting again. A timer is a minimum guide, not an order to move before you are ready. If you need increasingly long rests after very short pushes, shorten the route or reduce resistance.
Stop for chest pain, faintness, unusual severe breathlessness, or other concerning symptoms and seek appropriate medical help. If you have a condition that limits exertion or have been advised to avoid strenuous exercise, obtain individualized guidance before adding demanding sled work.
Progress distance, repetitions, or load one at a time
Repeat the first setup until the pushes look and feel similar from beginning to end. Then choose one small change. Do not simultaneously add plates, double the route, and cut the rest interval because the previous session went well.
A simple learning sequence could look like this, with stages repeated as needed:
- Stage one: Three pushes of ten meters at a manageable load, for thirty meters total.
- Stage two: Four pushes of ten meters at the same load and rest, for forty meters total.
- Stage three: Repeat four pushes until the last one remains controlled and recovery is comfortable.
- Stage four: Test a small load increase while returning to three pushes of ten meters. Keep the route, handles, and rest approach unchanged.
Going from three pushes to four increases the number of efforts by one-third. That can be meaningful even without adding weight. If your original route was five meters, keep using five meters through the early stages rather than quietly doubling distance at the same time.
The 2026 ACSM guidance favors consistent, individualized resistance training. It does not provide this sled progression. Here, the value of a simple plan is that you can recognize which change improved the session and which made it harder to control.
Fix the limiting factor rather than forcing another push
The sled will barely start
Check the surface and equipment first. A skid may be catching, the lane may be damaged, or the sled may be positioned against an obstruction. If the setup is clear, reduce load. Do not solve an unexpectedly stuck sled by repeatedly ramming the handles with your body.
Your feet keep slipping
Stop and check the soles and turf. Shorter steps and less resistance may help when the issue is reaching too far, but poor traction is not always a technique problem. Use suitable footwear and a safe surface rather than accepting repeated slips as part of the workout.
Your hips rise and your chest drops
The load or accumulated fatigue may be exceeding the position you intended. Rest, reduce resistance, and use a shorter route. A small change in angle during movement is not automatically dangerous, but a large progressive collapse is a reason to end that effort.
Your shoulders or wrists hurt
Stop the push. Check handle height and grip only within a comfortable range, and choose another exercise if the position remains painful. Do not assume that lower handles, tightly bent elbows, or heavier loading will fix an uncomfortable joint position.
The first length is easy and the third is a grind
Increase recovery time or reduce the planned work. Your best isolated push does not establish the right dose for repeated efforts. The session should be judged by whether you can repeat the intended task, not by how impressive the opening length looked.
Where sled pushes fit in a weekly plan
For learning, use a small block when you are reasonably fresh. That could be after a warm-up on a light training day or after main strength work if fatigue is still modest. Avoid making your first exposure the final challenge after an already exhausting leg session.
One session in the first week may be enough to learn how you respond. If recovery is comfortable, a second nonconsecutive session can be considered later. This is a conservative example, not a universal frequency prescription. Your existing training, walking demands, and recovery matter.
A seated leg press provides a more fixed setup for lower-body resistance work. It does not reproduce sled pushing, but it may be a better fit when the lane is unavailable or handle positions are uncomfortable. You do not have to force a sled session to keep training your legs.
For a different walking-based strength task, the farmer’s carry loads the hands while you walk upright. It requires its own clear route and sensible weight choice. If your immediate goal is easy sustained cardio, a recumbent bike workout may be easier to pace than repeated loaded pushes.
Frequently asked questions
Are sled pushes strength training or cardio?
They can challenge both muscular effort and breathing, with the balance changing according to load, speed, distance, rest, and your fitness. A short heavy push and a longer moderate series are different sessions. Describe what you actually performed instead of relying only on a category label.
Can I push an unplugged treadmill instead?
Do not use a conventional treadmill this way unless its manufacturer explicitly permits a sled-style mode and provides instructions. A machine designed with a resisted-push function is a separate piece of equipment with its own controls and safety requirements. It is not a reason to improvise on any belt.
Do I need a stopwatch?
No. A measured short route and a count of completed pushes are enough for initial practice. Timing can become useful later, but it may encourage rushing before your setup is reliable. If you do record times, compare them only under similar equipment and surface conditions.
Should I be sore afterward?
Soreness is possible, especially after unfamiliar work, but it is not a required sign of a useful session. Neither its presence nor absence proves the dose was ideal. Pay more attention to comfortable movement, recovery, and whether the next planned workout remains manageable.
Keep a log that explains the actual resistance
Record the sled, surface, handle position, added plates, base mass if known, distance per push, number of pushes, and approximate rest. Note whether the route felt different in the opposite direction. These details make a later comparison much more meaningful than a plate total alone.
Workit offers personalized workout programs and a journal with editable weights, reps, and sets. Keep your broader training there, and preserve sled-specific route and surface details in your accompanying workout notes.
The next session should begin with the same quick calibration, even if the last one went well. A controlled sled push starts with the conditions in front of you, then builds only as far as your steps, grip, and breathing can remain organized.