
Published October 11, 2026
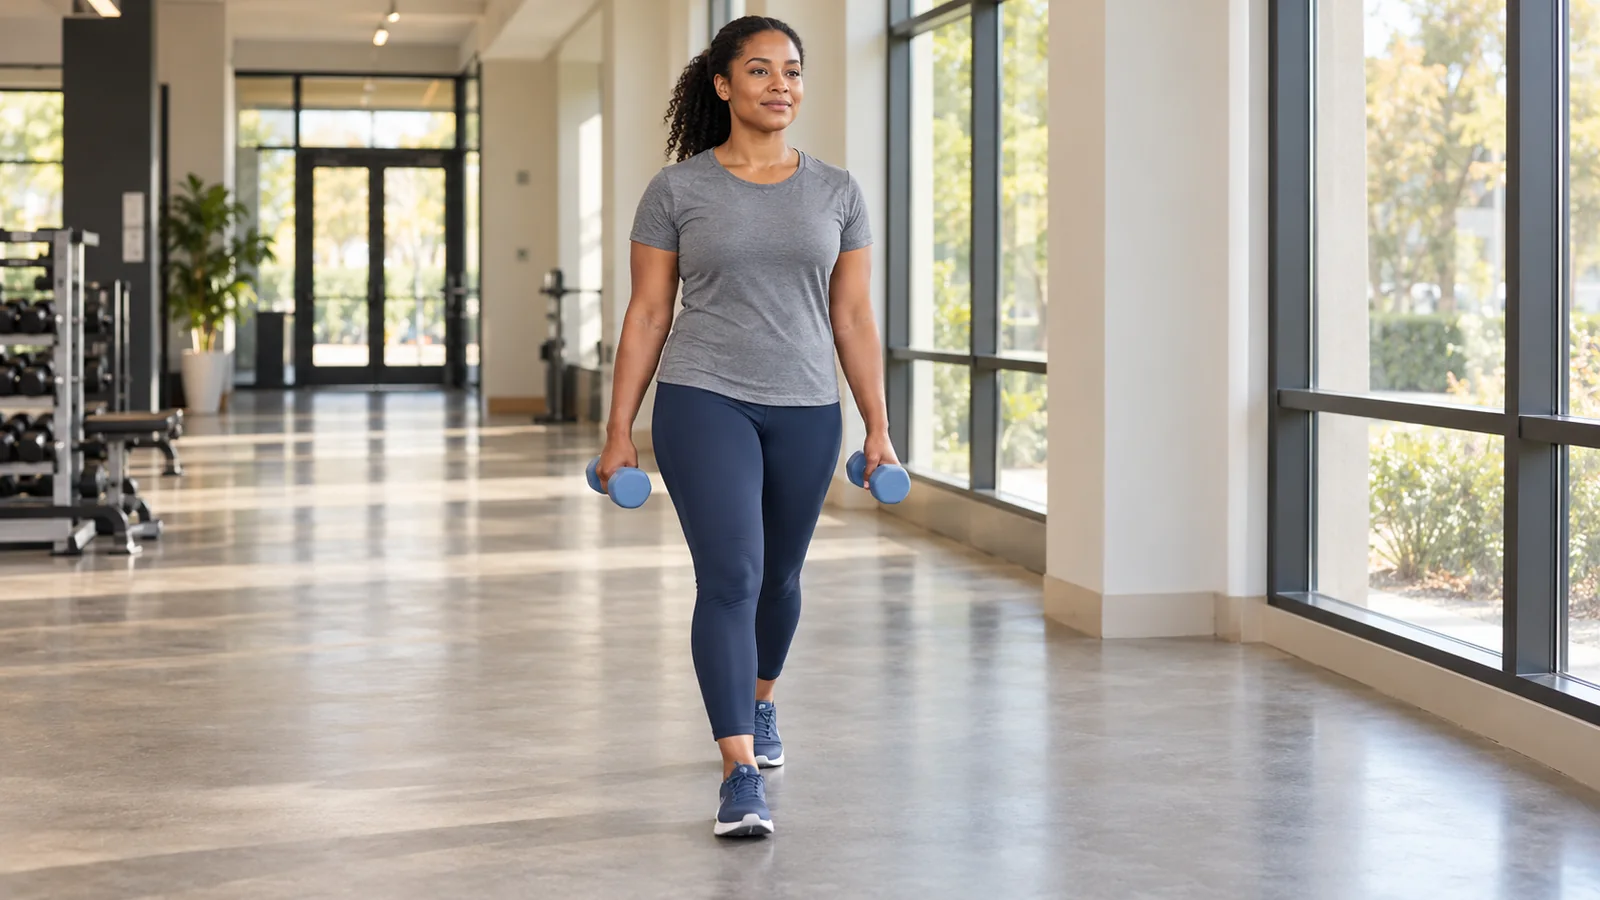
A farmer’s carry is a loaded walk: hold a manageable weight in each hand, stand comfortably tall, and walk with controlled steps along a clear path. Keep the weights steady, breathe throughout the effort, and set them down before your grip or walking deteriorates. Start with short distances or brief timed sets rather than testing how long you can hang on.
Also called the farmer’s walk, this exercise gives your grip, trunk, and whole-body coordination a simple challenge. The useful details are choosing the right load, planning the pickup and finish, handling turns, and recording a workload you can repeat. Here is how to put those pieces together.
What is a farmer’s carry?
The standard farmer’s carry uses a weight on each side of your body. Dumbbells, kettlebells, or dedicated farmer’s handles are common options. You lift the implements, walk a planned distance or time, and return them to the floor under control.
The ACE exercise library describes the basic dumbbell version as a full-body exercise performed over a predetermined distance. Choosing that distance before starting is especially helpful because you can plan a safe endpoint.
A suitcase carry uses one weight on one side. It introduces a different asymmetrical challenge and is usually performed on both sides in separate sets. A front-rack carry or overhead carry changes the load position again. These are related exercises, but their weights and times are not interchangeable.
For a first attempt, two matching dumbbells on a flat, open surface offer a straightforward setup. There is no need to start with specialized strongman equipment or copy competition loads.
Muscles worked and realistic benefits
Your finger and forearm muscles work to maintain the grip. Your shoulders and upper back support the hanging weights, while your trunk helps control unwanted movement. Your hips and legs continue doing the work of walking under the added load.
That combination can make carries useful for practicing sustained grip, managing a load while moving, and adding a brief conditioning challenge. It does not mean every involved muscle receives the same training stimulus or that the exercise replaces an entire strength program.
The NSCA discussion of loaded carries describes potential applications for grip, trunk, and work capacity while also noting limited research. That is a more useful perspective than promises that one exercise will fix posture, prevent injuries, or transform every muscle.
For example, a set might end because your fingers are tiring even though your legs could keep walking. That set provides information about the carry, but it is not equivalent to taking your quadriceps through a challenging squat set.
What the research can and cannot tell you
A biomechanical study of six experienced male strongman athletes compared the farmer’s walk with unloaded walking and deadlifting. Loaded walking changed several gait and force measures. The participants and loads were highly specific, so the study does not establish a beginner’s ideal starting weight.
Another study of strongman exercises examined trunk activity and modeled spinal loading across several events, including carries. It helps explain that these exercises place demands on the torso; it does not demonstrate that heavy carries cure back pain.
Use the research to understand the exercise’s demands, then apply conservative practical judgment to your own setup. The sample programs below are general examples, not protocols proven superior in head-to-head trials.
If your goal is rehabilitation or managing a medical condition, get an individualized recommendation. A familiar-looking task such as carrying weights can still become demanding quickly.
Check your equipment and walking lane first
Choose a level, dry, nonslip area where you can walk without crossing another person’s exercise space. Move loose weights, bottles, bags, and cables. At home, keep pets and children away from the lane and the place where you will lower the load.
Check the full width of your setup. The weights extend beyond your hips, so a doorway that fits your body may not fit the carry. Allow room for a turn, or use a shorter straight route with a planned stop.
Inspect adjustable dumbbells and attachments according to the manufacturer’s instructions. Handles should be dry and secure. A loose plate, damaged handle, or shifting load is a reason to change equipment.
Use stable footwear that allows reliable contact with the floor. Avoid slick socks on a smooth surface. Do not perform loaded carries on a moving treadmill; a flat, clear floor gives you a more controllable place to start and stop.
How to do a farmer’s carry, step by step
- Place the weights beside you. Arrange them where you can reach both handles without twisting. Check the route and the set-down area.
- Get a secure grip. Bend your hips and knees enough to reach the handles comfortably. Keep the load close to your body.
- Stand before walking. Push through your feet and straighten your hips and knees. Pause briefly to establish balance.
- Find a comfortable tall position. Keep your head facing ahead and your ribs roughly over your pelvis. Let your arms hang with the weights by your sides.
- Walk smoothly. Take controlled, comfortable steps. Avoid rushing, exaggerated strides, and swinging the weights.
- Keep breathing. Maintain enough trunk tension to control the load without holding your breath throughout the set.
- Finish deliberately. Stop walking, establish your stance, then bend your hips and knees to lower the weights with control.
Practice the pickup and set-down with a light pair before adding distance. If those transitions are awkward, the walking portion is not the only part that needs adjusting.
Posture cues that help without making you rigid
Think “stand comfortably tall” rather than forcing your chest upward. An exaggerated back arch does not improve the exercise. Aim for a position in which your trunk feels steady and you can still take comfortable breaths.
Your shoulders do not need to be squeezed together or pulled down as hard as possible. Let them support the load in a comfortable position. If you are visibly shrugging, straining your neck, or feeling painful traction, reduce the weight and reassess.
Keep your gaze far enough ahead to see the lane. Looking down briefly to check the floor is different from walking the entire set with your chin tucked and your attention fixed on your shoes.
A carry includes normal movement as you walk. The goal is not to freeze every joint. Watch for an increasing side lean, large weight swings, stumbling, or a posture you cannot comfortably restore. Those are practical signals that the current set should end.
How heavy should a farmer’s carry be?
Choose a weight you can pick up, walk with, and put down comfortably while maintaining control. The first test should be deliberately easy: stand with the weights, take a few steps, then lower them. If that feels reliable, try a short planned set.
A useful starting target is roughly fifteen to twenty seconds or a short clear lane. Finish with a margin rather than waiting for your fingers to open. If your grip is already slipping halfway through, reduce the weight or distance.
There is no universal percentage of bodyweight that makes a carry appropriate. Handle thickness, grip size, training experience, walking space, and pickup height all affect the task. Competition standards and online benchmarks are poor starting prescriptions for an unfamiliar movement.
Use our guide to choosing dumbbell weight for the broader load-selection process. For carries, include the transitions and walking quality in that decision, not just whether you can briefly hold the load.
Time or distance: choose one main target
Distance works well when you have a consistent lane. Mark a clear start and finish and record the length. For example, three sets of twenty meters means sixty meters of total carrying, with recovery between sets.
Time can be more convenient when the space changes, but keep the route and pace reasonably consistent. Three twenty-second sets produce sixty seconds of carrying, not a continuous one-minute carry. The recovery periods change the task.
You can record both time and distance, but avoid trying to improve everything simultaneously. Walking faster to beat a timer may conflict with learning a controlled carry. For general training, steady movement is a better initial target than speed.
If you have only a short lane, count the number of lengths and turns. Ten meters out and ten meters back is twenty meters. Frequent turning makes that set different from walking twenty meters in a straight line, even though the distance matches.
Turn without twisting under the load
Slow down as you approach the end of the lane. Make the turn through several small steps so your feet and body change direction together. Avoid planting one foot and sharply rotating your torso while the weights keep moving.
Allow enough space that the implements cannot hit a wall, bench, or another person. If the turn is tight, shorten the route or finish the set before it. You can set the weights down, reposition, and begin a new set after resting.
Do not backpedal with heavy weights just to avoid turning. Walking backward adds a different coordination demand and makes it harder to see obstacles. Keep your first carries simple and forward-facing.
A load that feels manageable in a straight line can become awkward during a turn. Include that part of the route when judging whether you are ready to increase weight.
Beginner sets, rest, and weekly frequency
Start with two or three short carries, using a load that leaves your walking and grip controlled. A practical range is fifteen to thirty seconds or about ten to twenty meters per set, depending on the space available. These are conservative examples rather than mandatory targets.
Rest until your hands, breathing, and balance feel ready for another reliable effort. Around one to two minutes may be enough for a manageable set; heavier work may require longer. Do not shorten rest merely to make the exercise feel more intense.
One or two weekly exposures can be a sensible way to introduce carries within a broader routine. Consider your rows, deadlifts, pull-ups, manual work, and other grip demands before adding more.
If your hands remain fatigued enough to compromise the next workout, reduce the carry dose. You can improve the exercise with a modest amount of repeatable work rather than turning every session into a grip endurance test.
A four-session progression example
Imagine you have selected two 8-kilogram dumbbells and a clear ten-meter lane. That load is hypothetical. You can walk the lane steadily and lower both weights with a useful margin remaining.
- Session one: Complete three ten-meter carries. Rest as needed between them.
- Session two: Repeat the same weight and distance, aiming for equally controlled pickups and finishes.
- Session three: If the work feels comfortable, extend each carry slightly on a suitable route, or add a few seconds. Keep the load unchanged.
- Session four: Repeat the new distance. If you instead choose a heavier pair, return to the original short route.
You do not have to progress every session. If a longer carry makes your shoulders uncomfortable or your hands unreliable, return to the previous dose and assess whether it suits your goal.
A change in equipment can also require a reset. A thick-handled kettlebell and a narrow-handled dumbbell can feel very different at the same labeled weight. Record the implement rather than treating the number as the entire exercise.
Where carries fit in a strength workout
Place carries according to your main priority. If heavy rows or deadlifts are important that day, doing challenging carries first may fatigue your grip before those exercises. Many people therefore put moderate carries near the end of a session.
If learning the carry is your main task, practice it while fresh with a light load. You can complete the rest of your workout afterward without exhausting your hands during the practice.
Our exercise-order guide explains how priorities and fatigue affect sequencing. There is no requirement for a carry to be a punishing final event.
A simple session could include a goblet squat, a supported row, an incline push-up, and two short carries. Another day might use a step-up as the lower-body movement. Choose familiar exercises and enough rest that the carry begins with stable walking.
How to log carries without confusing the numbers
Record weight per hand, implement type, sets, distance or duration, rest, and any important route detail. “Dumbbells, 10 kg each hand, 3 × 20 m, one turn per set” is much clearer than “farmer carry, 20 kg.”
Two 10-kilogram dumbbells equal 20 kilograms of external load in total. That does not mean the session can be directly compared with a one-handed 20-kilogram suitcase carry. The distribution of the weight changes the task.
Add a brief note about what ended the set: planned endpoint, grip fatigue, breathing, or technique. That note helps distinguish a load that needs reducing from a distance that simply needs adjusting.
Use a workout log to keep those details consistent. You do not need a complicated tonnage calculation to make progress. Compare like-for-like sessions first, then change one meaningful variable.
Common farmer’s carry mistakes
Carrying until the weights fall
End the set before grip failure. A dropped dumbbell can injure you or someone nearby, and catching a slipping implement can create a sudden awkward movement. A planned set-down is part of a successful repetition.
Starting with an ambitious bodyweight benchmark
Choose a load based on your current performance. Benchmarks omit equipment differences and individual history. A smaller weight carried reliably is a useful training starting point.
Taking hurried or exaggerated steps
Slow down and choose a comfortable stride. If the weights swing or your feet cross unpredictably, shorten the set. You are allowed to walk at an ordinary pace.
Ignoring the pickup
If the weights are hard to reach or lift cleanly, use lighter equipment or a suitable setup shown by a qualified coach. Do not improvise unstable elevated supports to avoid practicing the transition.
Adding carries to every workout
Count the demands on your hands and upper body across the week. More carries can compete with other training when recovery is limited. Start modestly and increase only when there is a clear reason.
Farmer’s carry versus suitcase carry and static holds
The two-handed farmer’s carry distributes external load on both sides. A suitcase carry puts it on one side, so your body has to manage the asymmetry. Begin lighter when changing to the one-sided version, and train both sides with a comparable dose.
A static hold removes the walking component. It may suit a setting without a safe lane, provided you can pick up and lower the weights safely. It trains holding a load, but it should not be logged as the same distance-based exercise.
Marching in place adds repeated single-leg support and can be less stable than it appears. It is an optional variation, not an automatic beginner substitute for limited space.
Overhead and front-rack carries require different positions and may introduce additional wrist, shoulder, or balance demands. Learn those separately if they fit your goals. There is no need to progress through every carry variation.
Grip aids, gloves, and straps
Dry handles and an appropriate load should come first. Chalk may improve friction if your gym permits it, but it does not make a slipping, fatigued grip safe. Wipe sweaty handles and hands before the next set.
Gloves change the feel and effective thickness of the handle. If you use them, make sure they fit securely and keep that setup consistent when comparing workouts.
For basic carries, avoid using straps as a reason to carry more than you can manage. Straps change the grip challenge and can complicate releasing an implement. Specialized uses belong in a deliberate program with appropriate equipment and coaching.
If hand pain, numbness, or tingling appears, stop rather than covering the symptom with more padding. Persistent symptoms deserve assessment, particularly when they also occur outside training.
Safety limits and reasons to stop
Put the weights down if you become dizzy, develop sharp pain, cannot breathe comfortably, or cannot control your steps. Do not try to finish the remaining distance simply because it was written in your plan.
If you have a condition for which heavy straining or loaded walking is restricted, follow your clinician’s guidance. Carries can require substantial effort even when they look simple. Avoid holding your breath through a long set.
Recurring back or shoulder symptoms, balance problems, or a recent injury may call for a different exercise or supervised progression. Carries are a training option, not a diagnostic test or a guaranteed rehabilitation treatment.
Frequently asked questions about farmer’s carries
Will farmer’s carries build my forearms?
They challenge the muscles involved in supporting the grip and can be part of forearm training. The result depends on load, effort, progression, and your other training. A carry-specific muscle-growth guarantee would go beyond the evidence.
Are they cardio or strength training?
They can challenge both muscular effort and breathing. The emphasis changes with load, duration, and recovery. Short carries do not automatically replace a broader aerobic training routine.
Should I carry the same weight in both hands?
Matching weights make the standard version easier to compare. Uneven loading is a separate variation that changes the balance demand. Do not accidentally create it because the available dumbbells look similar.
Make your first carry repeatable
Clear a short lane, choose a manageable pair of weights, and rehearse a controlled pickup and finish. Complete a few brief sets with a margin remaining. Record the load per hand and the distance or time, then build gradually from a setup you trust. If you would like to look at the app, explore Workit.