
Published October 15, 2026
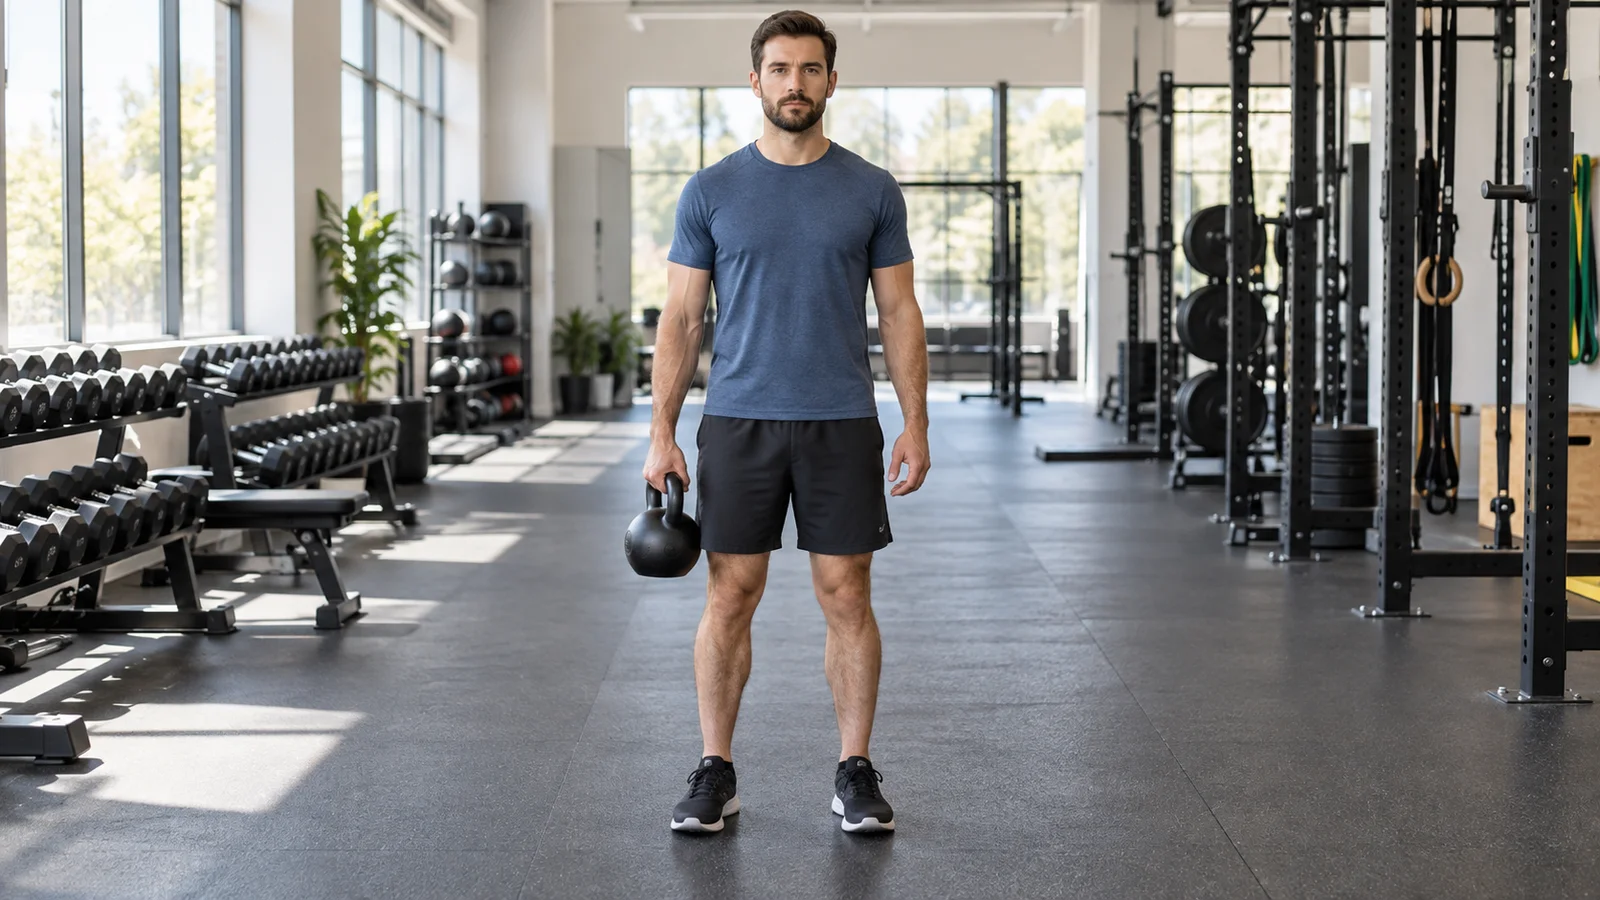
A suitcase carry means walking with one weight at your side while keeping your torso comfortably upright. Start with a light dumbbell or kettlebell, walk slowly along a clear route, and stop before you lean, twist, or lose your grip. A practical first session is two short carries per hand, about 15–20 seconds each, with enough rest to repeat the same controlled posture.
The defining challenge is the uneven load. Your trunk has to resist being pulled sideways while your legs keep moving. That makes this a useful exercise to learn deliberately, rather than treating it as a farmer’s walk with one weight missing. The goal is repeatable movement, not the longest possible struggle across the gym.
What makes a suitcase carry different?
In a two-handed farmer’s carry, weights hang on both sides. In a suitcase carry, one hand carries the entire external load. That creates a sideways bending demand, and the trunk muscles work together to manage it. Coaches commonly call this an anti-lateral-flexion exercise: you are practicing resisting excessive side bending.
Resisting movement does not mean becoming a statue. Walking naturally involves small changes in position. You are trying to avoid an obvious sideways collapse, exaggerated counterlean, or rotation that grows as you become tired. Your stride should still resemble your ordinary walk.
The NSCA’s discussion of loaded carries places them in the broader context of hip and trunk stability. That supports using carries as one training option; it does not establish a universal weight, distance, or promise that carrying will prevent injury.
If your main interest is holding two heavy implements and developing your general carry capacity, see our farmer’s carry guide. Here, the focus stays on controlling a one-sided load.
What muscles does the suitcase carry work?
Your forearm and hand muscles keep the handle secure. The shoulder region supports the hanging load. Muscles around the trunk, including the obliques and spinal extensors, help organize your position as the weight pulls on one side. Your hips and legs support and propel each step.
It is tempting to say that only the side opposite the weight works. The actual task is more coordinated than that. Several muscle groups contribute, and the demands change with your posture, walking speed, load, and body proportions. Train both hands rather than trying to assign the whole exercise to one small muscle.
You may notice your grip first, even if you chose the movement for your trunk. That does not make the set useless. It tells you which part is limiting the version you are doing. A lighter weight, shorter trip, or stationary hold may let you practice the intended position more effectively.
Do not judge success by whether your abdomen burns. Being able to maintain your position, breathe, and place each foot predictably is more useful feedback than searching for a dramatic sensation.
Choose equipment and a route before choosing weight
Dumbbell or kettlebell?
Either can work. A dumbbell is often easy to find in small weight increments. A kettlebell gives you a handle above the mass of the bell, which some people find convenient. Choose the implement you can grip fully without pinching your fingers or bending your wrist sideways.
Inspect the handle and make sure it is dry. Avoid an adjustable implement with loose components. Household bags are less predictable because their contents can shift, straps may break, and the load may swing against your leg. A secure exercise weight is a simpler learning tool.
Make the walking space boring
Use a level, dry, unobstructed route with enough room for your body and the weight. Keep away from crowded racks, moving treadmills, stairs, loose mats, and people performing other exercises. You should not have to step over anything or squeeze around a bench while carrying.
A short straight lane is enough. If turning would require a sharp pivot, stop and put the weight down before changing direction. The route does not need to be a measured track. You can use time or a consistent number of comfortable steps, provided you record which method you chose.
Keep your phone out of your hands. If you use a timer, set it before picking up the weight or have it visible from a safe location. Looking down to manage a screen changes the task and distracts you from the floor.
How to do a suitcase carry, step by step
- Set up beside the weight. Stand with your feet comfortably apart. Place the handle where you can reach it without twisting or stretching sideways.
- Pick it up under control. Bend at your hips and knees as needed, take a full grip, and stand with the weight close to your side. If lifting from the floor is awkward, use an appropriate stable raised surface or ask a trainer for help setting up.
- Organize your posture. Face ahead, let your shoulders sit comfortably, and keep your ribs roughly over your pelvis. Avoid lifting the loaded shoulder toward your ear or deliberately pushing it down as hard as possible.
- Pause before moving. Take an ordinary breath. If you must lean substantially to hold the weight still, select a lighter load.
- Walk with small, natural steps. Keep the weight beside you without deliberately swinging it. Let the free arm move comfortably rather than stretching it out as a counterweight.
- End while you still have control. Stop your feet, then lower the weight with the same controlled hip-and-knee movement you used to lift it. Rest before changing hands.
Think of the pickup, walk, and set-down as one exercise. A technically tidy walk does not compensate for a rushed twist when the weight leaves the floor. Leave enough energy to finish the whole sequence safely.
How upright should you be?
Use “comfortably tall” as a cue, not “perfectly vertical at any cost.” Your body will make small adjustments under load. What you want to avoid is a visible and increasing lean that changes your stride or feels like you are hanging on one side of your back.
Two common compensations look opposite. Some people collapse toward the weight. Others lean far away from it to balance the load. Both are reasons to reduce the challenge and rebuild control. Squeezing your abdomen harder is not always the answer if the weight is simply too heavy.
A brief video taken from the front, with the camera positioned safely outside your lane, can help you compare the beginning and end of a set. Look for increasing lean, shoulder hiking, uneven steps, and the weight drifting away from your leg. You do not need a precise angle measurement.
If you have a longstanding spinal condition, current pain, or have been advised to limit one-sided loading, ask a qualified clinician or exercise professional whether this movement suits you. A carry is an exercise option, not a treatment plan.
Breathing and bracing without turning the carry into a strain
Gently firm your trunk as though preparing to move a moderately heavy object, then keep breathing. You should not need to hold your breath for the entire walk. A short set with ordinary breathing is a better starting point than a longer set powered by a prolonged strain.
If you cannot take a comfortable breath without losing your position, reduce the load or duration. Do not try to force large, theatrical breaths while keeping every muscle maximally tense. The aim is enough muscular effort to manage the task.
Stop if you feel dizzy, develop unusual shortness of breath, or experience sharp pain. Chest pain, fainting, or severe breathing difficulty warrants urgent medical attention. Ordinary effort and gripping fatigue are different from warning symptoms.
How heavy should a beginner go?
There is no single starting weight that fits every beginner. Body size, grip strength, training history, handle shape, and balance all affect the choice. A percentage-of-body-weight target can create false precision before you have learned the movement.
Start lighter than your strongest two-handed carry. Hold the weight at your side for a few seconds, then try a short walk. Your first useful weight lets you keep your steps steady, maintain a secure grip, and set it down with control. You should finish feeling that you could have walked a little farther with the same technique.
Check both hands before deciding that a weight is appropriate. If one side feels clearly less controlled, let that side set the initial dose. Use the same weight and short duration on each side instead of adding extra work to “correct” a difference you have not assessed.
For example, if your right hand can carry a particular dumbbell comfortably for 20 seconds but your left hand starts slipping after 12, use a lighter dumbbell or shorter carries for both. You can investigate persistent differences with a trainer, particularly if weakness is new, painful, or accompanied by numbness.
A simple beginner suitcase-carry session
The following is an example for a generally healthy adult learning the exercise, not a tested prescription for every person. Add it to a manageable strength workout once or twice a week initially, with recovery between sessions.
- Take an unloaded walk through the route and clear any obstacles.
- Perform one brief practice hold with a light weight in each hand, one at a time.
- Carry for 15–20 seconds with the first hand.
- Rest about 45–60 seconds, or longer until your grip and breathing feel ready.
- Carry for the same time with the other hand.
- Rest again, then repeat the pair once.
That is two carries per hand, four carries in total. At 20 seconds each, the loaded walking time is 80 seconds. With three one-minute rests between those four carries, the work-and-rest block takes 4 minutes 20 seconds, plus setup, practice, transitions, and any extra recovery. It is not a complete full-body workout.
Shorter sets are entirely reasonable. Ten controlled seconds per side can be a productive first exposure if you are unfamiliar with loading or have limited space. You do not need to reach a minimum distance before the movement counts as practice.
Progress one thing at a time
Keep the same route, weight, and basic technique for several sessions so that you can tell what is changing. When both sides feel controlled and recovery is comfortable, choose one small progression. Do not simultaneously increase weight, walking time, and the number of sets.
First, improve consistency
Your first improvement may be less leaning, smoother turns, or a calmer pickup. Repeat the same dose until the final carry looks like the first. That is meaningful progress even when the number on the dumbbell stays the same.
Then add a little time or distance
You might move from 15 seconds to 20 seconds per hand while leaving everything else unchanged. Or add a few steps to a measured route. Choose one measurement system rather than increasing both the distance and the time target.
Then consider a small load increase
Once the existing dose feels comfortably repeatable, try the next sensible weight and shorten the walk again. If the available jump is too large, stay with the current weight. You do not need to compensate for a coarse dumbbell rack by walking until your grip fails.
A possible sequence is two 15-second carries per side, then two 20-second carries, then two 25-second carries. After comfortable sessions at that dose, a slightly heavier weight might return you to 15 seconds. These are examples of organizing practice, not deadlines or mandatory weekly increases.
Common problems and practical fixes
“The weight keeps bumping my leg.”
A little proximity is normal, but repeated collisions suggest swinging, an awkward implement, or a stride that is too long for the load. Slow down and take slightly shorter steps. Do not solve it by holding the weight far away from your body; that changes the demand and may overload your shoulder.
“My shoulder keeps shrugging.”
Reduce the weight and reset before you walk. Think of carrying the handle with a relaxed neck rather than pulling it upward. Avoid the opposite extreme of aggressively dragging the shoulder downward. If you cannot find a comfortable shoulder position, choose another exercise and get your setup checked.
“My grip gives out first.”
Shorten the set or use a lighter implement with a manageable handle. Stop before the handle slips. For beginner practice, straps can add complexity and make releasing the weight less straightforward; they are unnecessary for learning this version.
“I feel it only in my lower back.”
Some trunk effort is expected, but pain is not a goal. Check for leaning, twisting, over-arching, and breath holding. Reduce the challenge. If discomfort persists, stop and seek individual guidance rather than repeatedly testing whether the next set feels better.
“I wobble when I turn.”
Use a straight route or put the weight down before changing direction. Later, a wide turn with several small steps may be appropriate. Avoid swiveling abruptly on one planted foot while a weight swings at your side.
What if you have almost no walking space?
A stationary suitcase hold is a useful starting alternative. Stand with one weight at your side, breathe normally, and maintain a comfortable upright position for a short period. It removes the foot-placement and turning demands, so it is not identical to walking, but it lets you practice the uneven load.
Do not automatically replace walking with high-knee marching. Marching adds a single-leg balance challenge and may be harder than the original task. If a hold is steady and you want to progress, first find a safe place for a few ordinary steps.
For another way to train resistance to sideways bending without carrying a weight through a room, see our side-plank form and progression guide. Choose the variation that fits your space, current ability, and comfort.
Where suitcase carries fit in a workout
A carry can fit after your main strength exercises, when you still have enough coordination and grip control to perform it well. If demanding deadlifts or rows leave your hands exhausted, lower the carry dose or place it on a different day.
Alternatively, a very light practice carry early in the session can help you learn the movement before fatigue accumulates. Keep that version easy so it does not interfere with the exercises you care about most. Placement depends on your priority, not on a universal rule that carries must be a finisher.
Avoid turning the movement into a race between strength sets. When your goal is trunk control, shortened rest and frantic walking can make the exercise less useful. You can build conditioning elsewhere without making every carry an exhaustion test.
Include other movement patterns across your week. A one-sided carry does not replace squatting, hinging, pushing, pulling, or aerobic activity. It earns its place by filling a specific role in a broader routine.
What to record after each session
Write down the implement, weight, time or distance, number of carries per side, and one short technique note. “Two 20-second carries each hand, no leaning, left grip tiring” is more useful than “core done.” Record the actual load label and units.
Also note unusual circumstances such as a crowded route, a thicker handle, or carries performed after heavy pulling. Those details help explain why a familiar weight felt different. Our workout log template gives you a simple structure to adapt.
Review trends over several sessions. One easy day does not obligate you to increase the weight, and one difficult day does not erase progress. Reliable technique and a repeatable dose are the foundation.
Suitcase-carry questions
Should I train the weaker side twice as much?
Not automatically. Begin with equal, manageable work on both sides and let the less controlled side guide your starting dose. Extra unilateral volume is a programming decision, not a default remedy for every difference.
Can suitcase carries reduce waist fat?
They train your ability to carry an uneven load; they do not selectively remove fat from your waist. Choose them for movement and strength goals rather than a promise of spot reduction.
Can I use my heaviest dumbbell?
Only if it genuinely fits the task, which is unlikely to be the best way to learn. A weight that forces immediate leaning or an unsafe pickup is too challenging for your current version, regardless of what you can lift in other exercises.
Do I need soreness the next day?
No. Soreness is not the target or a reliable score for the session. Judge the exercise by your execution, gradual tolerance, and ability to repeat it without troublesome symptoms.
Make your next carry easy to repeat
Choose one secure weight, a clear route, and a short dose you can complete on both sides. Keep breathing, walk naturally, and stop before your posture or grip unravels. Once that feels consistent, adjust one variable at a time.
Use a simple log to keep your carry dose consistent. Workit’s workout journal lets you record weights, repetitions, and sets and revisit your saved workout history. Keep your carry time or distance alongside your record, and use repeatable technique to guide the next step.