
Published
The simplest push-up progression for beginners is to start with your hands on a wall or a secure elevated surface, practice controlled repetitions, and gradually lower the hand height. Train two or three nonconsecutive days a week, use a variation that allows about 6–10 good repetitions, and stop before your body position breaks down. Floor push-ups come when the strength and control are ready.
You do not need to do hundreds of repetitions, test yourself daily, or follow a deadline for your first full push-up. An adjustable incline lets you practice the pressing movement at a manageable difficulty while keeping the whole-body position similar to the floor version.
This guide explains how to choose your starting height, perform each repetition, progress between surfaces, and handle common sticking points. The sample routine is general guidance for adults who can exercise without restrictions. Pain, a recent injury, or a medical restriction calls for an individualized approach.
The progression in one simple sequence
- Wall push-up: useful when a high horizontal surface is still too demanding.
- High incline push-up: hands on a fixed, sturdy counter or suitable gym bar.
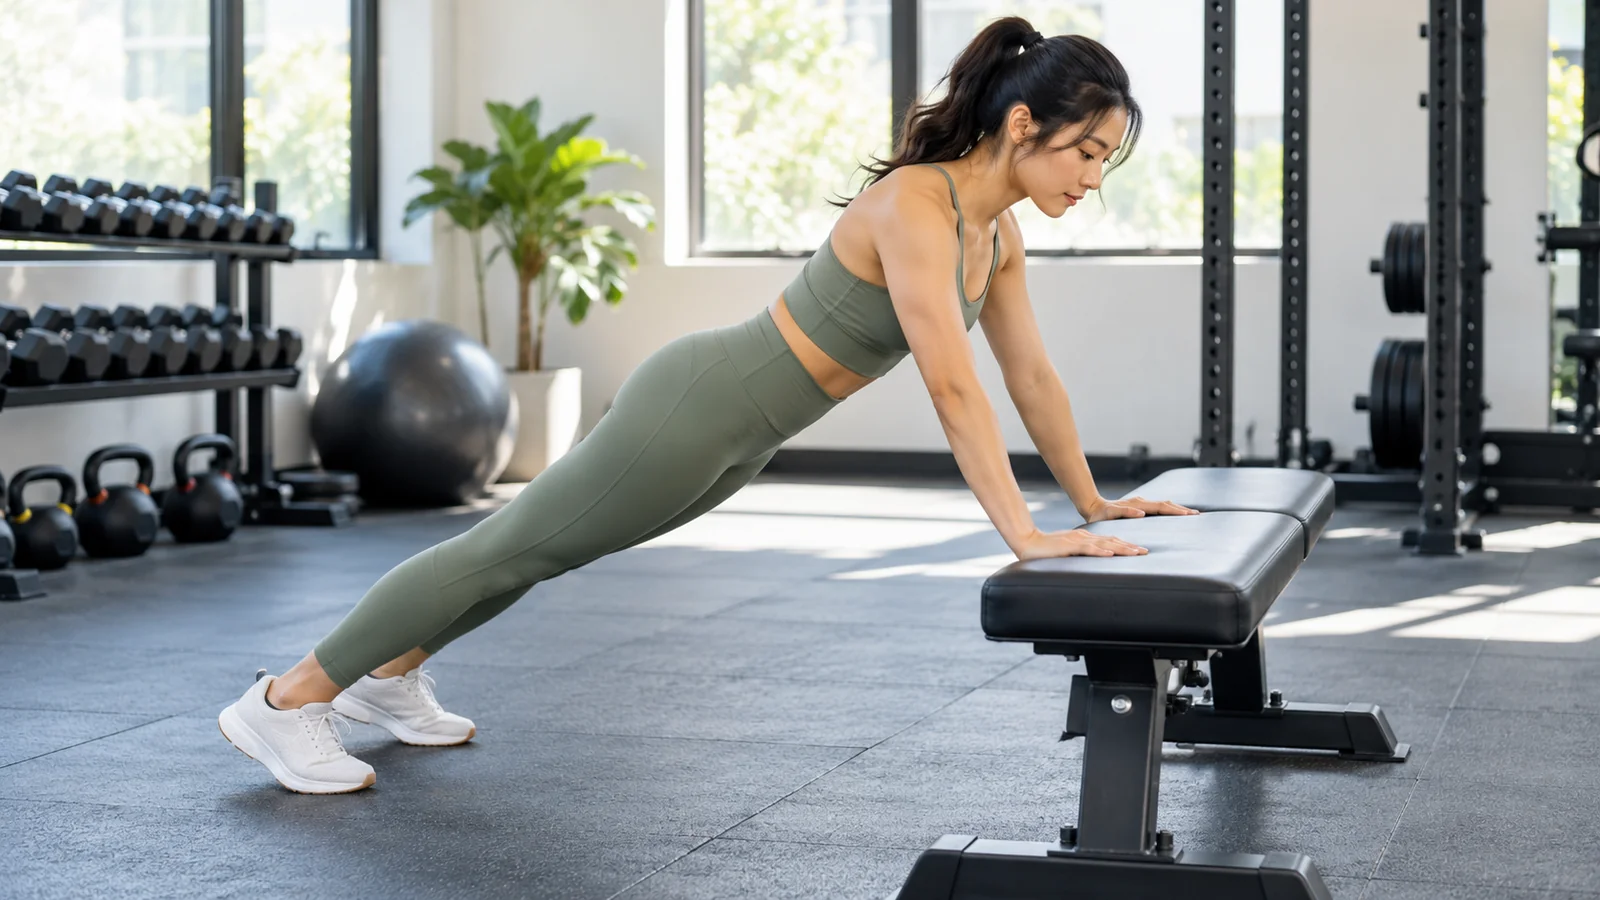
- Lower incline push-up: hands on a secure bench or progressively lower fixed bar.
- Floor push-up: hands and toes on the floor, with the body moving as one unit.
You can begin anywhere in that sequence. Knee push-ups and controlled lowering repetitions are optional tools, explained below. They are not compulsory stages, and you do not have to complete a particular number of wall push-ups before trying an appropriate incline.
A practical progression rule is to lower your hands one small step after completing all planned sets at the top of your repetition range with good control on two sessions. Expect the repetitions to fall after a harder change. If the new variation makes controlled movement impossible, the step is too large.
Why elevating your hands helps
Raising your hands changes the exercise’s leverage and generally reduces the load borne by the upper body. That gives you a way to practice the same broad pressing pattern without having to move the full demand of a floor push-up immediately.
In a small laboratory study of push-up variations, hands-elevated and knees-down versions produced lower peak vertical ground-reaction forces than the regular version. The study involved 23 recreationally fit people and measured loading, not how quickly beginners learned a first push-up. It supports adjusting the exercise’s difficulty, but it does not establish a guaranteed training timeline.
Hand height is also easy to document. “Two sets of eight at the fixed bar’s fifth position” is a clearer baseline than “some easier push-ups.” Your exact load still depends on your setup and body proportions, so avoid treating an online bodyweight percentage as a precise measurement.
Choose a safe surface before choosing a rep target
A wall should be solid, with enough clear space for your hands and feet. A counter or bench must be stable, strong enough for the load, and unable to tip or slide. Avoid glass tables, rolling furniture, lightweight chairs, and folding surfaces that can collapse.
In a gym, an adjustable bar can offer smaller height changes than moving from a kitchen counter directly to the floor. Ask staff which station is suitable, how its locks work, and how to secure it. Do not assume an unloaded bar is fixed just because it sits at the right height.
Wear footwear or use a floor surface that gives your feet reliable traction. Wipe away moisture that could make your hands slip. Leave room to step closer to the support or place your knees down safely when the set ends.
If getting to and from the floor is difficult, stay with an elevated version. A useful strength exercise does not become worthless because it is performed standing. Your training should fit your current access and movement needs.
Find your starting level in a few minutes
Begin with a height you expect to be fairly easy. Perform three slow, comfortable repetitions. If those feel smooth, try three more. Stop before you need to sag, twist, or push your head forward to finish.
For the routine in this guide, choose a variation that allows around 6–10 repetitions with roughly two or three more possible using the same technique. If you cannot reach six, use a higher surface. If ten feels effortless, try a modestly lower surface after resting.
Avoid turning this setup check into a long ladder of maximum sets. You only need a workable starting point, and it is fine to choose slightly easier than necessary on the first day. You can adjust after seeing how your body responds.
The reps-in-reserve guide explains this idea of leaving a small margin. Beginners will estimate imperfectly, so use visible control as your first guide rather than chasing an exact number.
Technique that carries across the progression
Hands and elbows
Place your hands around shoulder width or slightly wider, then adjust for comfort. Spread pressure through the hands rather than collapsing onto one edge. Let your elbows travel in a comfortable diagonal path instead of forcing them straight out to the sides or squeezing them tightly against your ribs.
A roughly 30–60-degree elbow angle to the torso can be a useful starting cue, but it is not a rigid rule for every body and surface. The goal is a repeatable position that does not create pain. NASM’s incline push-up demonstration provides a visual reference for the elevated version.
Body position
Think of moving your chest, hips, and legs together. Gently brace your abdomen and keep your neck in a comfortable line with your torso. You do not need to squeeze every muscle as hard as possible.
If your hips stay behind while your shoulders move, step into a more consistent whole-body position or choose an easier incline. If your lower back sags, shorten the set and reduce the difficulty. A brief plank can teach the starting position, but a longer plank alone will not supply all the pressing strength you need.
Lowering and pressing
Bend your elbows and bring your chest toward the support, or toward the floor for a standard push-up. Use a range you can control comfortably. Press away until your elbows straighten naturally, without snapping them into a forced end position.
Allow your shoulder blades to move around the rib cage as you lower and press. Do not try to clamp them together for the entire repetition. Keep the return smooth rather than bouncing off the surface or using a head thrust to imitate more range.
Breathing and pace
Inhale as you lower and exhale as you press if that rhythm feels natural. Keep breathing rather than deliberately holding a long breath. A controlled descent and steady press are sufficient; you do not need an elaborate tempo count.
When the final repetitions slow down, check whether you can still keep the same movement. Slower effort can be normal. Losing control or experiencing pain is a reason to stop the set.
How to perform each level
Level 1: Wall push-ups
Stand facing the wall with your hands around chest to shoulder height. Step your feet back enough to create a slight lean, keeping reliable traction. Bend your elbows to bring your torso toward the wall, then press away.
Start close to the wall if you need less resistance. Move your feet back only modestly as the exercise becomes easier, maintaining a stable body line. If the angle becomes awkward or your feet slide, return closer and look for a suitable high horizontal surface instead of continuing to increase the distance.
Level 2: High incline push-ups
Place your hands on a fixed counter or an approved gym support. Walk your feet back until your arms and torso are in a comfortable starting position. Lower your chest toward the edge while your body stays connected, then push the surface away.
Be careful with the edge’s position: your chest should approach it without your face striking anything. If the surface shape prevents a comfortable range, choose a different support rather than contorting your neck.
Level 3: Lower incline push-ups
Use a lower stable surface while preserving the same basic movement. A small height reduction may feel much harder, especially near the floor. Start with fewer repetitions and allow the new position to become familiar.
Check the setup again whenever you change surfaces. A lower bench can slide even when the higher counter was immovable. A harder exercise should come from the change in leverage, not from trying to balance on unreliable furniture.
Level 4: Floor push-ups
Begin in a high plank with hands and toes grounded. Lower your chest toward the floor while keeping your hips and shoulders moving together. Use a consistent, comfortable depth, then press back to straight arms.
For a full repetition in this guide, aim to bring the chest close to the floor without resting the body or leading the ascent with the hips. Body proportions affect what touches first, so avoid forcing contact that changes your shoulder position. If control disappears before that depth, return to an incline for most of your training.
A simple beginner push-up routine
Start with two nonconsecutive sessions each week. Add a third only if the current sessions are comfortable to recover from and fit your other pressing work. This is an example training structure, not a promise that everyone needs exactly the same volume.
- Prepare: spend a few minutes moving easily, then gently move the wrists, elbows, and shoulders through comfortable ranges.
- Warm up: perform one easy set of 5–8 repetitions at a higher incline than your working level.
- Practice: complete 2 working sets of 6–10 repetitions at your chosen height.
- Rest: allow about 90 seconds to two minutes between working sets, or longer when needed.
- Record: write down the surface, repetitions, and whether you could have done a couple more controlled repetitions.
After a few manageable sessions, you can add a third working set if you want more practice and are recovering well. Do not add the set on the same day that you make a substantial drop in hand height. Changing one variable at a time makes your response easier to understand.
If you already bench press or use a chest-press machine, count that toward your overall pressing workload. Replace some existing pressing with push-up practice rather than stacking a new challenge on top of everything.
When to lower the incline
Move to the next practical height when all your planned sets reach ten controlled repetitions with a little capacity left on two sessions. Keep the same approximate depth and body line when you make that judgment.
For example, you might record 8 and 7 repetitions at a counter, then 9 and 8, then 10 and 10. After repeating 10 and 10 comfortably, try a slightly lower secure support. Six good repetitions at the new level can represent progress even though the number is smaller.
If you cannot do six at the new height, the jump may simply be too big. Look for an intermediate surface. Alternatively, perform one small, controlled set at the harder height and use the previous height for your remaining work, provided the harder repetitions are comfortable.
This approach uses the same principle as double progression: improve repetitions within a range, then increase the challenge. Here the difficulty change comes from leverage rather than adding a weight plate.
Where knee push-ups and negatives fit
Knee push-ups are a valid option
Supporting yourself on your knees reduces the demand compared with a toes-supported floor push-up. Keep a line from your head through your hips to your knees rather than sitting back toward your heels. Use padding if needed for comfort.
Knee push-ups can build pressing strength when an appropriate elevated surface is unavailable. Their body position differs from the full version, so include some comfortable incline practice when you can. Neither exercise is universally superior, and you do not need to label knee push-ups by gender.
Controlled lowering is optional
If you can maintain a floor plank, you may practice a few slow lowering repetitions. Lower for roughly three seconds, then place your knees down and reset rather than struggling to press back up. End the descent safely before control is lost.
Begin with two or three total repetitions, replacing part of your regular work. Unfamiliar lowering work can create substantial soreness, so avoid adding many sets at once. If you drop rapidly or your shoulders hurt, stay with incline repetitions. Negatives are a tool, not an entry requirement.
Troubleshoot the problem you actually have
Your wrists are uncomfortable
Stop and check hand placement, the support edge, and how much load you are taking. A higher incline may be more comfortable. Stable push-up handles designed for the purpose can reduce wrist extension, but avoid round dumbbells or anything that can roll.
Handles change the available depth, so do not automatically lower farther between them. Persistent pain, numbness, or symptoms that continue outside training deserve professional advice rather than repeatedly testing a painful variation.
Your shoulders feel pinched
Stop the painful repetition. Try an easier height and check whether your hands are too far forward or your elbows are forced into an awkward position. Keep the movement within a comfortable range. If pain returns, get an assessment rather than treating it as normal beginner weakness.
Your lower back sags before your arms tire
Raise your hands and shorten the set. Practice holding the easier starting position briefly while breathing, then add controlled repetitions. More fatigue is unlikely to fix a body position you already cannot maintain.
You can do many wall push-ups but no counter push-up
The change in angle may be too large. Choose a higher horizontal surface or a gym setup with smaller height increments. A large wall repetition count does not guarantee readiness for a much harder position, so there is no need to keep adding dozens of repetitions as the only strategy.
Your second set is much worse
Rest longer or end the first set sooner. If the first set is a maximum effort, the next will reflect that fatigue. The guide to rest between sets can help you choose a break that supports repeatable practice.
Test your first floor repetition without derailing training
When your lower-incline work has improved, try one floor repetition after warming up and before the demanding sets. Keep the attempt controlled and place your knees down if you cannot press back up safely.
A missed attempt is information, not an instruction to repeat it until exhausted. Return to your working incline and keep practicing. You can test again after several more useful sessions or a clear improvement in height or repetitions.
After your first successful repetition, build repeatability with a few well-rested singles if they remain smooth, followed by easier incline work. Do not abandon all assistance immediately. It can help you accumulate more controlled practice than repeated maximum singles alone.
Keep a record that makes small gains visible
Write down more than the total repetition count. Include the support you used, its approximate height or setting, the number of sets, and a brief note about control. “Fixed bar position 6, 9/8, steady depth” gives you something concrete to repeat. “Push-ups done” does not explain whether the exercise became easier.
If you change the surface, treat the first session as a fresh comparison point. A bench and a counter can differ in height, edge shape, and hand comfort. More repetitions after changing several details may not mean the same thing as more repetitions under identical conditions.
After a break from training, choose a slightly easier variation or fewer sets for your first session back. See how it feels during the workout and afterward before restoring the previous workload. You do not owe the program an immediate return to your best numbers.
Also notice improvements that do not appear in the repetition total: less hesitation getting into position, a more controlled descent, or completing the same work with less effort. These observations help you decide when to progress without requiring a maximum test every visit.
Frequently asked questions
How long will it take to do a push-up?
Starting strength, body proportions, training experience, available equipment, and consistency all matter. Some people need a small adjustment; others need a longer period of strength development. Use improving repetitions and a lower hand height as progress markers rather than accepting a guaranteed number of weeks.
Should beginners do push-ups every day?
Start with two or three nonconsecutive sessions. Daily maximum sets can make fatigue difficult to manage, especially alongside other pressing exercises. Easy occasional practice may suit some people, but it should stay genuinely easy and comfortable.
Are push-ups a complete workout?
They train a pressing pattern and require trunk control, but they do not cover every major movement or fitness need. Include lower-body work and pulling exercises as well. The two-day full-body plan offers a broader structure, and the first pull-up guide provides a separate pulling goal.
Can you keep using incline push-ups after learning the floor version?
Yes. They can remain useful for warm-ups, additional manageable repetitions, or a lighter session. A floor push-up is one option, not a rule that makes every easier variation obsolete.
Build the next good set
Choose a stable surface that lets you move well, record your starting height, and repeat a small number of quality sets. Lower the incline when the current work is consistently manageable. That gives you a clear next step without turning every workout into a test.
For support with your broader workout routine, explore Workit on the App Store. Keep the focus on a progression you can practice comfortably and return to next week.