
Published
A useful first pull-up progression combines assisted pull-ups, an adjustable row or pulldown, and gradual reductions in assistance. Practice twice a week at first, stop sets before your technique breaks down, and test an unassisted repetition occasionally when you are fresh. Controlled lowering repetitions can help, but they are optional and should start with a small dose.
You do not need to pass a rigid checklist of hang times or lift an exact percentage of your body weight before you are allowed to try. You need a safe setup, a version of the movement you can train, and a way to make that version gradually more demanding.
This guide is for an adult working toward a controlled first repetition. It is general training information, not rehabilitation advice. If hanging or pulling causes shoulder, elbow, wrist, or neck pain, stop and seek an appropriate assessment. A recent injury or an exercise restriction needs an individual plan.
What counts as your first pull-up?
For this guide, a pull-up begins with a secure overhand grip and straight arms in a comfortable overhead position. You pull until your chin clears the bar without deliberately craning your neck, kicking your legs, or bouncing out of the bottom, then lower under control.
Your body does not need to remain geometrically perfect. A small natural change in position is different from using a large swing to launch yourself upward. Pick a standard you can repeat and keep it consistent when comparing attempts.
A chin-up uses an underhand grip. A neutral-grip pull-up uses handles with the palms facing each other. Any of these can be a meaningful goal, and comfort differs between people. If you specifically want an overhand pull-up, include comfortable overhand practice rather than assuming another grip transfers completely.
NASM’s pull-up exercise guide illustrates a controlled ascent and descent and includes assisted variations. Use the visual reference to understand the movement, while adjusting the grip and training dose to your own starting point.
Start with a setup you can trust
Use a properly installed, load-rated pull-up bar or a gym station. Check the manufacturer’s instructions and attachment before loading it. A doorway bar needs a compatible frame and correct installation; a convenient-looking trim or improvised fixture is not a substitute.
Make sure you can reach and leave the bar safely. Use a stable exercise step when needed, positioned so it will not obstruct your movement. Avoid climbing onto a rolling chair, balancing on stacked furniture, or making repeated jumps to a bar that is beyond easy reach.
For an assisted machine, have gym staff demonstrate the moving platform, weight selector, and entry and exit sequence. On many models, selecting more weight gives more assistance. Confirm this on the actual machine rather than guessing from how other resistance machines work.
Bands need their own checks. Use a band intended for the exercise, inspect it for damage, and follow the maker’s attachment instructions. A stretched band can snap or slip. Ask for hands-on help if getting into or out of it feels uncertain, and keep your face away from its potential recoil path.
Find the right starting point
If you cannot comfortably hang yet
Begin with a lat pulldown and, if comfortable, a supported hold with your feet remaining on a stable surface. The feet can take enough weight that your grip and shoulders are working without being overwhelmed. You do not have to force a fully relaxed dead hang.
Try a brief supported hold, perhaps 5–10 seconds, and stop well before your grip slips. Gradually reduce foot pressure only when the position stays comfortable. If even substantial support does not make hanging comfortable, leave it out and get help identifying an appropriate alternative.
If you can hang but cannot start the pull
Choose assistance that lets you begin from straight arms and complete several controlled repetitions. A machine or foot-assisted setup can make this easier to adjust. Practice the first few centimeters with adequate help rather than repeatedly straining against a load you cannot move.
A small shoulder-blade pull can be an optional awareness drill: with straight elbows and support as needed, move your torso slightly upward by changing the shoulder position, then return gently. This is a small movement, not a full pull-up, and it should not require aggressively pinning the shoulders down.
If you can pull partway up
Keep most of your work assisted through the range you are trying to learn. Unassisted partial repetitions can show progress, but repeatedly practicing only the easy section can leave the difficult section undertrained.
If the top is your sticking point, choose enough assistance to reach it without throwing your chin forward. If the bottom is hardest, retain assistance there. A controlled full assisted repetition is often more useful for this goal than an increasingly dramatic half repetition.
Choose one main assisted variation
Assisted pull-up machine
A machine offers a visible assistance setting and usually makes repeated workouts straightforward to compare. Position yourself according to its instructions, grip securely, and keep your torso reasonably still as you pull.
Start with enough assistance for 5–8 repetitions while leaving around two repetitions in reserve. When you can repeat the upper end of that range across your sets, reduce assistance by the smallest practical step. A smaller assistance number generally makes the exercise harder, the opposite of a pulldown stack.
Do not subtract the displayed assistance from your body weight and treat the result as a precise measure of what you lifted. Machine mechanics and friction differ. Use the number as a reference for that machine, not as a universal strength score.
Foot-assisted pull-up
A suitable low bar or professionally arranged setup can let your feet share the load. Keep your feet supported and use only as much leg help as you need to complete the pulling motion. The support should remain stable throughout.
This option is easy to adjust by feel but harder to measure. You may unknowingly push much harder with the legs on one day. Record the setup and concentrate on using consistent, modest assistance. If you cannot maintain a secure position, choose a machine or pulldown instead.
Band-assisted pull-up
Bands can make bar practice possible without a machine. They usually provide more help when stretched farther, which means the assistance changes throughout the repetition. The bottom may feel much easier than the top.
Use a band that allows smooth movement without swinging. Band colors are not standardized between brands, so record the brand or band identifier as well as the color. Moving to a thinner band can be a large jump; it is reasonable to use a few repetitions with the lighter assistance and finish with the previous band.
Pick one main variation for several sessions before judging progress. You can use another when equipment is unavailable, but changing the setup every visit makes comparison difficult.
A twice-weekly first pull-up program
This example keeps the main work small enough to fit inside a broader strength routine. Train on two nonconsecutive days, such as Tuesday and Friday. The exact calendar matters less than arriving recovered enough to practice well.
Session A
- Warm-up: a few minutes of easy movement, comfortable shoulder and elbow movement, then one or two easy assisted pulling sets.
- Assisted pull-up: 2–3 working sets of 5–8 repetitions.
- Seated or chest-supported row: 2 sets of 8–12 repetitions.
- Optional supported hang: 1–2 brief holds of 10–20 seconds if comfortable and your grip is not exhausted.
Session B
- Warm-up: repeat the same short preparation and easy pulling practice.
- Assisted pull-up: 2–3 working sets of 5–8 repetitions.
- Lat pulldown or row: 2 sets of 8–12 repetitions.
- Optional skill practice: a small amount of supported shoulder-blade movement, or the controlled-lowering option below, if appropriate.
Begin with two assisted sets per session. Add the third only when the work is manageable and your shoulders, elbows, and grip recover well. Keep roughly two repetitions in reserve rather than treating every set as a test. The reps-in-reserve guide explains how to use this estimate without needing exact precision.
Rest about two to three minutes between challenging assisted sets and around 90 seconds to two minutes for rows or pulldowns, extending the break when needed. Shorter rests are not automatically better practice. The next set should begin when you can grip securely and move deliberately.
If you already follow a program with substantial pulling work, replace some of it with these sessions rather than adding everything on top. The total workload includes rows, pulldowns, climbing, and other demanding upper-body activities.
How to use negatives without overdoing them
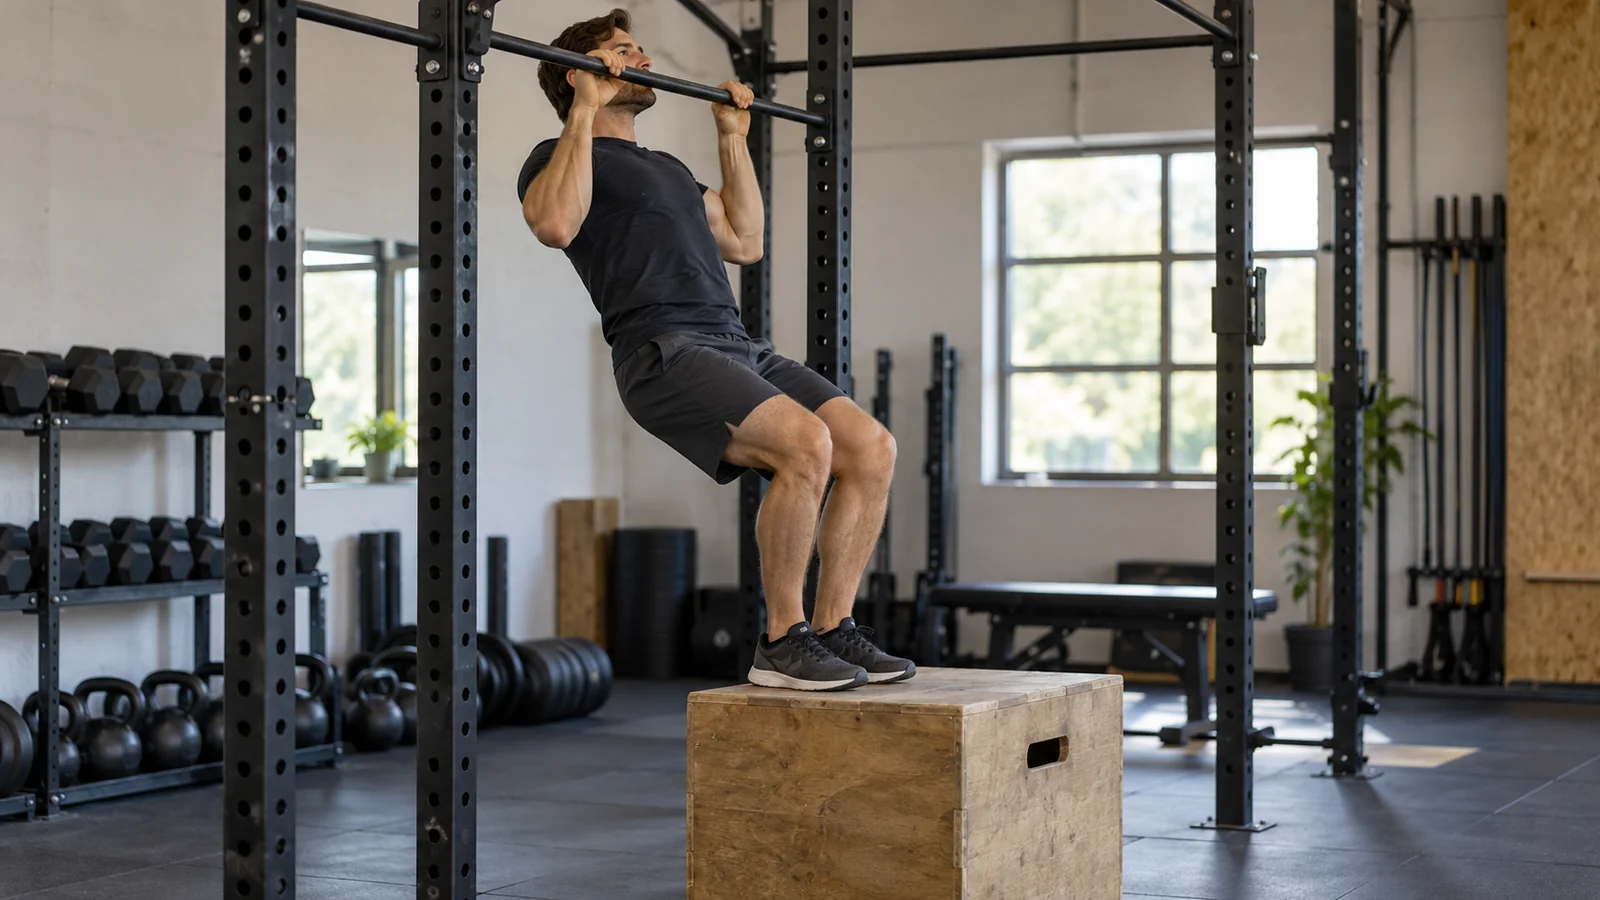
A negative pull-up trains the lowering portion. Use a stable step to enter the top position without jumping, establish control, then lower for roughly three to five seconds. Return to the step safely before the next repetition. Use assistance if body weight is too demanding.
Being able to lower does not mean you can pull up, so negatives can provide a useful additional practice option. They can also create more soreness than expected when they are unfamiliar. Longer and slower is not automatically better.
Start by replacing one assisted set in Session B with just two controlled lowering repetitions. Rest between repetitions as needed. If you drop immediately, lose your grip, or feel joint discomfort, use more support or leave the exercise out.
If that small dose is well tolerated over several sessions, you might use two sets of two repetitions, replacing other pulling sets rather than continually adding volume. Keep the descent within a range you can control. There is no requirement to perform negatives to earn a first pull-up.
Do not combine maximum hangs, repeated failed pull-ups, several negative sets, and a full pulling workout simply because each appears on a progression list. Choose a few useful pieces and give yourself room to recover.
Progress by reducing assistance, not by racing the calendar
Suppose your machine setting lets you perform three sets of 6, 6, and 5 repetitions. At the next session, aim to match or slightly improve that work with the same range and effort. Eventually you might reach 8, 8, and 8 with a little capacity remaining.
Repeat that performance on another visit before reducing assistance. After the change, dropping back to five or six repetitions is fine. If you can only perform one awkward repetition, the increment is too large for a full transition.
In that case, use the harder setting for one small, controlled set and the previous assistance for the remaining work, or stay with the easier setting a little longer. This adapts the logic of double progression to an exercise where less assistance means more load.
Record the grip, equipment, assistance, repetitions, and any major technique change. “Three more reps” means little if the new repetitions begin with bent elbows or finish well below the bar. Consistent standards make small gains easier to see.
When and how to test an unassisted repetition
There is no verified universal assistance number or hang duration that predicts a first pull-up. You can try an occasional fresh repetition when assisted practice has become noticeably stronger and the unassisted setup is comfortable.
Test near the start of a session after warming up, before your working sets. Take one controlled attempt. If you cannot move upward smoothly, return safely to your support and resume assisted practice. Avoid several prolonged, maximal attempts in a row.
Consider retesting every few weeks or after a clear improvement in assistance level, rather than every day. The interval is a practical way to preserve useful training; it is not a scientific countdown.
Once you achieve one repetition, do not immediately turn it into ten failed attempts. On later sessions, you can practice a small number of well-rested singles if they remain controlled, then use assisted sets to accumulate manageable work. Your first repetition is a starting point for building repeatability.
Troubleshooting common sticking points
Your grip gives out first
Use more assistance and shorter sets so you can practice the pulling movement without slipping. Optional supported hangs can build familiarity, but do them after the main work or on a separate easy occasion, not until your hands are exhausted before every set.
Check the bar surface and your hand position. A comfortable full grip is usually a sensible starting choice. If skin irritation changes how you hold the bar, allow it to settle rather than training through worsening tears.
You swing before every repetition
Pause in a controlled starting position, add assistance, and use a smaller set. Check whether you are jumping to the bar or being pulled around by a band. Solve the setup problem before assuming you need more abdominal exercises.
Your elbows become irritated
Stop the painful variation and reduce the recent workload. Consider whether you added negatives, extra grip work, or multiple new pulling exercises together. A different comfortable grip may be useful later, but persistent or worsening pain deserves assessment rather than repeated experimentation under load.
You are stronger on pulldowns but still cannot pull up
Pulldowns let you train pulling muscles with adjustable resistance, but the task is different from moving your body around a fixed bar. Keep some suitably assisted bar practice if it is comfortable. Do not use a particular pulldown number as proof that an unassisted repetition must already be possible.
You have made no clear progress for several weeks
Check the simple variables first: consistent sessions, comparable assistance, sufficient rest, and stable technique. Then review total pulling volume and recovery. If you always finish exhausted, reducing work may help more than adding another exercise.
If the sessions feel very easy and never change, try a small progression. If the movement itself remains confusing, a qualified trainer can observe what a written plan cannot, including your setup and how much assistance you actually use.
Adapt the plan to your equipment and available time
If you train at home
Start by asking whether your current equipment offers secure assistance and a safe exit. A high doorway bar with no suitable step or band setup may be less useful than it first appears. You can work on general pulling strength with equipment designed for that purpose while arranging safer bar practice elsewhere.
A suspension row can be a supporting exercise only when the straps and anchor are installed as intended. Avoid improvised rows from a loose table, towel caught in a door, or furniture whose load capacity is unknown. An exercise alternative needs to solve the original problem without introducing a new equipment risk.
If your gym is crowded
Warm up first, then use the assisted station when it becomes available. If you must do rows beforehand, keep them easy enough that they do not exhaust your grip. Record that the order changed, because the same assistance may feel harder after other pulling work.
If no safe bar station is available that day, perform your pulldown and row and return to specific practice at the next visit. One changed session does not erase the work you have already done.
If you only have a short practice window
After warming up, do two good assisted sets and one or two supporting sets, then stop. Leave out optional hangs, negatives, and repeated tests. A compact session can still give you a useful baseline and an opportunity to improve one detail, such as a smoother start or more consistent range.
Fit pull-up practice into a complete week
A pull-up goal should not crowd out lower-body training, pressing, or aerobic activity. Use the pulling work as one part of a balanced plan. The two-day full-body workout provides a broader framework, while the beginner machine workout explains useful supporting stations.
Keep enough time between hard pulling sessions to recover. Sleep, regular meals, and a manageable overall schedule support training. You do not need to pursue a weight-loss diet to deserve this goal; body size affects the demand, but building strength and skill is a useful focus at any starting point.
The ACSM’s 2026 guidance favors individualized, repeatable resistance training over unnecessary complexity. This specific progression is an illustrative program, not a protocol tested or endorsed by ACSM.
Frequently asked questions
How long does a first pull-up take?
It varies widely with starting strength, body size, training history, equipment, and consistency. Some people are close when they begin; others need a longer period of building capacity. A calendar guarantee would be misleading. Track reduced assistance and better repetitions as meaningful progress.
Should you practice every day?
Hard daily practice is unnecessary for this beginner example and can make recovery harder to manage. Start with two focused sessions. Additional easy practice may suit some people later, but it should not become a hidden series of maximum attempts.
Are chin-ups cheating?
No. They are a valid exercise with a different grip. You may find them more approachable, equally difficult, or less comfortable. If your goal is specifically an overhand pull-up, keep some overhand practice as tolerated and record the two variations separately.
Do you need curls?
Curls can be an optional accessory if you enjoy them and recover well. They are not mandatory, and they do not replace practicing the pulling task. Begin with the assisted movement and one supporting exercise before adding more.
Your next useful step
Choose one safe assisted setup and record a baseline session. Repeat it twice a week, reduce help gradually, and make occasional fresh attempts when your training suggests you are closer. Keep the standard simple: controlled movement, comfortable joints, and a safe way back down.
If you want app-based support for your broader routine, explore Workit on the App Store. Build the next few good sessions rather than demanding a first pull-up on a fixed date.