
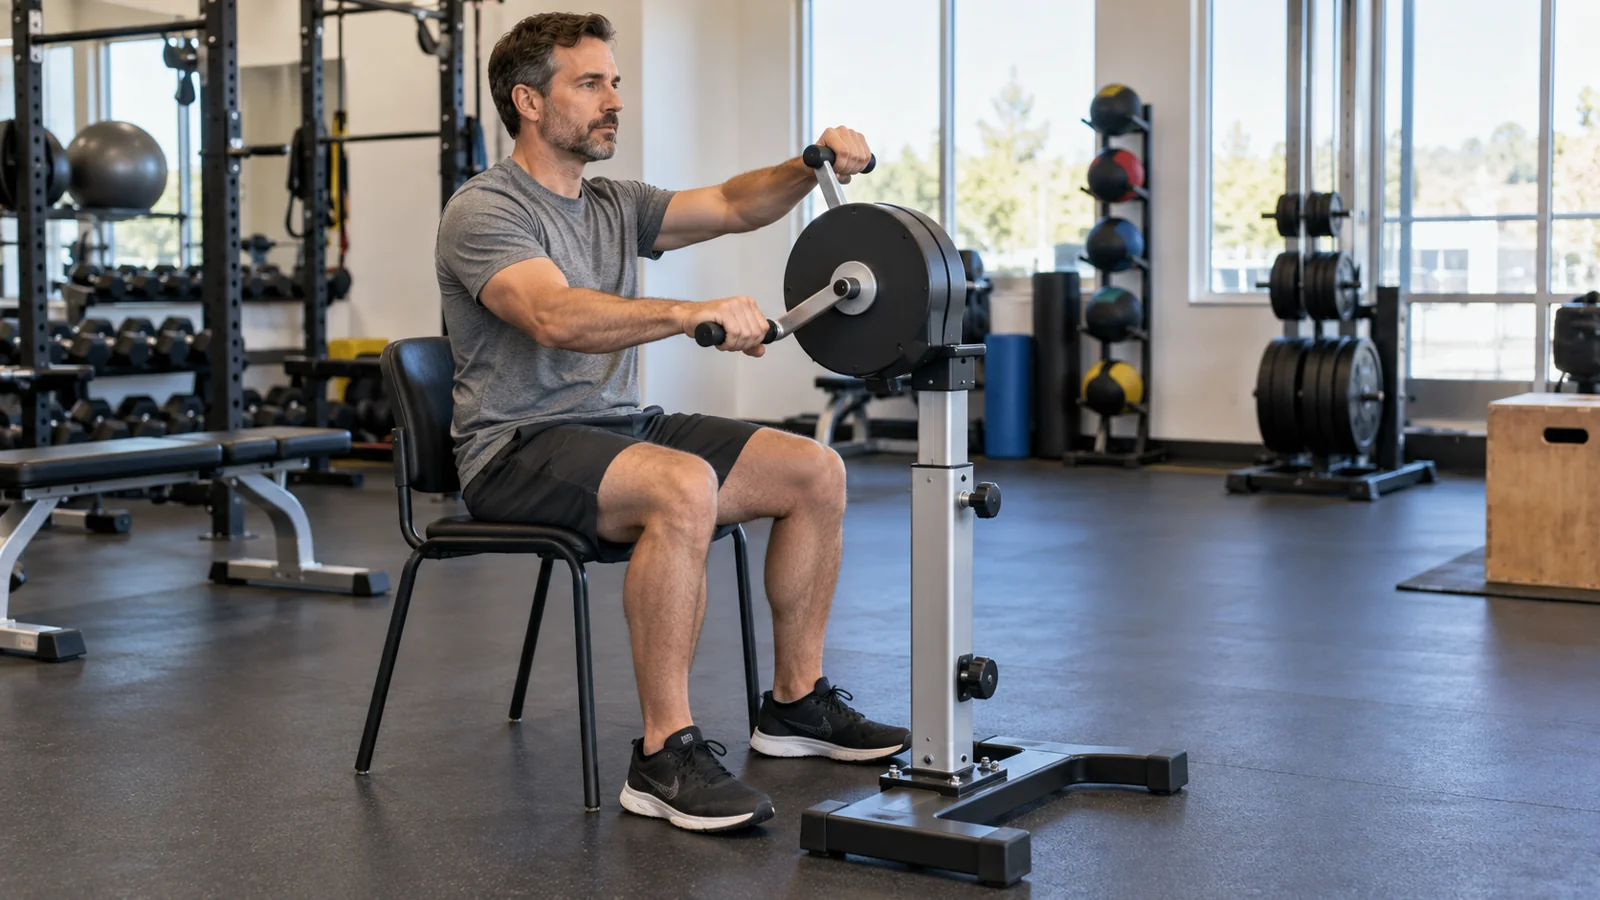
A beginner arm-bike workout can start with 5 minutes of very easy cranking, four rounds of 1 minute at a comfortable steady effort and 1 minute easy, then 5 minutes easy to finish. Use low resistance, keep the movement smooth, and shorten the session if your arms tire before your breathing settles into a sustainable rhythm. This 18-minute example is a starting option, not a minimum you must complete.
Published October 18, 2026.
An arm bike, also called an upper-body ergometer or UBE, lets you pedal with your hands. It can add variety to cardio training, but sitting down does not make the exercise effortless. The most useful beginner priorities are a comfortable setup, manageable shoulder workload, and a pace you can repeat without straining.
What an arm bike does, and where it fits
An arm bike uses rotating handgrips attached to a resistance mechanism. Some models have an integrated seat; others accommodate standing exercise or a separate chair. Compact devices may be approved for both hand and foot use. Choose equipment intended for the position and activity you plan to use.
Repeated cranking involves the arms and shoulder region, with the trunk helping you maintain your position. For this plan, the purpose is controlled aerobic practice and upper-body endurance. You are not trying to turn the handles into a heavy press, pull, or maximum-strength test.
Arm cycling can be convenient when you want a change from leg-based cardio. It is not automatically the right substitute during an injury. A lower-limb restriction may also affect transfers, balance, or how you brace yourself, while an upper-limb problem may make cranking unsuitable. This guide is for general fitness, not shoulder rehabilitation or post-surgery exercise.
If you want seated cardio that primarily uses your legs, compare the setup in our recumbent-bike workout for beginners. Neither machine is universally easier: comfort depends on your body, experience, and the specific equipment.
Set up the arm bike before starting the timer
Ask gym staff to show you the seat adjustments, resistance controls, and stopping procedure on your first visit. A minute spent learning the controls is more useful than discovering them while tired. Follow the manufacturer’s instructions whenever they differ from a general cue below.
Start with a stable seated position
For this beginner example, use an approved seated setup. Sit securely rather than balancing on the front edge, and place your feet on the designated supports or floor as appropriate. Keep enough space around the equipment to enter and leave without stepping over moving parts. Secure loose sleeves, jewelry, and anything else that might catch.
The SCIFIT PRO1 owner’s manual, for example, describes adjusting the seat for comfortable reach and foot support and checking that crank adjustment knobs engage fully. Those details are model-specific; do not copy another machine’s lever positions or adjustment numbers.
Check reach throughout the circle
With the machine stopped, bring a handle to its farthest point and check whether you can reach it without leaning after it. Aim to retain a little elbow bend rather than snapping the arm straight. Then move slowly through the rest of the circle. At the nearest point, the handle should not crowd your chest or force an awkward wrist position.
Choose a height and crank range that let the shoulders stay comfortable throughout the movement. You should not have to shrug continuously, duck your head, or twist to complete each revolution. There is no universal seat number or exact handle height that works across every machine. If a full circle feels forced, stop and ask for help adjusting it.
Use a secure, relaxed grip
Hold the handles securely without squeezing harder than necessary. Let your wrists stay comfortably aligned with your forearms. Keep your head over your torso and allow natural shoulder-blade movement rather than aggressively pinning the shoulders back. Breathe continuously.
Begin with the lowest practical resistance and a slow, controlled rhythm. Select a simple manual mode if staff confirm how it works. Save unfamiliar automatic programs for later: a hill or constant-power setting may change the load when you are expecting it to remain easy.
Choose effort with breathing and comfort, not a borrowed heart-rate zone
Use two checks together: how hard your breathing feels and how well your arms maintain the movement. The CDC’s talk-test guidance describes moderate activity as an effort at which you can talk but cannot sing. If you can manage only a few words before taking a breath, you have moved toward vigorous effort.
For your first session, it is fine to stay easier than moderate. During the steady portions, speak a complete sentence out loud occasionally. You should not be fighting to finish it. During the easy portions, lower the resistance or slow the cranking enough that the work clearly feels easier.
Arm fatigue adds a separate limit. Your forearms or shoulders may tire even while conversation remains easy. That is a reason to reduce the load or stop, not to keep increasing resistance until your breathing catches up. A comfortable talk test does not make painful or deteriorating technique acceptable.
Why leg-cycling numbers do not transfer neatly
Do not assume that your usual stationary-bike watts, resistance level, or heart-rate target describes the same effort on an arm bike. In a small laboratory study of 21 untrained men, arm cranking produced higher heart rate and oxygen use than leg cycling at the same submaximal external workloads. The study used a specific standing protocol, so it does not establish a universal correction for every user. It does show why matching watts across modes can mislead. See the original arm-crank and cycle comparison.
For general beginner practice, treat heart rate as additional information rather than a number to chase. If a clinician has given you an exercise limit or a target range, ask whether it applies to arm exercise and follow that individualized advice. Do not add or subtract a fixed number of beats based on a generic online rule.
An 18-minute arm-bike workout for beginners
This is an original, conservative example for someone who can use the equipment comfortably. It is not a tested clinical protocol, and the timing does not override symptoms, equipment instructions, or medical restrictions. Keep the first session deliberately manageable so that you can assess how you feel afterward.
Minutes 0–5: easy introduction
Start slowly with very light resistance. Spend the opening minute checking your reach, grip, and seat stability. Let the rhythm become smoother before you think about speed. Keep conversation easy throughout this section.
If the machine feels jerky, do not immediately increase the resistance to force it into a smoother pattern. Check the setup and ask staff whether you are using the controls correctly. Stop if the equipment moves unexpectedly, a handle feels loose, or your position cannot stay secure.
Minutes 5–13: four controlled rounds
- 1 minute steady: Use a comfortable rhythm and, only if needed, a small increase in resistance. Aim for light-to-moderate effort with smooth circles and relaxed breathing.
- 1 minute easy: Return to clearly easier cranking. Keep the hands moving gently if comfortable; stop for a proper rest if you need one.
- Repeat four times in total: Each steady-and-easy pair lasts 2 minutes, giving you 8 minutes in this section.
The steady minute is not a sprint. If the first round feels harder than expected, keep the remaining rounds easy or end the work section early. If an easy minute does not feel restorative, take longer before deciding whether to continue. Finishing all four rounds is optional.
Use the same comfortable direction throughout this first workout. Changing direction, speed, and resistance at once makes it harder to understand what caused discomfort or fatigue. You can explore supported variations after you have a repeatable baseline.
Minutes 13–18: gradually ease out
Reduce the effort to easy cranking and gradually slow down. Let the handles stop before releasing them or adjusting the seat. Exit using the manufacturer’s intended procedure, especially if the seat swivels or slides.
If a warning symptom occurs, stop promptly rather than completing the cooldown. A planned finish is for an otherwise comfortable session; it is not a reason to continue exercising through a problem.
When 18 minutes is too much
Try a 12-minute introduction: 5 minutes very easy, 30 seconds slightly steadier, 90 seconds very easy, then 5 minutes easy to finish. You can also stop after the first few easy minutes if that is enough for today. The useful result is learning a comfortable setup and tolerable dose.
If even the lowest resistance feels demanding, have staff check the machine and its setup. Do not assume the answer is to push harder. Another machine or a different form of activity may suit you better.
Progress by repeatability rather than a calendar deadline
Start with two nonconsecutive arm-bike sessions in a week as a practical scheduling option. This leaves room to observe your response and account for other upper-body work. It is not a requirement to exercise twice, and there is no need to add a third day merely because a week has passed.
Before making the next workout harder, check three things: you kept a comfortable position, the steady sections remained conversational, and your arms and shoulders returned to their usual comfort before the next session. If any check fails, repeat an easier version or reduce the work.
First, add a small amount of time
After several comfortable sessions, add one extra 2-minute steady-and-easy round. The 18-minute example becomes 20 minutes while the warm-up and cooldown remain unchanged. Keep resistance and cadence familiar. Repeat that version enough times to know how it feels before adding more.
You can also lengthen only one steady section by 30 seconds and add that time to the session. Choose one method so your log remains easy to interpret. Progress does not require a larger number every workout.
Next, make the middle more continuous
If intervals become easy, replace part of the middle section with a short continuous block. For example, after 5 easy minutes, try 3 steady minutes, 2 easy minutes, and another 3 steady minutes, then finish with 5 easy minutes. The total stays 18 minutes, but the steady work is less interrupted.
If your shoulders tire during the longer blocks, return to 1-minute sections. Continuous exercise is one option, not a superior achievement you must unlock. Planned easy periods can remain part of your routine.
Increase resistance only when the movement stays comfortable
Once your chosen duration feels repeatable, test the smallest resistance increase for one short section. Keep the rest familiar. If you start rocking, gripping excessively, or holding your breath, return to the previous setting. Avoid increasing duration, resistance, and frequency together.
Account for shoulder workload across the week
An arm-bike session adds repeated upper-body work even when the resistance is light. Consider it alongside pressing, rowing, swimming, carrying, and other activities that already ask a lot of your arms. A hard lifting session followed by unfamiliar cranking may be more total work than you intended.
For the first few sessions, avoid placing your longest arm-bike workout immediately after your hardest shoulder or upper-body workout. This is a practical way to evaluate the new activity, not a claim that combining them is always unsafe. If strength is your main priority that day, keep any preceding arm-bike warm-up easy enough that it does not leave your arms tired.
The American Academy of Orthopaedic Surgeons’ shoulder guidance cautions against overdoing unfamiliar activities. Do not interpret persistent joint pain as a sign that the machine is working. Seek individualized advice for pain that recurs, worsens, or affects everyday movement.
An arm bike also does not provide a complete strength routine. If you are organizing the rest of your week, our two-day full-body workout offers a separate strength-training framework. Adjust the combined workload rather than stacking every suggested session together.
Common beginner problems and useful adjustments
- Your torso rocks on every turn: Reduce resistance and check your reach. The plan should not require a repeated lunge toward the handles.
- Your neck feels increasingly tense: Stop and reassess height, distance, and load. Avoid forcing a shrugging position simply to match a screen target.
- Your hands are doing a death grip: Ease the load and hold securely with less unnecessary tension. Stop for numbness or tingling rather than repeatedly shaking it out and continuing.
- Your cadence collapses in the steady minute: Make that minute easier or shorter. You do not need to rescue the prescribed time with strained revolutions.
- The display looks unimpressive: Compare your own repeatable sessions on the same machine. Another person’s watts, distance, or calorie display is not your starting assignment.
- You feel good today and want to double everything: Keep the planned dose and see how you recover. One comfortable session gives useful information, but it does not establish how a much longer session will feel.
Know when to stop
Stop for shoulder, elbow, or wrist pain, sharp pain anywhere, new numbness, tingling, loss of grip, or a feeling that the shoulder is unstable. Do not use repeated trial-and-error adjustments to push through symptoms. Get professional guidance before resuming if the problem persists or returns.
Stop and seek medical assessment for chest pain or pressure, dizziness, faintness, or unusual breathlessness. The American Heart Association’s exercise guidance identifies these as reasons to stop and get evaluated. For possible heart-attack symptoms, including chest discomfort with shortness of breath or upper-body discomfort, call emergency services promptly; see the AHA’s warning signs.
People with a known condition affecting exercise tolerance, current shoulder symptoms, recent surgery, or an existing rehabilitation plan should get advice specific to arm exercise. A machine being used in a clinic does not make a general internet workout a rehabilitation prescription.
Record enough to make the next session easier to plan
Write down the machine model, seat and crank settings, total time, resistance, and the number of steady sections. Add a short note about breathing and upper-body comfort. Check again later that day and before your next workout.
A useful entry might read: “18 minutes, four easy-steady rounds, conversation comfortable, last round shortened because arms tired, no shoulder pain.” That tells you more than a calorie number. Next time, repeat the easier workload rather than automatically adding another round.
Our workout log template can help you keep these notes consistent. Keep the record brief enough that you will actually use it.
Frequently asked questions
Is an arm bike a cardio workout?
It can be when the effort raises your breathing and heart rate sufficiently. Very gentle cranking may remain light activity. The CDC recommends that adults work toward 150 minutes of moderate aerobic activity weekly, or an equivalent vigorous combination, plus muscle-strengthening activity. Count the portions that actually reach the relevant intensity; an 18-minute session with easy periods is not automatically 18 moderate minutes.
How fast should a beginner crank?
Use a cadence that feels smooth and controlled on your machine. There is no universal beginner revolutions-per-minute target for every resistance system, crank length, and user. Start slowly, avoid chasing the display, and let your ability to maintain comfortable technique guide the pace.
Should I crank backward?
Only if the machine supports it and the movement is comfortable. Reverse cranking is optional, and it does not automatically fix posture or balance every shoulder muscle. Follow the operating instructions for changing direction. Learn one direction first so that your early sessions are easier to compare.
Can I use a tabletop pedal exerciser?
Only use it for arm exercise if the manufacturer approves that use and gives a stable setup. A lightweight unit that slides or a table that wobbles is a reason to stop. Do not improvise mounting arrangements or assume every foot-pedal device is suitable for hand cranking.
Does the arm bike replace lifting weights?
Treat this plan as cardio and endurance practice. It does not cover all major muscle groups or supply a complete strength program. Increasing resistance until you can barely turn the handles changes the task and is not the progression recommended here.
Is it suitable for wheelchair users?
Some arm bikes accommodate wheelchairs, but equipment access alone does not establish suitability. Positioning, chair stability, transfers, grip, and existing shoulder demands need individual consideration. Ask a qualified professional to help with the setup and exercise plan when needed; do not improvise restraints or adapt this general routine around medical restrictions.
How many calories will I burn?
There is no reliable universal number for this routine. Effort, body size, equipment, and how much of the session you actually complete all matter. Treat a machine estimate cautiously and avoid using it as a promise of fat loss. Time, comfort, and consistency are more useful beginner targets.
Build a routine you can repeat
Begin with a secure setup and light resistance, use easy periods generously, and finish before fatigue takes over your technique. Add a small amount of work only after the current session feels repeatable. For more ideas as you build your routine, Explore workout programs and fitness challenges with Workit.
Sources
- SCIFIT PRO1 Upper Body Exerciser owner’s manual: model-specific operation and adjustment guidance.
- CDC: Measuring Physical Activity Intensity.
- Louhevaara and colleagues: Differences in cardiorespiratory responses during and after arm crank and cycle exercise.
- AAOS: Shoulder Pain and Common Shoulder Problems.
- American Heart Association: Gradual increases in exercise intensity.
- American Heart Association: Taking Care of Yourself.
- CDC: What Counts as Physical Activity for Adults.