
The reverse fly exercise trains the rear shoulders and upper back by moving your arms outward while keeping a small, fairly constant bend in your elbows. Start with very light dumbbells, a stable torso, and a comfortable range. Raise the arms without swinging or shrugging, then lower slowly. A chest-supported version often makes the movement easier to learn.
Published October 12, 2026
You do not need impressive weights to make a reverse fly challenging. Holding a weight away from your shoulder creates a long lever, so a dumbbell that feels trivial during a row can feel surprisingly demanding here. The priority is choosing the version, load, and range that let you control that lever.
This guide covers dumbbell, machine, and cable options, with particular attention to setup, common technique problems, and beginner programming. The suggestions are for general exercise education. They are not a shoulder rehabilitation plan, and an exercise should not be pushed through pain because it is described as good for posture.
What is a reverse fly?
A reverse fly is an upper-body exercise in which the arms move outward and back relative to the torso. With dumbbells, you usually lean forward or lie chest-down on an incline bench so gravity provides resistance to that outward movement. Your elbows remain softly bent rather than bending substantially as they would during a row.
Names include rear-delt fly, bent-over reverse fly, and rear lateral raise. They often describe closely related movements, but the equipment and torso position matter. A standing cable reverse fly and a seated dumbbell reverse fly may look different even though both involve moving the arms outward against resistance.
The reverse pec deck is a machine version. You face the chest pad and move the handles apart, using the machine’s permitted path. It is not the same as sitting facing away from the pad to perform a chest fly. Check the machine’s diagram and ask gym staff if its adjustment system is unfamiliar.
Muscles worked, without overpromising
The posterior deltoids, or rear portions of the shoulder muscles, help move the upper arms outward and backward. Muscles around the shoulder blades also contribute to the movement and positioning. Your hands, forearms, and trunk participate in holding the equipment and maintaining the chosen posture.
Mayo Clinic’s reverse-fly demonstration describes the exercise as targeting the upper back, including the rhomboid region. That makes it a useful addition to some strength routines, but it does not establish that every person needs it or that it fixes shoulder symptoms.
Think of it as one way to train a particular movement, rather than an antidote to sitting. Being stronger may give you more physical options, but posture varies with task, fatigue, comfort, and habit. No single accessory exercise guarantees a permanent posture change or prevents every shoulder injury.
A strong burning sensation also does not measure the quality of the session. The more useful questions are whether the intended motion stays controlled, the load is appropriate, and you can gradually do a little more without sacrificing your standard.
Choose the version you can stabilize
Chest-supported dumbbell reverse fly
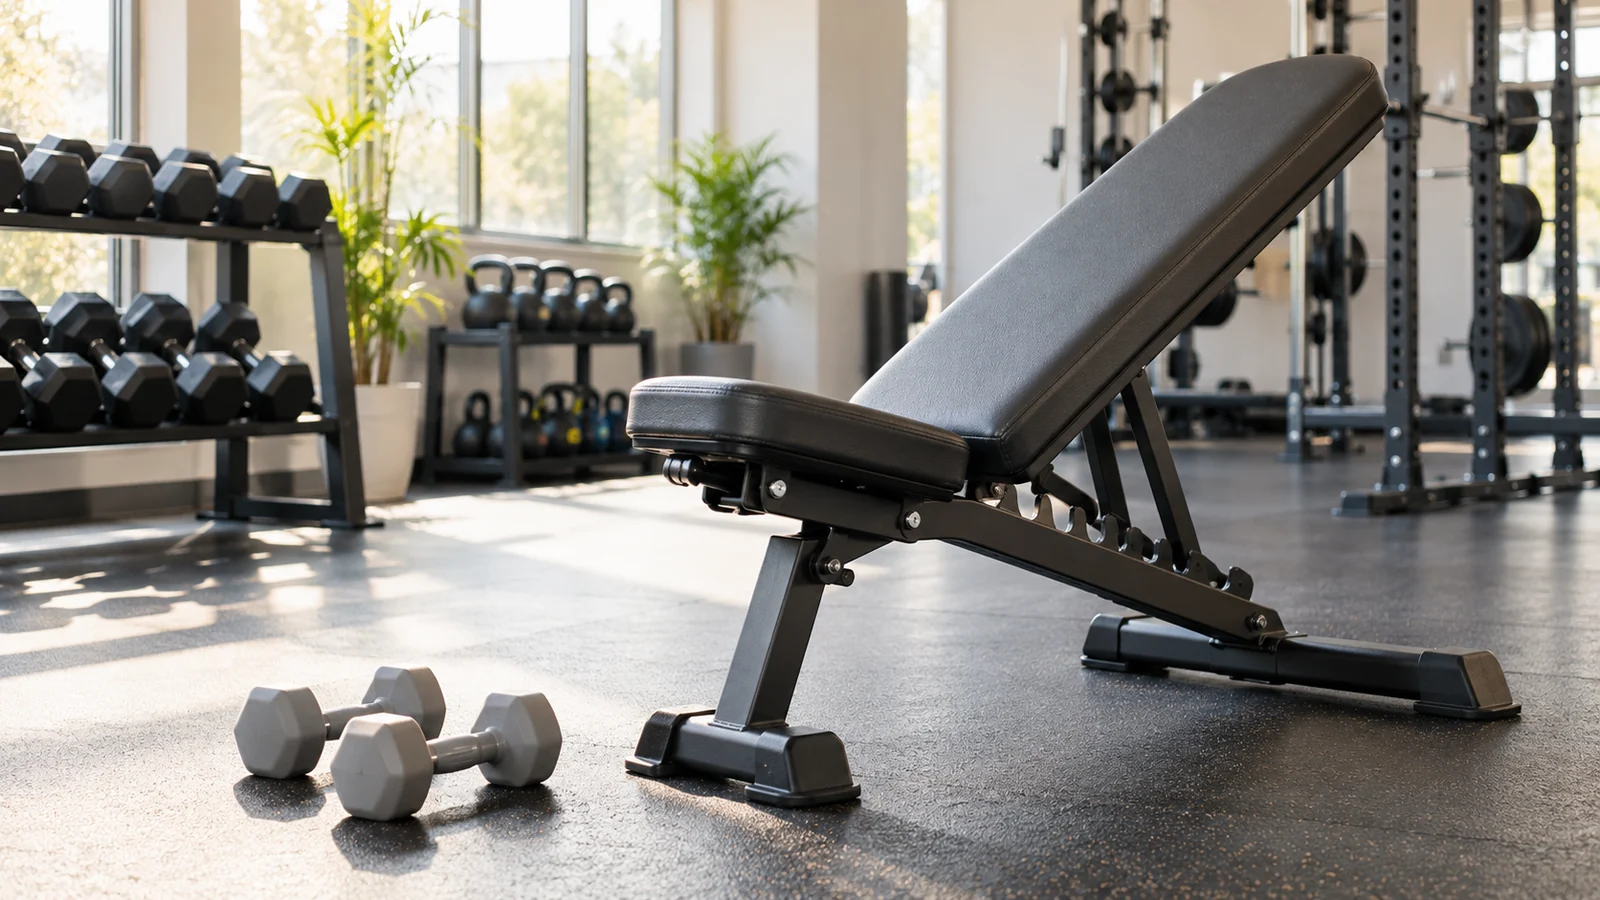
This is a practical starting choice if you have an adjustable bench. Support reduces the need to maintain a bent-over position while learning the arm movement. It also gives you a reference: your chest should remain against the pad instead of bouncing away from it as the dumbbells rise.
Use a moderate incline that provides both torso support and space for the dumbbells. The American Council on Exercise’s incline reverse-fly demonstration uses a 45- to 60-degree backrest. You can use that range as a starting point while checking that your feet are secure and your head clears the pad.
Seated bent-over dumbbell reverse fly
Sit on a stable exercise bench with your feet on the floor, then lean forward from your hips while maintaining a comfortable back position. Let your arms hang toward the floor. This removes the need to balance in a standing hinge, although your torso still has to hold its position.
The seated version can be convenient when an adjustable bench is unavailable. It is less useful if leaning forward makes breathing uncomfortable, your thighs block the dumbbells, or your back position changes with every repetition. Do not force the version simply because it is common in demonstrations.
Standing bent-over dumbbell reverse fly
Use a soft bend in the knees and hinge at the hips until your torso is angled forward enough to create the intended movement. Keep your stance steady and your neck comfortable. This version demands more ongoing positional control than the supported options.
If you are still learning a hip hinge, you may find that holding the position distracts from the shoulder movement. Learn the reverse fly with support first. The standing version is an option, not a required advancement that everyone must eventually earn.
Set up the chest-supported version safely
Check the bench adjustment, base, and weight rating before using it. Set the incline and test your position without dumbbells. Your upper chest should rest comfortably on the pad while your head remains clear of its top edge. Place your feet so they cannot slide as your arms move.
Keep enough open space on both sides for the full arm path. Reverse flies require more lateral room than rows. Check for nearby benches, racks, people walking past, and objects on the floor. A crowded gap between machines is not a suitable place to discover how wide your arms travel.
Choose a pair of light dumbbells that you can pick up and set down while staying in control. Arrange them near the bench without placing them under its legs or frame. Rehearse the pickup and finish unloaded. Avoid twisting deeply to reach a weight while your chest is pinned against the pad.
If you cannot reach the floor safely from the supported position, do not improvise by dropping the dumbbells at the end. Use a lighter, manageable setup, ask a qualified trainer to show an appropriate entry and exit for that bench, or choose the machine version.
How to perform a reverse fly, step by step
- Establish your support. Position your torso and feet before worrying about how high you can lift.
- Start with the arms hanging. Hold the dumbbells securely, palms generally facing one another, with a small bend in the elbows.
- Move the arms outward. Guide the upper arms away from the midline while maintaining approximately the same elbow bend.
- Stop within a comfortable range. Shoulder-height upper arms are a common endpoint, but do not force that height if control or comfort disappears sooner.
- Return smoothly. Lower the dumbbells to the starting position without letting them collide or using the rebound to start again.
- Finish deliberately. Set the weights down under control, then leave the supported position without a loaded twist.
Exhale as you raise the dumbbells and inhale as you lower them, or simply use a steady breathing rhythm that does not involve prolonged breath-holding. Keep your jaw relaxed and avoid lifting your chin to look ahead during every repetition.
Your shoulder blades can move as your arms move. You do not have to clamp them together before the first rep and hold them there. Equally, avoid an exaggerated squeeze that makes your chest lift and your lower back arch. A controlled, comfortable motion is enough.
Reverse fly versus row: watch the elbows
The clearest practical difference is how much the elbows bend. In a reverse fly, their angle stays relatively steady while the arms travel outward. In a row, the elbows bend substantially as you pull the weights toward your body. Turning a fly into a row usually lets you move more weight, but changes the exercise you are practicing.
Neither movement is inherently superior. A row is a useful broader pulling exercise; a reverse fly is a lighter accessory with a different arm path. If you only have time for a short beginner workout, a row may be easier to integrate before deciding whether you need extra rear-shoulder work.
Our chest-supported dumbbell row guide uses a similar bench arrangement but explains the distinct rowing path. Use separate loads and separate log entries. The fact that two exercises share a bench does not mean they should share a dumbbell weight.
How light should the dumbbells be?
Light enough that you can perform several practice repetitions without changing your torso position or bending the elbows more to shorten the lever. An unloaded rehearsal is entirely reasonable. Then try the smallest practical dumbbells and increase only if they are clearly manageable.
There is no reliable beginner weight based only on sex, height, or body weight. Previous training, limb length, movement familiarity, and the particular variation all matter. Our guide to choosing dumbbell weight covers the broader selection process; for the reverse fly, be especially cautious about borrowing the load you use for rows.
For example, someone who rows a particular pair easily might still need a much lighter pair for flies. That is expected because the arm is acting as a longer lever. It is not evidence that the shoulders are defective or that the movement only works with heavy dumbbells.
Small increases are meaningful here. Going from a 2 kg dumbbell to a 3 kg dumbbell is a 50% increase per hand, even though the label changes by only one kilogram. If that jump breaks your technique, stay at the lighter weight and progress through controlled repetitions instead.
Common mistakes and how to change them
Shrugging to finish the repetition
If the shoulders rise toward the ears as the weights go up, reduce the load and shorten the range slightly. Think about reaching outward rather than dragging the shoulders upward. Some shoulder-blade movement is normal; the concern is a large shrug that takes over because the intended motion has become too difficult.
Swinging the weights from the bottom
Pause briefly between repetitions if necessary to remove the rebound. Use a lighter pair if you cannot restart without a swing. You should be able to lower the weights smoothly, arrive at the bottom, and choose when the next repetition begins.
Changing the elbow angle halfway up
A little natural variation is not a disaster, but dramatically bending your elbows makes the exercise more row-like. Establish a modest bend at the beginning and keep it fairly consistent. If maintaining it is too difficult, the load or intended range is probably more demanding than your current control allows.
Reaching much higher than shoulder level
More height is not automatically better. Stop before the movement becomes a shrug, a back arch, or an uncomfortable shoulder position. The endpoint should be something you can reproduce on your final rep, not a maximum stretch or contortion you can achieve once.
Rushing the lowering phase
Lowering is part of the repetition. Letting the dumbbells fall may create an abrupt tug at the bottom and make it easier to swing into the next rep. Reduce the load if you cannot control the descent. You do not need an extremely slow tempo, only a deliberate one.
Machine and cable alternatives
Using a reverse pec deck
Set the seat so the handles and arm path suit your shoulder height, following the machine’s instructions. Face the chest pad, establish foot support, and choose a light pin setting. Adjust the start position so you can reach the handles without an excessive stretch. Verify any adjustment pin is fully engaged.
Move within the machine’s intended path without leaning away from its support. Let the weight stack settle under control when you finish, then release the handles. Different machines have different lever lengths and pulley systems, so their weight labels are not directly comparable.
Using two cables
Cables allow a different resistance direction, but they add setup decisions. Choose handles, pulley heights, and a standing position that permit a comfortable outward arm path. Make adjustments with the weights settled, keep fingers away from the stack, and confirm the attachments are secured.
Start very light because the resistance may feel different from dumbbells throughout the motion. Avoid stretching cables across a busy walkway or stepping so far away that you lose balance. If managing both handles feels awkward, ask a trainer to teach the setup rather than copying a complicated social-media variation.
A conservative beginner prescription
Start with one or two working sets of 10 to 15 controlled repetitions, once or twice per week. Leave about two or three good repetitions available rather than finishing with a forced shrug. These numbers are a practical entry point for a healthy beginner, not a claim that one exact rep range is uniquely effective.
Rest about 60 to 90 seconds between sets, and take longer if needed to reproduce the movement. An easy rehearsal set can come first. If you have already done several hard rows or other shoulder exercises, one modest set may be enough while you assess how the added work feels.
The ACSM’s 2026 resistance-training summary emphasizes consistency and gradual progression across a program. It does not require elaborate equipment or an all-out failure set for every exercise. Keep this accessory simple enough that it supports the rest of your training.
Two sets on Tuesday and two on Friday equal four direct reverse-fly sets per week. That does not erase the contribution of your other pulling exercises. Consider the whole schedule before adding more, especially if shoulder fatigue starts affecting rows or presses.
Progress without turning every session into a test
Choose a repeatable standard: same version, same bench setting if used, same approximate elbow bend, and similar range. Add repetitions within your planned range while preserving that standard. Once both sets reach 15 controlled reps comfortably, you can try the smallest available increase.
Imagine your log reads 12 and 11 reps, then 13 and 12, then 15 and 14. There is no need to increase weight yet. When you eventually reach 15 and 15, test the next increment with a practice set. If the smallest jump is too large, keep the lighter pair or use equipment with finer increments.
Our reps-in-reserve guide explains how to estimate the repetitions you could still perform. Beginners do not have to estimate perfectly. A useful starting rule is to stop when the next repetition seems likely to require a swing, shrug, or changed elbow angle.
Do not add weight, sets, frequency, and a new variation simultaneously. Changing one main variable makes it easier to understand the result. If performance worsens over several sessions, review sleep, overall workload, and recovery before assuming you need more shoulder exercises.
Fit the exercise into an ordinary workout
For a beginner full-body session, complete your main lower-body exercise, press, and row before adding reverse flies if they fit your priorities and time. The fly does not need its own training day. One or two deliberate sets near the end can be easier to sustain than a large separate shoulder routine.
For example, two squat sets, two press sets, two row sets, and two reverse-fly sets total eight working sets. The reverse flies are an optional accessory within that example, not a substitute for leg work or a requirement to balance every press with an exact number of fly sets.
If you prefer a structured starting schedule, the two-day full-body workout guide gives broader context. Add the fly only when you understand where it fits and have enough time to set up and finish safely.
Keep a useful record
A short entry such as “incline reverse fly, second bench notch, 2 kg per hand, 13/12 reps, no swinging” is enough. You can use the workout log template to keep those details together. The bench notch is more useful than guessing an angle if the equipment has no angle markings.
Also note whether you performed the fly before or after your other pulling exercises. A lower repetition count after a harder row session does not necessarily mean you lost strength. Compare sessions with similar conditions, and look for a pattern across several workouts instead of judging your progress from one tired afternoon.
Frequently asked questions
Should I feel it only in my rear delts?
No. Upper-back muscles and your grip can contribute, so an isolated sensation is not required. Pay more attention to your movement and progression than to whether you can feel one small region working. Pain or an uncomfortable joint sensation is different and is a reason to stop.
Can I do reverse flies with no weights?
Yes, an unloaded version can help you learn the arm path and assess comfort. It may also be a suitable starting challenge for some people. To build the exercise over time, add resistance only when the unweighted motion is easy and controlled.
Are reverse flies the same as lateral raises?
No. A typical lateral raise lifts the arms to the sides from an upright torso, while a dumbbell reverse fly uses a forward-inclined torso and a different movement relative to the body. They can both train the shoulders, but they are not interchangeable descriptions of the same exercise.
Should reverse flies hurt?
Muscular effort and fatigue can occur, but sharp, pinching, radiating, or persistent pain should not be pushed through. Stop the exercise and seek individual guidance when symptoms persist or you have an existing injury. Changing the grip is not a universal fix for an unknown problem.
The next useful step
Choose one stable version and practice it with no load or very light dumbbells. Find a comfortable range, keep the elbow bend fairly steady, and finish before momentum takes over. Record the version and repetitions so your next session has a clear starting point.
If you want to explore another fitness resource, explore the Workit app. For this exercise, the most useful immediate change is usually simple: use less weight than you expect and make each repetition easier to repeat.