
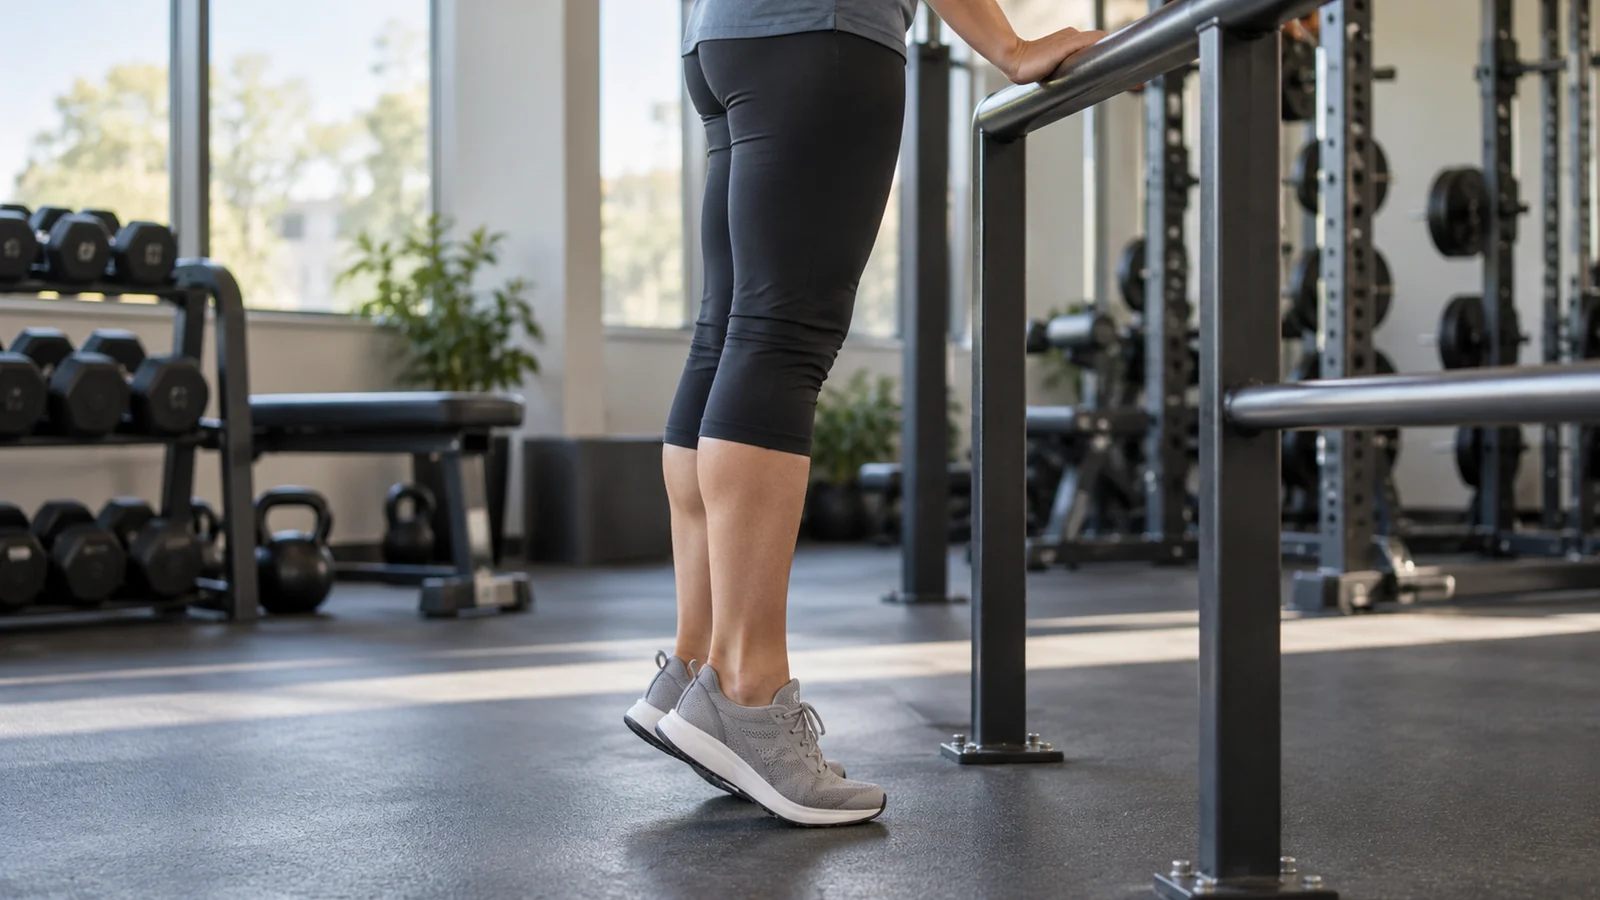
Calf raises strengthen the muscles at the back of your lower legs by lifting your heels against resistance. Start with both feet on a stable floor, use a wall for balance, rise smoothly, and lower with control. Two sets of 8–12 comfortable repetitions twice a week are a reasonable starting experiment for a healthy beginner, with the amount adjusted to your ability and recovery.
Published October 12, 2026
You do not need a staircase, a heavy machine, or a hundred daily repetitions to begin. The useful question is whether you can repeat the same controlled movement and gradually make it more challenging. This guide covers standing and seated options, sensible sets and repetitions, common technique problems, and a practical way to progress without turning a small accessory exercise into an exhausting project.
What muscles do calf raises work?
The gastrocnemius and soleus are the two main muscles people mean when they talk about their calves. Both help produce plantar flexion, the ankle action that raises your heel when the front of your foot stays on the ground. The gastrocnemius crosses the knee as well as the ankle; the soleus does not cross the knee. That distinction helps explain why straight-knee and bent-knee exercises feel different.
A standing calf raise with the knee relatively straight challenges both muscles. Bending the knee changes the gastrocnemius’s position and reduces its contribution relative to a straight-knee version. A seated calf raise is therefore a useful bent-knee option, but describing it as working only one muscle would be misleading. Your body does not switch individual muscles completely on and off when you change position.
The muscles around the foot and ankle also help you maintain position. That does not mean you need to make the surface unstable. If the goal is to train the calves, removing unnecessary balance difficulty often lets you perform cleaner repetitions. A fingertip on a wall can make the exercise more useful rather than less legitimate.
How to do standing calf raises on the floor
The American Council on Exercise’s wall-supported calf raise provides a straightforward equipment-free starting point. Its basic pattern is a supported, slow heel lift followed by a controlled lowering. Use the following checklist to make your own practice repeatable.
- Choose your support. Face a solid wall or stand beside a fixed countertop. Avoid wheeled furniture, folding chairs, or anything that could slide when you lean on it.
- Set your feet. Stand approximately hip-width apart with your feet pointing naturally forward. Keep both forefeet fully supported on a level, nonslip floor.
- Stand comfortably tall. Keep your knees straight without aggressively forcing them backward. Stack your torso over your feet rather than leaning your whole body into the wall.
- Lift your heels. Press through the front of both feet and rise as high as you can comfortably control. Avoid rolling onto the outer edges of your feet or clawing hard with your toes.
- Pause briefly. Find a steady top position without bouncing. A short pause makes it easier to notice whether one ankle is drifting sideways.
- Lower smoothly. Bring your heels back to the floor under control. Reset your position before the next repetition if needed.
Try roughly two seconds to rise, a brief pause, and two seconds to lower while learning. This is a coaching aid, not a mandatory tempo or a claim that one exact speed produces the best results. Once you understand the movement, a natural controlled rhythm is fine. Keep breathing rather than holding your breath for the entire set.
Your range of motion should be the range you can control comfortably. On the floor, the bottom position ends when your heels return to the surface. You do not need to hang your heels off a step to make the repetition count. A smaller, consistent heel lift is a better starting point than a large movement created by swaying or bouncing.
A quick self-check after five repetitions
Pause and ask three questions: did both heels move smoothly, did my knees stay in roughly the same position, and could I stop at the top without falling forward? If the answer is no, use more support and slow down. You can also reduce the number of repetitions. Practice quality is easier to improve before fatigue becomes the main challenge.
Standing versus seated calf raises
Standing calf raises are a convenient default because they require little equipment and allow a relatively straight knee. Seated raises can be useful when standing is uncomfortable, when you want a bent-knee exercise, or when a suitable machine is available. Neither version requires you to chase a burning sensation to prove that it is working.
In a 12-week study involving 14 untrained adults, standing calf-raise training produced greater gastrocnemius growth than seated training, while soleus growth was similar between conditions. That supports including a straight-knee exercise when calf size is a goal. It does not prove that every person needs both versions or that a beginner should copy the study’s training volume.
How to practice a seated version
Sit on a sturdy chair with your feet flat and your knees bent comfortably, approximately to a right angle. Keep the balls of your feet on the floor, lift your heels, pause, and lower. Start without added resistance to learn the movement. Keep your torso quiet rather than rocking forward to push your legs down.
An unloaded seated raise may quickly feel easy because it provides less resistance than supporting your standing body weight. At a gym, a purpose-built seated calf machine offers a more practical way to add load. Ask staff to show you the adjustment and release mechanism before using it. Set the thigh pad according to the machine instructions and avoid placing pressure directly on your kneecaps.
At home, you can keep seated raises as light movement practice and progress the supported standing version instead. There is no requirement to improvise heavy objects on your thighs. A simple exercise becomes less appealing when setting it up takes longer than performing it or when the weight is difficult to control safely.
How many sets and repetitions should beginners do?
Begin with an amount you can recover from while continuing your usual walking and other training. The following is an original starter template, not a medical prescription or a scientifically unique optimum:
- Frequency: two nonconsecutive days per week.
- Exercise: supported two-leg standing calf raise on the floor.
- Working sets: two sets per session.
- Repetitions: 8–12 per set, or fewer if control deteriorates sooner.
- Rest: approximately 60–90 seconds between sets, longer if needed.
- Effort: finish with a few clean repetitions still possible.
Two sets of ten means twenty repetitions in one session and forty across two sessions. That is enough work to begin evaluating how you respond. If you are already doing demanding running, jumping, hiking, or lower-body training, start especially conservatively. The calf raise is only one part of the loading your lower legs receive.
To judge effort, imagine whether you could perform another two or three repetitions with the same height and control. This is more useful than counting extra repetitions that become tiny bounces. Workit’s explanation of reps in reserve can help you distinguish a challenging set from one that has already lost its intended technique.
Some beginners will find eight repetitions difficult; others will find twelve easy. The template is a starting range, not a test you must pass. If you struggle at five, do fewer. If you could comfortably perform many more, improve consistency first and then move toward a harder variation rather than adding endless repetitions in one session.
A four-week calf-raise progression you can adjust
Use the same support, footwear, and surface so that your sessions are reasonably comparable. Leave at least a day between the two weekly sessions. Advance only when the current amount feels manageable during the exercise and does not interfere with normal movement afterward.
Week 1: establish a repeatable movement
Perform two sets of eight on each of two days. Use as much hand support as you need for balance. Your task is to make the first and last repetition look similar. If the second set falls apart, shorten it; do not force the target just to complete the plan. Record your actual repetitions rather than the ones you intended.
Week 2: add a little practice
If week one was comfortable, try two sets of nine or ten. That changes the workload modestly while preserving the same technique. If soreness made stairs or ordinary walking unusually difficult, repeat a smaller amount instead. There is no prize for advancing every calendar week. A progression that accommodates your response is more useful than one that ignores it.
Week 3: approach the top of the range
Work toward two sets of eleven or twelve, keeping the same heel height and lowering control. Do not increase repetitions and add weight simultaneously. If you get twelve in the first set and ten in the second, record that result and repeat it next time. Uneven set totals are normal and do not require extra sets to compensate.
Week 4: repeat or make one small change
If both sets of twelve are comfortably repeatable, choose one progression: add a small external load while keeping both feet down, or practice a more demanding supported variation. Return toward the lower end of the repetition range when the exercise gets harder. Otherwise, keep the current version and continue practicing. Four weeks establishes a process; it does not guarantee a visible transformation.
This is the same general logic described in double progression: build repetitions within a chosen range, then increase difficulty and rebuild. The useful change is the one you can measure while keeping the movement recognizable.
How to make calf raises harder without sacrificing balance
Add a manageable dumbbell
Once two-leg floor raises feel easy, hold a light dumbbell in one hand while your other hand rests on a solid support. Choose a weight you can carry into position and put down safely. The calves should be the main limiting factor, not a struggle to avoid dropping the dumbbell or leaning sideways.
Use the same two-leg stance before trying to combine heavy loading with single-leg work. If you cannot keep your torso steady, reduce the weight. A heavier number is not progress when the actual heel movement becomes smaller or you start pushing strongly through the supporting arm.
Try a supported single-leg raise
Stand beside a fixed support, shift onto one leg, and lift the other foot clear of the floor. Perform a small number of controlled repetitions. This is a substantial jump in difficulty, so do not assume your two-leg repetition count will transfer. Start with a trial set of three to five clean repetitions and assess it.
If that is too difficult, return to two-leg raises or use a slightly staggered stance to place more weight on one leg while retaining assistance from the other. This intermediate version is less standardized, so keep your setup consistent and avoid pretending you know the exact load on each side.
Use a calf machine when the setup suits you
A suitable machine can simplify resistance progression, but models differ. Learn the starting position, safety stops, and release process before loading it. Begin light enough to explore the movement. Do not copy another person’s stack setting, and do not assume a higher platform means you should lower into the deepest possible stretch.
Extra range below the forefoot can be an option for experienced, comfortable trainees on appropriate equipment. It is not the default beginner progression here. Stay with a stable floor if an elevated setup introduces uncertainty, awkward access, or discomfort. Avoid improvised stacks of books, loose plates, and unstable steps.
Common calf-raise mistakes and useful fixes
Bouncing through the bottom
If each repetition rebounds immediately into the next, slow down and briefly settle at the bottom. Reduce the load or stop the set earlier. Your goal is to make the calf muscles produce controlled movement, not to see how many rapid heel pulses you can fit into thirty seconds.
Bending and straightening the knees
A small amount of natural movement is not automatically a problem, but turning each repetition into a mini squat changes the exercise. Use less resistance and watch whether your head rises mainly because your heels lift or because your knees straighten. Keep a comfortable knee position rather than locking aggressively.
Rolling onto the outer edge of the foot
Reset your stance and think about keeping the forefoot evenly supported. A front or rear video can reveal an obvious ankle drift, though a video cannot diagnose its cause. If you repeatedly cannot control the movement or it produces pain, get qualified individual guidance instead of forcing a particular foot angle.
Turning the toes dramatically inward or outward
Beginners do not need a collection of extreme foot positions to cover every section of the calf. Start with a natural forward-facing stance and improve your consistency. Changing the angle every session also makes progress harder to interpret. Comfortable alignment and repeatable loading matter more than trying to isolate a tiny region.
Using balance as the measure of difficulty
Letting go of support can make the exercise harder to coordinate without meaningfully improving the calf-training stimulus. Keep the support if it helps. Balance practice is a separate goal that can be trained deliberately; it does not need to be smuggled into every strength exercise.
Where calf raises fit in a full-body workout
For general strength training, calf raises often fit near the end of a session after the larger exercises that need your attention. A simple session might include a squat pattern, a press, a chest-supported dumbbell row, and then calf raises. The exact order should reflect your priorities and available equipment.
If learning calf raises is your main goal that day, practice a light set earlier while you are fresh. You still do not need to exhaust your calves before movements where lower-leg fatigue might affect stability. Workit’s guide to exercise order explains how to organize competing priorities without treating one sequence as universal.
You can also add two sets to a home workout. Clear enough floor space to put the dumbbell down, if you are using one, and avoid rushing between stations. Rest while your breathing settles and your calves feel ready for another consistent set. Pairing exercises is optional, not a requirement for efficiency.
How to track progress realistically
Write down the variation, external weight if any, repetitions in each set, and a short technique note. “Floor, wall support, body weight, 10/10, steady height” provides more information than “calves done.” Next time, you can compare like with like rather than relying on how much the muscles burned.
Use a simple workout log to notice trends across several sessions. More controlled repetitions, a modest load increase, or less need to stop and reset can all be useful signs. Visible size changes are slower and affected by many factors, so avoid judging the program from daily mirror checks.
Keep the definition of a repetition honest. If your first eight repetitions reach a clear height and the next four barely leave the floor, record eight good repetitions rather than calling the set twelve. That makes progression more conservative and more informative. You can then adjust the load or target before the next session.
Discomfort, soreness, and when to stop
Muscular effort is expected; sharp pain, sudden pulling sensations, or worsening Achilles or ankle discomfort are reasons to stop. Do not use this general exercise guide to rehabilitate an injury. If you have a relevant condition, recent surgery, or persistent symptoms, a qualified clinician can help determine whether calf raises and which variation are appropriate.
Some soreness after unfamiliar exercise can occur, but severe soreness is not a goal. If ordinary walking is significantly affected, reduce your next session rather than adding more work to “loosen it up.” Do not train through unexplained symptoms or assume every uncomfortable sensation is ordinary post-exercise soreness.
Calf raises: frequently asked questions
Should I do calf raises every day?
You do not need daily hard sets to begin. Two nonconsecutive sessions make it easier to learn your response and preserve recovery for other activities. Light movement practice is different from demanding strength work. Increase frequency only for a clear reason, rather than assuming a small muscle group cannot be overworked.
Are body-weight calf raises enough?
They can be enough at the beginning, especially when you use full control. If they become very easy, add a manageable load or choose a supported harder variation. Whether they remain enough depends on your starting ability and goal. An exercise that still challenges you does not need upgrading just because it uses no equipment.
Do calf raises replace walking or leg training?
No. They emphasize a specific ankle movement. Walking provides a different activity experience, while squats, hinges, and other lower-body exercises train additional movements and muscles. Use calf raises as one part of a balanced routine rather than expecting one accessory exercise to cover all lower-body needs.
Should I stretch between sets?
You do not have to. Resting comfortably is fine. If you enjoy a gentle stretch and it feels good, keep it easy rather than forcing a deep position while fatigued. Do not interpret tightness as an instruction to push harder into discomfort. A comfortable range and consistent training are the starting priorities.
Start with the version you can repeat
Choose stable floor support, perform a small number of controlled repetitions, and record what you actually did. Repeat that amount before making one modest change. If you want Workit alongside your training routine, explore Workit on the App Store. The next useful step is a manageable session you can come back to.