
Published October 9, 2026.
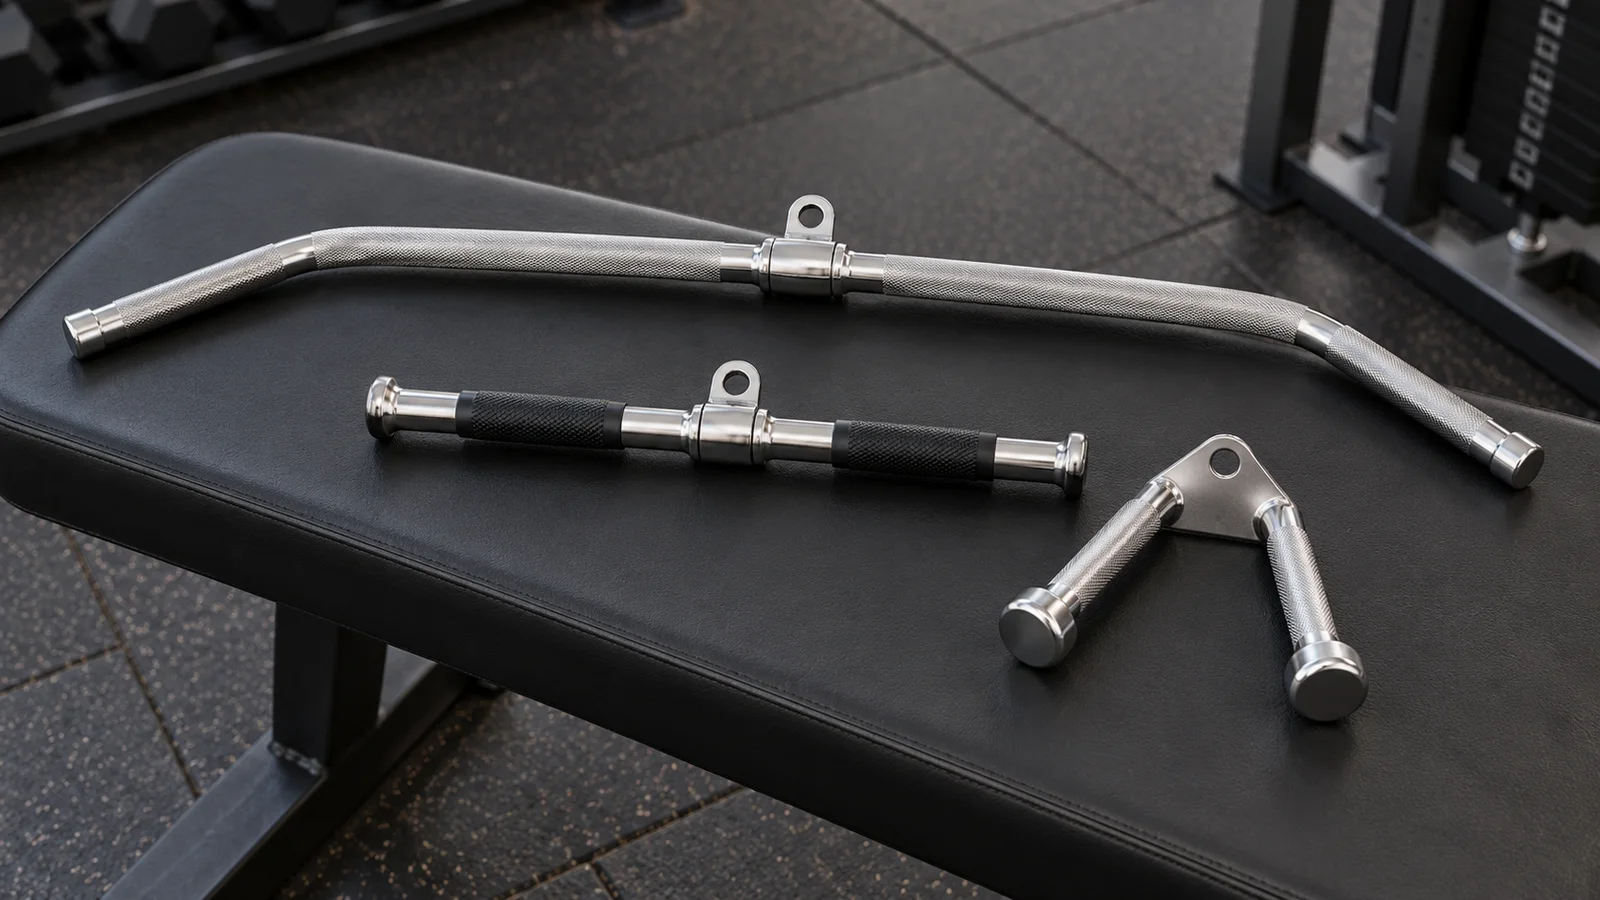
The best lat pulldown grip is one that lets you pull through a comfortable, repeatable range of motion without swinging your torso or irritating your wrists, elbows, or shoulders. Start with an overhand grip a little wider than your shoulders, or a roughly shoulder-width neutral grip if parallel handles are available. Neither an extra-wide grip nor a particular attachment is necessary for building your back.
Grip choice matters because it changes how your hands, elbows, and shoulders move together. The useful question is which setup helps you train well and progress consistently. This guide compares the main options, explains what the research can actually tell you, and gives you a practical way to choose your grip during your next workout.
Lat pulldown grips at a glance
- Medium overhand: Palms face away from you, with hands slightly outside shoulder width. A practical starting point on a standard pulldown bar.
- Wide overhand: Hands move farther toward the bar ends. This changes your elbow path and often reduces how far the bar travels.
- Neutral: Palms face each other. Parallel handles may feel comfortable, but their width varies considerably.
- Underhand: Palms face toward you. Usually performed around shoulder width, with elbows traveling in front of the body.
- Single handle: One arm works at a time. This allows more freedom to find a comfortable path, with additional setup and training time.
These labels describe two separate variables: hand spacing and palm direction. A narrow grip is not automatically an underhand grip. A neutral grip is not automatically narrow. If you change both at once, you cannot know which change made the exercise feel better.
What muscles do different grips work?
Every version above trains a pulling movement involving your back and elbow flexors. The latissimus dorsi helps bring the upper arm down toward the torso. Other muscles around the shoulder and shoulder blade contribute, while your biceps and other elbow flexors help bend the elbow. Your hands and forearms hold the attachment, and your trunk provides a stable base.
You cannot remove your arms from a pulldown simply by changing your grip. Feeling your biceps work does not mean the exercise has failed. Equally, a large stretch or a strong burning sensation is not a direct measurement of how much muscle you will build.
Be cautious with claims that one handle builds back width while another creates thickness, or that a grip isolates the inner or lower lats. Changes in arm position may alter muscular demands, but simple labels overstate what the grip research establishes. A more useful comparison asks whether the variation is comfortable, controllable, and easy to repeat under increasing resistance.
What the grip research actually shows
In a 2014 study by Andersen and colleagues, 15 men performed pulldowns with three overhand grip widths. Average lat muscle activation across the whole repetition was similar across widths. Participants handled somewhat more weight with the narrow and medium grips than with the widest grip. The study measured immediate electrical activity and lifting performance, rather than months of muscle growth.
A 2010 study by Lusk and colleagues compared overhand and underhand positions at two widths in 12 men. The overhand conditions produced greater measured lat activation in that experiment, while grip width did not provide the clear advantage often claimed online.
More recently, a 2025 study of seven pulldown variations tested 40 experienced male lifters. It found no significant difference in lat activation between the variations tested, which included changes in grip and torso angle. That does not prove all grips produce identical results for every person.
The studies use different participants, loads, attachments, and procedures. Surface electromyography also records an immediate signal from the measured muscle region; it does not directly rank long-term growth. Taken together, the evidence gives little reason to tolerate an awkward grip because somebody calls it scientifically superior. Use the research to keep your options open, then make a practical choice.
Medium overhand grip: a straightforward starting point
Take a standard bar with your palms facing away and your hands modestly outside shoulder width. Use matching landmarks on each side so the bar starts level. Do not assume the bend in every bar marks the ideal hand position for your body.
This setup is easy to reproduce in most gyms and usually leaves room for the elbows to move down without being pinned tightly against your sides. Think of bringing your upper arms toward your torso while your forearms connect you to the bar. Keep your wrists close to straight instead of curling the bar toward you.
If the bar feels awkward, first make a small spacing adjustment. Move each hand in or out by a similar amount and repeat a light set. A small change is easier to evaluate than jumping from a very wide overhand grip to a tiny V-handle.
Choose this grip when you want a simple baseline, your wrists tolerate the bar, and you can keep the same range as the set gets harder. It does not have to feel dramatically different from every other grip to be a good choice.
Wide overhand grip: useful when it fits comfortably
A wider grip places the upper arms farther out to the sides. The handle often travels a shorter distance because of that geometry. Shorter bar travel does not automatically make the exercise ineffective, but it can make comparisons with a closer grip misleading.
Avoid moving your hands as far apart as possible just to earn the label “wide.” If your wrists bend sharply, your shoulders feel crowded, or you cannot lower the elbows smoothly, bring the hands inward. The useful width is the one you control.
Watch the bottom position. Chasing contact between the bar and your chest can lead you to tip backward or move your elbows behind you. Stop at the point where you have completed your comfortable downward pull. Your body proportions and the attachment influence exactly where that occurs.
Wide pulldowns can remain in a program when they are comfortable and progressing. There is no requirement to replace them. There is also no good reason to choose them solely because you want a wider-looking back.
Neutral grip: check the handle width as well as the palm direction
Neutral handles let your palms face each other. Some attachments are close together, some sit approximately shoulder width apart, and some are very wide. These can produce noticeably different movements even though all are called neutral-grip pulldowns.
A moderate-width neutral attachment is a useful option to test if a straight bar feels uncomfortable at the wrists. It may also make it easier to find an elbow path you like. This is an individual comfort choice, not a guarantee that neutral grips are safe for every shoulder or injury.
With a close V-handle, leave enough clearance for your face as the handle descends. A small, fixed backward lean can help. Do not turn the repetition into a large backward rock just to bring the handle to your lower chest.
Angled handles and independent rotating handles add more options. Record the actual attachment you use. “Neutral pulldown” is an incomplete training note if your gym has three different parallel-handle bars.
Underhand grip: comfortable wrists come first
For an underhand pulldown, turn your palms toward you and begin around shoulder width. Your elbows will generally travel more in front of your torso than in a wide overhand version. Keep the hands secure and the wrists aligned comfortably with the forearms.
Some people find this variation strong and natural. Others dislike the fixed wrist position or feel irritation around the elbows. Neither experience makes one person’s technique universally correct. If the grip forces an uncomfortable position, choose another attachment rather than trying to stretch through discomfort under load.
Because the underhand setup resembles a curling position, it is easy to focus entirely on bringing the hands toward the face. Instead, let the elbows bend while the upper arms move down. You are coordinating both actions throughout the repetition.
Use a lighter first set when switching from overhand to underhand, even if you expect to be stronger. Familiarity and comfort matter more than predicting which variation should allow the biggest number on the stack.
Set up the machine before judging the grip
A poor setup can make every attachment feel wrong. Before changing handles repeatedly, check the seat, thigh pad, cable path, and available range. Ask gym staff for help if the machine’s adjustment system is unfamiliar.
- Check the attachment. Make sure the handle and connecting clip are properly secured and the cable appears intact.
- Choose an easy load. The first set should let you explore the movement without being pulled out of the seat.
- Secure the thighs. Adjust the pad so it holds you down comfortably while your feet provide stable support.
- Center yourself. Sit beneath the cable path with your hands evenly placed.
- Set your torso. Use a comfortable upright position or a slight backward lean, then keep that angle broadly consistent.
- Check overhead reach. You should be able to return the arms overhead without losing control or being lifted off the seat.
The ACE seated lat pulldown guide similarly emphasizes thigh-pad support, a stable trunk, and avoiding additional backward lean during the pull. It also describes allowing the shoulder blades to rise slightly as the arms return overhead. You do not need to clamp your shoulders down for the entire repetition.
If reaching the bar requires climbing or standing awkwardly on equipment, get help. Entering and leaving the station are part of performing the exercise safely.
Perform a controlled repetition
Begin with your arms extended overhead within a comfortable range and the weight under control. Brace your torso gently so the load does not pull your ribs into an exaggerated arch. Keep your head aligned naturally rather than pushing your chin forward.
Pull the elbows down as the handle moves in front of your face toward your upper chest. Let the elbows follow the path allowed by your grip. A wide bar and a neutral attachment will not create identical elbow positions, and trying to force them to match can make both feel awkward.
Finish when the upper arms have completed their comfortable downward movement. Do not keep pulling by cranking the wrists, throwing your torso back, or driving the elbows far behind you. A bar does not have to touch your shirt for the repetition to count.
Return smoothly until the arms are overhead again. Let the shoulders move naturally with the reach without surrendering control to the weight stack. Breathe throughout; an easy starting pattern is to breathe out during the pull and in during the return.
Choose a speed that lets you notice what is happening. An intentionally slow demonstration set can help you learn, but you do not need a complicated tempo prescription for every workout.
Find your grip with a simple comparison
Test two options across a few normal workouts instead of performing exhausting trials of every attachment in one session. Fatigue can make whichever grip you test last seem worse.
For example, compare medium overhand with shoulder-width neutral. On the first day, perform a light practice set and two comfortable working sets with the overhand grip. At the next similar workout, use the neutral grip. Keep exercise order, repetition target, and rest reasonably similar.
Choose the load separately for each variation. Matching the exact stack weight is less useful than matching a comparable effort and consistent technique. Different attachments can also weigh different amounts.
After each session, note:
- Whether your wrists, elbows, and shoulders felt comfortable
- Whether the last repetition used the same torso angle as the first
- Whether you could reach overhead without losing your position
- How many controlled repetitions you completed
- Which attachment and machine you used
If both grips work well, choose the easier one to access and repeat. You can keep the other as an alternative. A decision that reduces setup friction can be more valuable than a tiny difference in how a warm-up set feels.
Troubleshooting the problems a new grip will not always fix
Your forearms give out first
Check that the handle is dry and your grip is secure without unnecessary wrist curling. Reduce the load enough to control the full set. Forearm fatigue is common in pulling exercises and can improve with practice. Straps are an optional tool for experienced users, but learn their setup before using them and never use them to continue through pain.
You mainly feel your biceps
Your elbow flexors are supposed to contribute. Try a lighter practice set, keep the wrists quiet, and watch the upper arms move down. If you can progress controlled repetitions and your joints feel good, the absence of an intense lat sensation alone is not a reason to abandon the exercise.
You lean farther back on every repetition
The load or fatigue may exceed what you can manage with the intended technique. End the set when the torso angle begins changing substantially. For the next set, reduce the weight or stop earlier. Changing the grip while keeping the same excessive load usually preserves the problem.
The weight lifts you off the seat
Recheck thigh-pad height and foot support. If the pad cannot secure you comfortably, choose another machine. Do not try to solve an unstable setup by hooking your feet around unsuitable parts of the equipment or asking someone to hold you down.
Your shoulder or elbow hurts
Stop the painful set. A lighter load or another comfortable grip may be worth trying later, but persistent, sharp, or recurring pain needs individual assessment. Numbness, tingling, sudden weakness, or symptoms after an injury deserve professional attention. A grip guide cannot diagnose the cause.
How many sets and reps should you use?
For a general starting point, try two working sets of 8–12 controlled repetitions once or twice a week within a balanced program. Begin with a load that leaves roughly two or three good repetitions available when you stop. This is an example prescription, not a universal requirement.
Rest about two minutes between sets, then adjust if you are still too breathless or fatigued to reproduce your technique. Add warm-up sets as needed before the working sets; they should prepare you rather than tire you out. Workit’s guide to warm-up sets versus working sets explains that distinction.
Two pulldown sets performed twice weekly equal four direct pulldown sets for the week. Rows and other pulling exercises add further work, so review the whole program before adding several grip variations. Doing wide, neutral, and underhand pulldowns in the same session can create more repetition than you need.
Use your effort estimate conservatively while learning. If you are unsure whether another clean repetition is available, stop and review the set. The reps in reserve guide can help you put that judgment into a training note.
Progress without changing the exercise every week
Keep one main grip long enough to establish a baseline. Suppose you use an 8–12 repetition target for two sets. You might record 10 and 9 repetitions initially, then gradually build toward 12 and 12 with comparable control and effort.
Once both sets reach the top of the range comfortably, increase the load by the smallest practical amount and allow the repetitions to drop back toward the lower end. If the next stack increment is too large, stay at the current weight longer rather than turning the movement into a swing.
This is a basic example of double progression. The numbers only remain meaningful when the machine, attachment, and technique stay reasonably consistent. A heavier pulldown on a different cable system is not necessarily a strength improvement.
Change the grip when comfort, equipment access, or your training plan gives you a reason. Variety can be useful, but it does not need to interrupt every week of progress.
How pulldowns fit with rows
A pulldown brings the arms down from overhead. A seated cable row pulls from in front of you toward your torso. Including both can provide useful variety in a back-training program, but you can distribute them across the week if time or recovery is limited.
For example, one full-body session could include two pulldown sets and another could include two row sets. A program with more available time might include both in the same session. Choose the total workload before adding extra attachments. For the horizontal pulling movement, see our seated cable row form guide.
Frequently asked questions
Is close grip better than wide grip?
Neither wins for everyone. A closer grip may offer a comfortable longer movement for some people, while a wider grip may suit others. Compare comfort, control, and repeatable progress rather than assuming the handle with the longest travel must produce the best result.
Should I pull the bar behind my neck?
A front-of-body pulldown is a straightforward default. There is no need to use a behind-the-neck version to make this exercise worthwhile. If the bar cannot pass your face comfortably, adjust your setup or attachment instead of forcing your head forward.
Can I use the same weight with every grip?
You can if it happens to match your target effort, but there is no requirement. Establish a separate starting load when changing grip or machine, and judge the result by the quality of your repetitions.
Your next pulldown session
Start with a medium overhand or comfortable neutral grip, set the thigh pad, and perform a light practice set. Keep the torso steady and the return controlled. Record the attachment alongside your sets, repetitions, and load, then repeat the setup next time.
Use Workit to track your workouts so your next grip decision is based on a useful training history. The grip that helps you train comfortably and consistently is a strong place to start.