
Published October 15, 2026
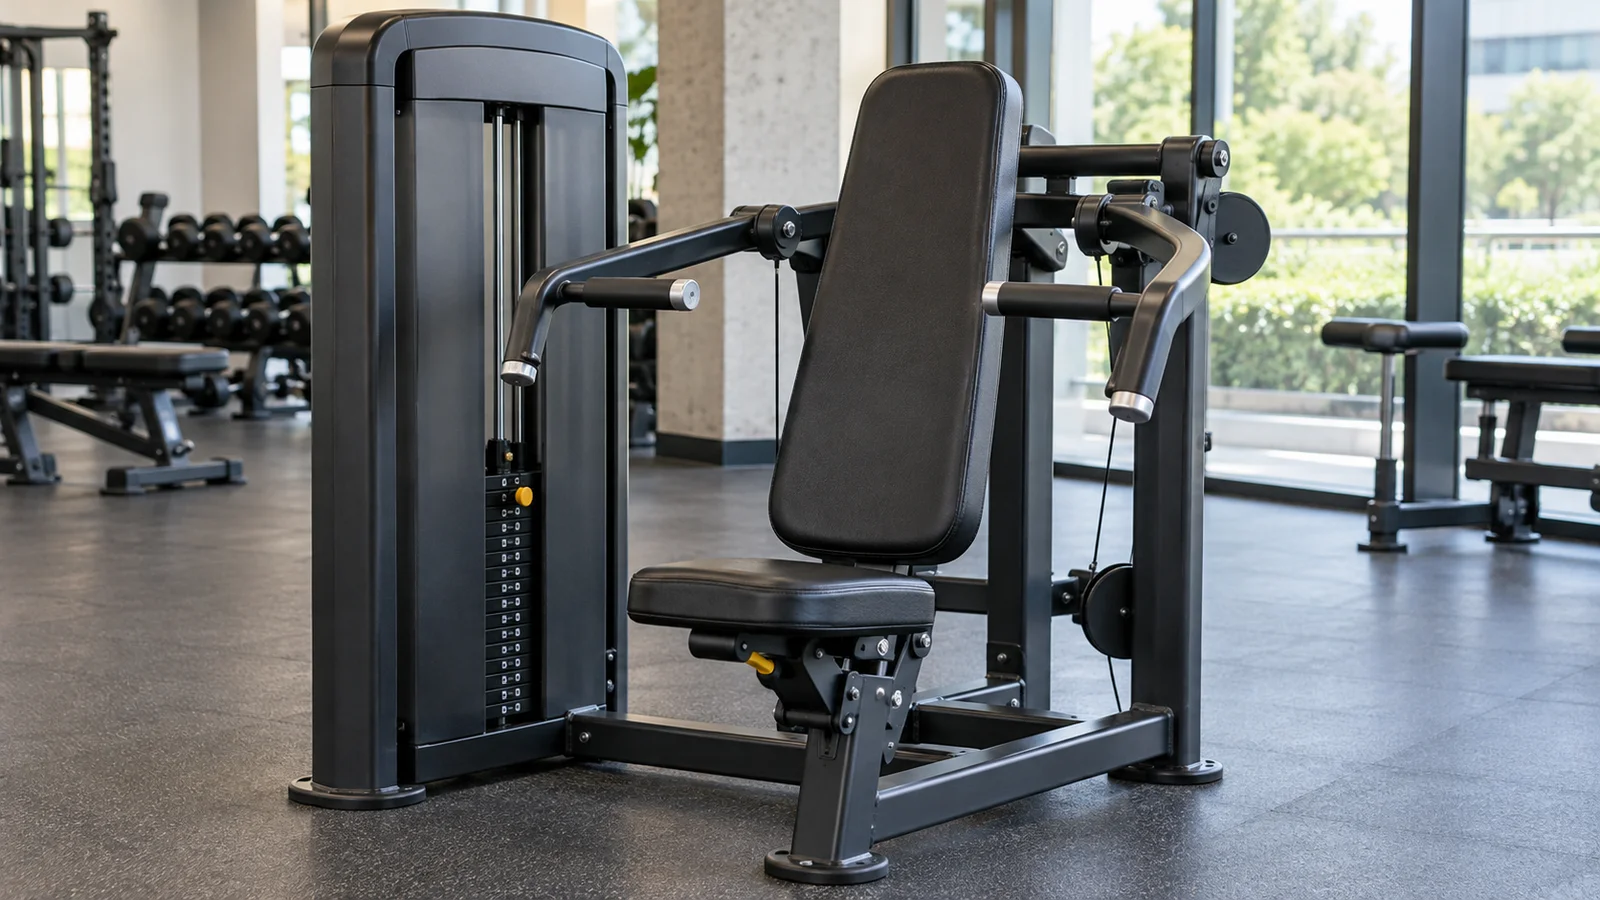
To use a seated chest press machine, adjust the seat so the handles sit around the middle of your chest, place your feet on the floor or intended supports, and keep your back comfortably against the pad. Press smoothly without snapping your elbows straight, then return under control. Begin with a light practice set and a range of motion that does not force your shoulders into an uncomfortable stretch.
The most important first step is making the machine fit you. A guided movement path can make pressing easier to learn, but it does not automatically guarantee a comfortable shoulder position. Seat height, starting depth, handle choice, and load all matter. This guide focuses on those details and a simple way to build your first working sets.
Which chest press machine is this guide about?
The main instructions apply to an upright or slightly reclined seated chest press with handles in front of the chest. Many use a selectorized weight stack; others use plates on loading arms. Some handles move straight ahead, while others come closer together as you press.
Read the exercise placard on the actual machine before copying a setup from another model. An incline chest press, a lying press, and a pec deck can look related while asking you to move differently. A pec deck is a fly movement, not the same exercise as pressing handles away by extending your elbows.
A seat adjustment number is not transferable between brands. Even two machines in the same gym may use different scales. Record the model or location along with the setting rather than assuming that “seat four” describes your universal setup.
If you want to place the exercise inside a broader routine, our beginner gym-machine workout covers that separate question. Here, we will build a reliable chest press from the first adjustment onward.
What muscles does the chest press machine train?
The pectoral muscles contribute to bringing your upper arms forward and across the front of your body. Your triceps extend the elbows, and the front of your shoulders also assists the press. The exact feeling depends partly on the machine’s path, grip, and how it fits you.
Feeling your triceps or shoulders work does not mean your chest has switched off. A press is a multi-joint movement. However, sharp shoulder discomfort, pinching, or joint pain is not a sign that you have finally found the right intensity.
The backrest and guided handles reduce some of the balance demands found in free-weight pressing. That can make a machine a practical place to practice producing force with a repeatable setup. It does not make the movement automatically superior or inferior to dumbbells or push-ups.
The ACSM’s 2026 resistance-training guidance emphasizes consistent, individualized training and notes that equipment type did not consistently determine outcomes for the average healthy adult. You can choose a machine because it fits your body, preferences, and routine without treating free weights as a required graduation ceremony.
Before sitting down: check the machine
Look for the instruction placard and identify the seat lever, any start-position adjustment, and the intended way to enter and exit. Check that the upholstery and handles are intact and that there is no obvious damage to cables or moving parts. Report problems to gym staff rather than attempting a repair.
On a weight-stack machine, change the selector only when the stack is fully resting. Insert the correct pin fully in the selected position. Do not use an improvised pin, place loose weights on top of the stack, or reach toward the stack while somebody is pressing.
On a plate-loaded model, follow the manufacturer’s loading and retention instructions. Do not assume that both arms share one load or that an empty arm has no resistance. Ask staff how the machine works before adding plates, especially if the loading pegs or starting position are unfamiliar.
Some machines have a foot-assist mechanism that brings the handles forward. It is not automatically a pedal you should push throughout every repetition. Have staff show you its intended use instead of testing it under a heavy load.
Set the seat height first
The ACE seated chest press guide uses mid-chest handle height as a setup reference. It also recommends supported feet, a secure full grip, neutral wrists, and a controlled press. Treat those as a starting checklist, then follow the machine’s instructions and your comfortable movement range.
Sit fully on the seat with your back against the pad before judging handle height. If you perch on the edge or slide your hips forward, you change the relationship between your torso and the handles. Adjust while the equipment is unloaded and stationary as directed by its placard.
When the handles feel too high relative to your chest, raising the seat often brings your body up to meet them. When the handles feel too low, lowering the seat may help. Check the result rather than relying on that rule blindly, because machines differ in their geometry.
Your feet should have a stable support after the adjustment. If getting the handles to the right height leaves your feet dangling, ask a trainer whether the machine has an intended foot support or whether another press fits you better. Do not improvise a wobbly platform from loose plates.
Check starting depth and handle position
A comfortable handle height does not solve an excessively deep starting position. If you must pull your elbows far behind your body or roll your shoulders forward to grasp the handles, inspect the start-position adjustment before adding weight.
Not every machine has an adjustable back pad or arm position. When those controls are absent, you may be able to use a shorter comfortable return range, but you still need a safe way to start and finish. A machine that forces an awkward first repetition may simply be a poor match for you.
Make a light trial press. You should be able to reach the handles without twisting, press without sliding forward, and return without feeling that the machine is pulling your shoulders into a position you cannot control.
Do not chase the deepest stretch possible. A larger range is only useful when it is comfortable and controlled for your body on that machine. Progressing the load and forcing additional depth at the same time makes it harder to identify what caused a problem.
Choose a grip that keeps your wrists comfortable
Some machines offer horizontal handles, palms-facing handles, or several grip widths. Use only the intended gripping surfaces. Wrap your thumbs around the handles and keep your wrists roughly in line with your forearms rather than allowing them to fold sharply backward.
A neutral or palms-facing grip may feel more comfortable for some people, but it is not a universal cure for shoulder symptoms. Try handle options with a light load and pay attention to the whole arm path. A comfortable wrist position can still accompany an unsuitable shoulder position.
Avoid imposing a rigid elbow angle on every machine. Your upper arms should move in a controlled path that fits the handles without forcing your elbows into an extreme flare or squeezing them hard against your ribs.
Once you find a workable grip, use it consistently for a while. Changing grips every set makes it harder to compare repetitions or determine whether a new weight is actually manageable.
How to perform a controlled repetition
- Settle into the pad. Keep your feet supported and your hips comfortably on the seat. Let your lower back maintain a natural, modest curve.
- Take a full grip. Position your hands securely and check that your wrists are not sharply bent.
- Prepare without over-tensing. Gently firm your trunk. Keep your head comfortable rather than jamming it into the pad.
- Press smoothly. Push the handles along their intended path as you breathe out. Avoid jerking the first few centimeters to get the load moving.
- Finish without a hard elbow snap. Reach a controlled extension while keeping your torso stable.
- Return deliberately. Breathe in as the handles come back. Stop at your chosen comfortable starting position, ready to repeat.
You do not need an elaborate tempo to learn. A useful practice cue is “smooth out, controlled back.” If the return drops suddenly or the weight stack crashes, reduce the load and regain control. Follow the machine’s instructions about how the stack should settle between repetitions.
Keep your back comfortably supported rather than turning the final repetitions into a full-body thrust. A large arch, a sliding seat position, or a sudden shoulder shrug is feedback that the current set is becoming too demanding.
How much weight should you use?
Start with the lightest practical setting that allows you to explore the movement. If even that feels too heavy or awkward, ask staff about another machine or use a different pressing exercise. The lowest setting is not a minimum fitness standard you must pass.
After a comfortable practice set, select a working load you can press for around 8–12 controlled repetitions while feeling that a few more good repetitions would be possible. This is a conservative learning example, not a requirement to find your exact maximum.
New lifters often find estimating remaining repetitions difficult. You do not have to assign a perfect number. Stop when the next repetition seems likely to require a jerk, a change in posture, or a much shorter range than the earlier ones.
Machine labels cannot be compared directly with a barbell bench press or another brand’s stack. Levers, pulleys, friction, and starting resistance differ. Track progress on the same machine with the same setup instead of treating its number as a universal strength score.
A beginner chest press session
For a generally healthy adult learning the exercise, the following is a manageable starting example. If you already have a prescribed rehabilitation or training plan, follow that individual guidance instead.
- Do a few minutes of easy movement and comfortable shoulder motion.
- Adjust the machine and perform one light practice set of 6–8 repetitions.
- Rest, then complete one working set of 8–12 controlled repetitions.
- Rest about 90 seconds to 2 minutes, longer if needed.
- If the first set was comfortable and controlled, perform a second working set.
Two working sets of 8–12 repetitions mean 16–24 working repetitions. The practice set is separate. This is a small pressing component of a workout, not a complete training program for all muscle groups.
You can begin with only one working set while learning the machine. Add a second when your technique and recovery are predictable. There is no prize for reaching a larger set count on the first visit and being too sore to return comfortably.
If chest pressing is new, allow recovery before another challenging chest session. Two nonconsecutive strength days can provide a practical weekly structure. Include pulling and lower-body work rather than repeating only the movements that feel easiest to set up.
How to add repetitions and weight
Use a stable repetition range so you have a clear reason to progress. For example, keep the same load until both working sets reach 12 controlled repetitions with some effort still in reserve. Repeat that performance comfortably before trying a modest increase.
After increasing the weight, your repetitions may return toward the lower end of the range. If you cannot reach eight without changing your movement, the jump may be too large. Return to the prior load or use an approved smaller increment if the machine provides one.
Do not attach random weights to the selector pin or improvise extra resistance. Ask staff about the manufacturer’s intended increment options. A steady month at the same load with better control is preferable to modifying equipment to force progress.
Keep depth and setup stable when assessing improvement. Twelve short repetitions at a new weight are not directly comparable with twelve fuller, controlled repetitions at the old one. Your log should describe what you actually performed.
Chest press machine troubleshooting
“I feel pinching at the front of my shoulder.”
Stop the set. Check seat height, starting depth, grip, and load with a qualified trainer. Do not repeatedly push through the same pinch to see whether it warms up. If symptoms continue, or you have a shoulder injury history, seek clinical advice before resuming the movement.
“My wrists bend backward.”
Reduce the load and reposition the handle in your hand so the force is easier to support through your forearm. Check that you are using the intended grip and not holding only the ends of your fingers. If the handle angle remains uncomfortable, try a different intended grip or machine.
“My back arches as I press.”
A small natural lower-back curve is different from a large arch that appears only when the handles move. Lower the weight, keep your feet supported, and reset your hips against the seat. Avoid solving the problem by forcing your spine flat or holding your breath throughout the set.
“I can start, but I cannot finish the last repetition.”
Stop earlier next time. Return the handles under control using the machine’s intended finish position. Do not twist out of the seat or ask someone to push randomly on the moving arms. Before your first set, learn how to end safely if a repetition becomes difficult.
“One handle gets ahead of the other.”
On an independent-arm machine, reduce the load and concentrate on a smooth, even movement. Some difference can occur, but new weakness, pain, or a persistent large discrepancy deserves assessment. Do not automatically add extra sets to one side without understanding the issue.
“The stack is loud every repetition.”
You may be letting the return speed up, using a range that causes an abrupt stop, or selecting too much weight. Slow the return and check the machine’s instructions. If the movement itself catches or feels uneven, report it to staff.
What if you cannot feel your chest?
First check whether the movement is comfortable and mechanically consistent. Then lighten the load enough to pay attention to pressing the handles away without shrugging or changing your seat position. You may notice your chest more, but sensation is not a perfect measurement of training effect.
Do not use extreme grip widths, exaggerated elbow positions, or a painful stretch just to chase a stronger burn. A chest press can be effective without producing a dramatic local sensation on every set.
If your arms fatigue quickly, that can simply reflect the muscles involved and your current training experience. Give the movement time, keep the dose reasonable, and judge progress by repeatable performance rather than the amount of soreness afterward.
Machine press, push-up, or dumbbell press?
Choose according to fit, access, comfort, and what you want to practice. The chest press offers a supported seat and a guided path. Push-ups let you adjust difficulty through body position and support height. Dumbbells allow a more individually chosen path but add balance and setup demands.
You can build a routine around any suitable option. There is no need to perform every pressing variation in the same session. If you already have several hard pressing exercises, adding machine sets may increase fatigue more than it improves your program.
If the machine is occupied, use a familiar alternative rather than rushing onto an unfamiliar model with the same displayed weight. When you do try another machine, treat the first set as a new setup check.
Keep a setup record, not just a weight record
Write down the machine model or location, seat setting, handle choice, starting-position setting, weight, sets, and repetitions. Add a brief note such as “comfortable return depth” or “second set slowed at ten.”
Our workout log template can help you organize that information. A consistent record makes it easier to distinguish genuine progress from a changed seat, different grip, or different machine.
Do not worry if your first entry contains more setup notes than impressive numbers. Those details save time on future visits and let you begin with confidence instead of repeating the same trial and error.
Frequently asked questions
Should I lock my elbows?
Finish with controlled extension rather than snapping hard into the joint’s end position. Keep the motion smooth, and do not shorten every repetition simply to avoid straightening your arms at all.
Should my shoulders leave the back pad?
For this beginner version, maintain comfortable support and avoid reaching so far that your torso and shoulders roll forward to finish the repetition. If the machine’s intended exercise differs, have a trainer explain that specific model.
Can I press every day?
Daily challenging sets are unnecessary for learning. Begin with a recoverable schedule and consider all of your other pressing work. Soreness, deteriorating performance, and joint discomfort are reasons to reassess the dose, not reasons to prove your commitment.
Is the machine safer than a bench press?
The setup and risks differ. A guided machine removes the need to balance a bar over your body, but poor fit, excessive load, and moving parts still require care. Use the option you can operate correctly and comfortably.
If your routine also includes direct arm training, the preacher curl guide explains a supported elbow-flexion option. Place it after your main exercises when it fits your plan.
Your first-session checklist
Find the instructions, adjust the seat, confirm your feet are supported, and test a comfortable starting depth. Use a secure grip, press smoothly, and leave a few good repetitions available. Record the setup before you walk away.
Record your working weights, repetitions, and sets in Workit’s workout journal and use your saved workout history to compare sessions. A subscription is required to use Workit. Keep your machine setup consistent so those numbers describe the same movement.